Azure active directory conditional access policies allow to control user access to resources, based on the environment he/she login from. This is really important in modern day zero trust infrastructures. we no longer can depend on traditional firewall rules to control access as threats are more sophisticated. Conditional access policies allow to verify user access based on different conditions such as location, device type, risks, applications etc.
In this demo, we are going to learn how to setup location-based conditional access policies.
In my demo setup I have Microsoft Flow app used by sales & marketing department. We are going limit its access based on locations they are login from.
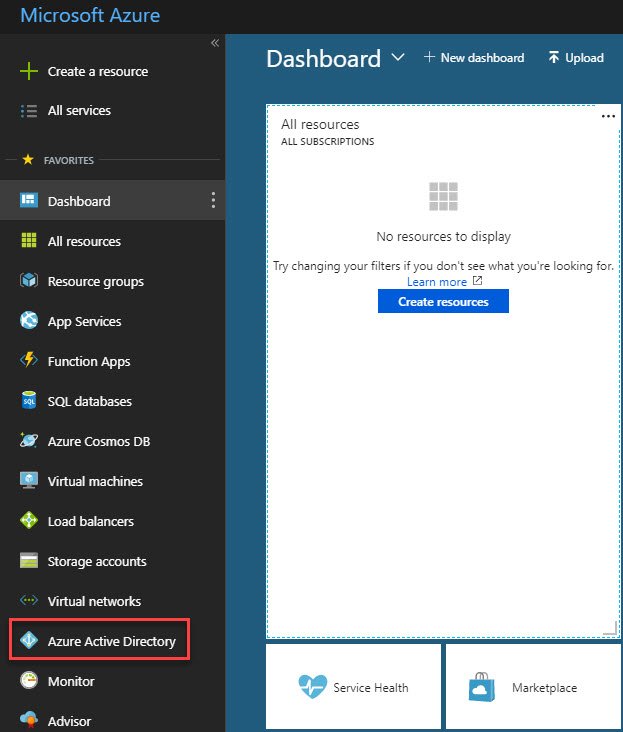
1. First, I have logged in to azure portal as global administrator.
2. Then navigate to Azure Active Directory
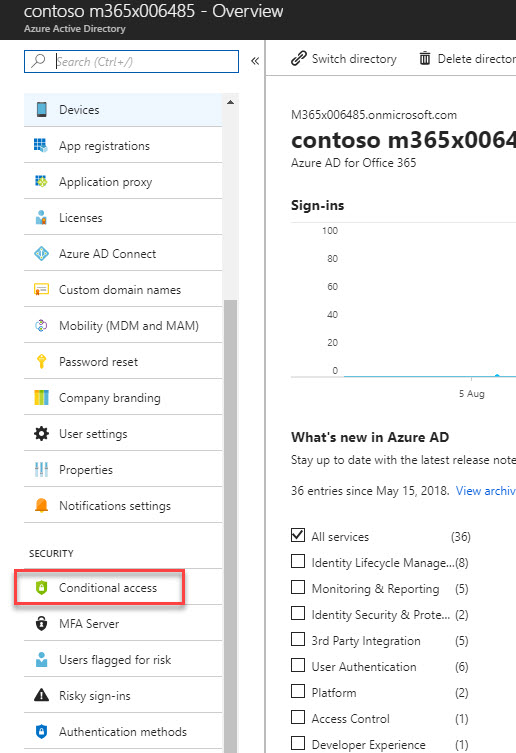
3. Then click on Conditional Access
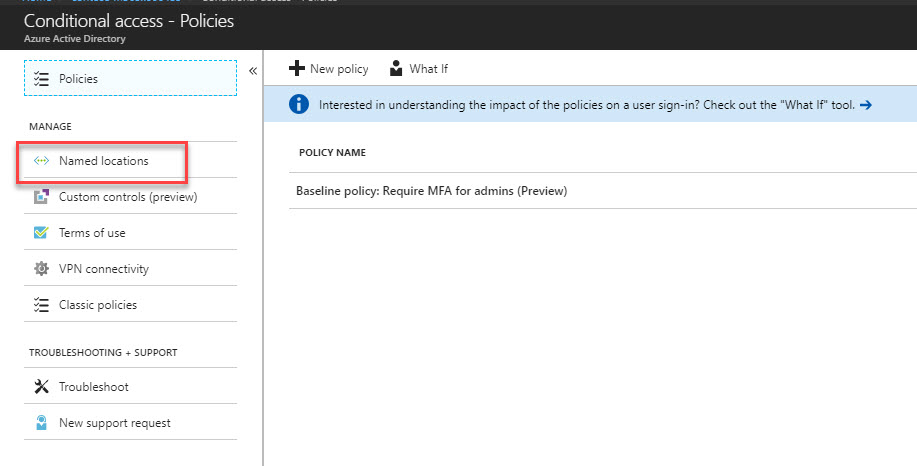
4. In new panel, click on Named locations
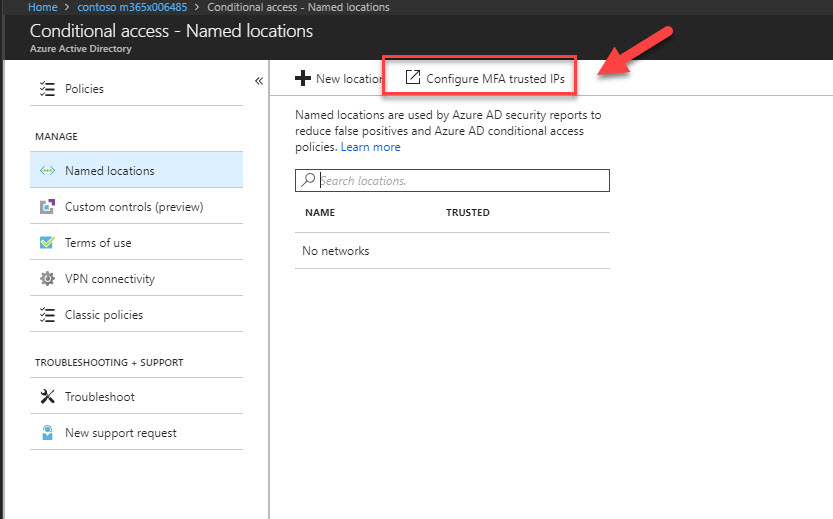
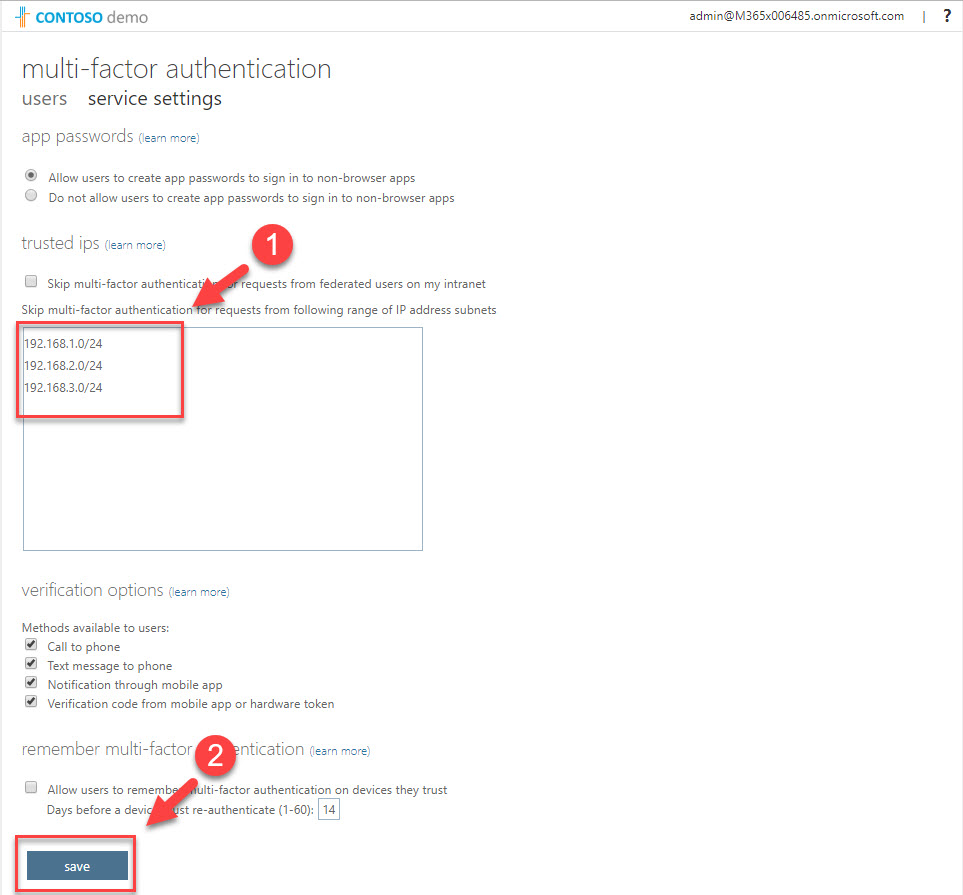
5. Then click on Configure MFA trusted IPs.
6. In new window, I have typed 192.168.1.0/24, 192.168.2.0/24, 192.168.3.0/24 as trusted ip addresses. After define ip addresses click on Save.
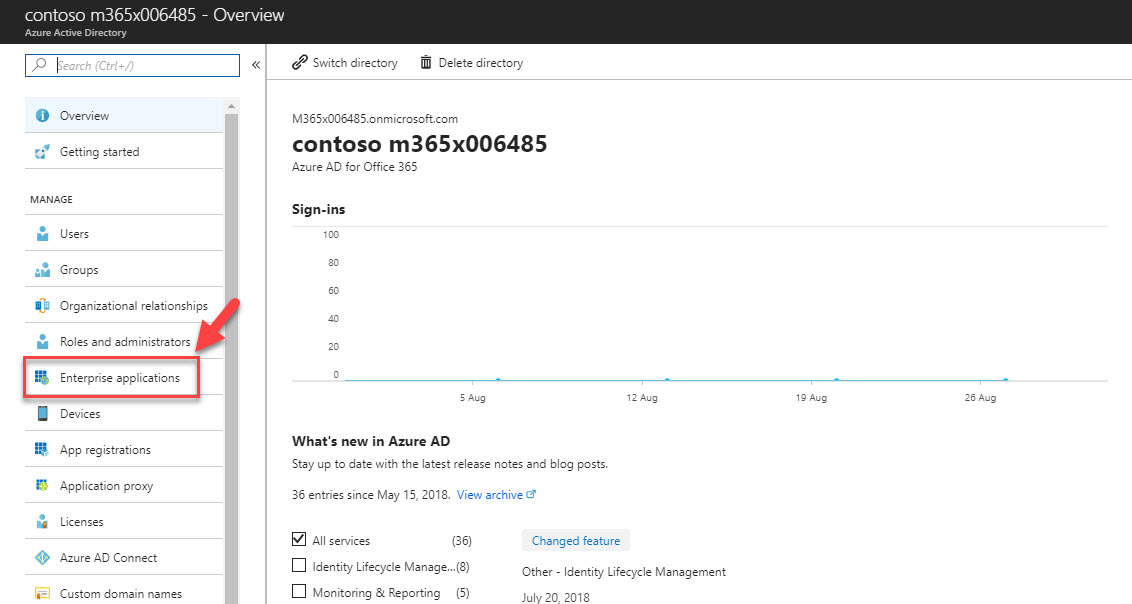
7. Then close all the additional windows and go back to Azure AD home page. Then click on Enterprise applications.
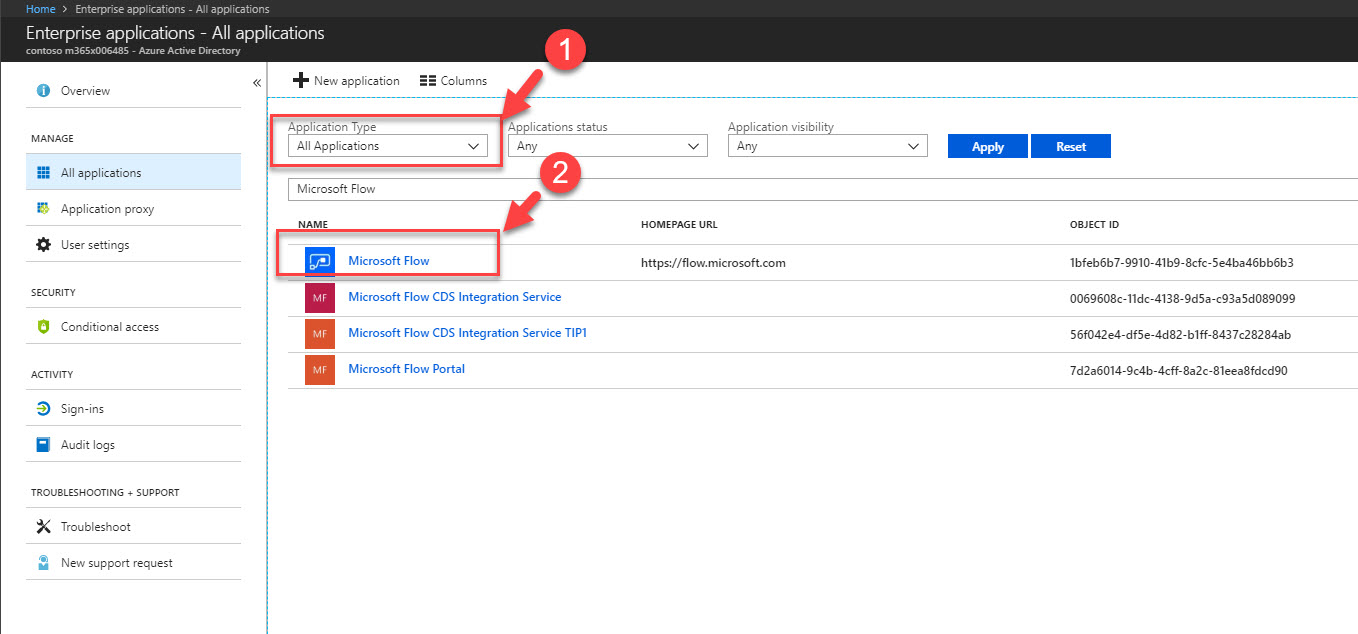
8. From the list search for Microsoft Flow app and click on it.
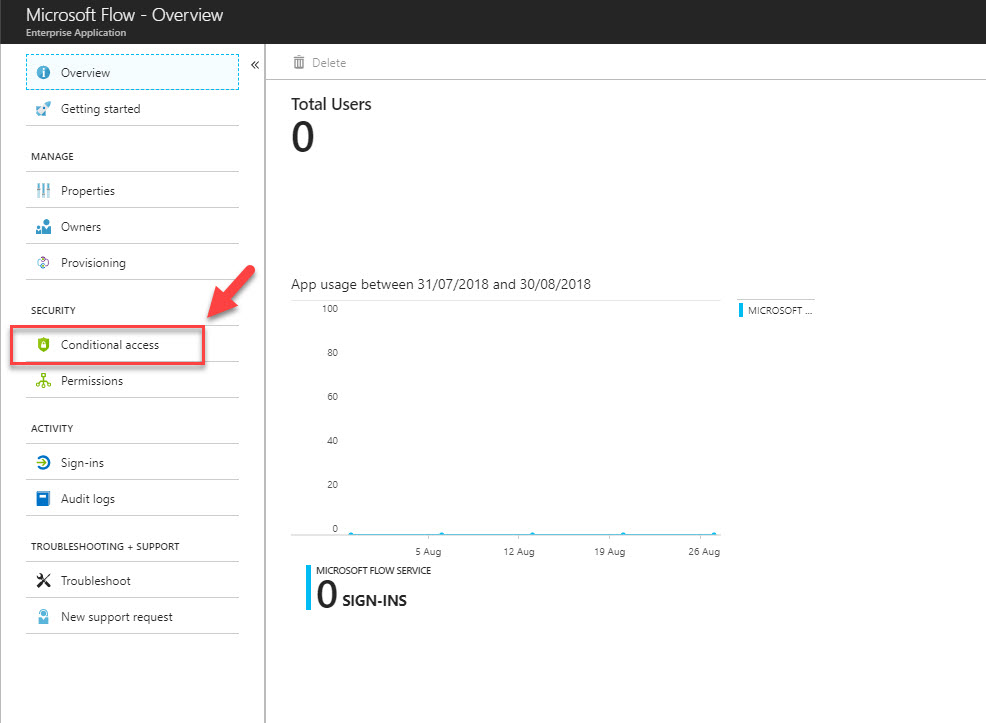
9. Then click on Conditional Access
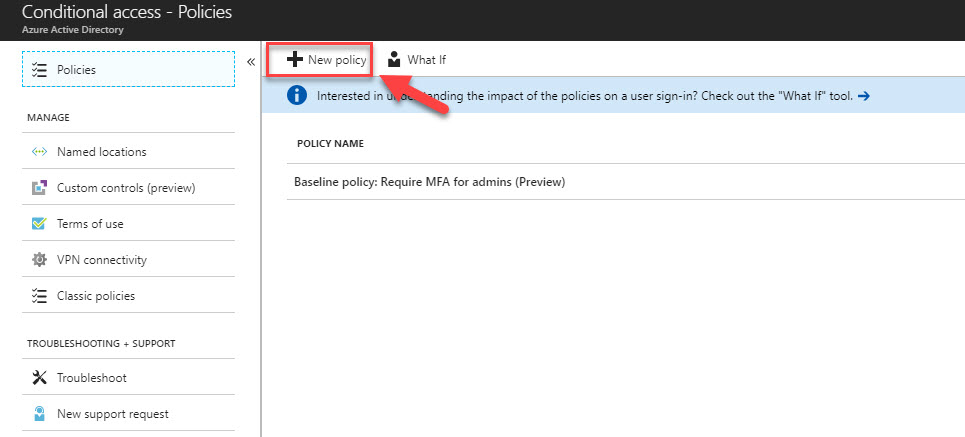
10. In new window, click on New Policy
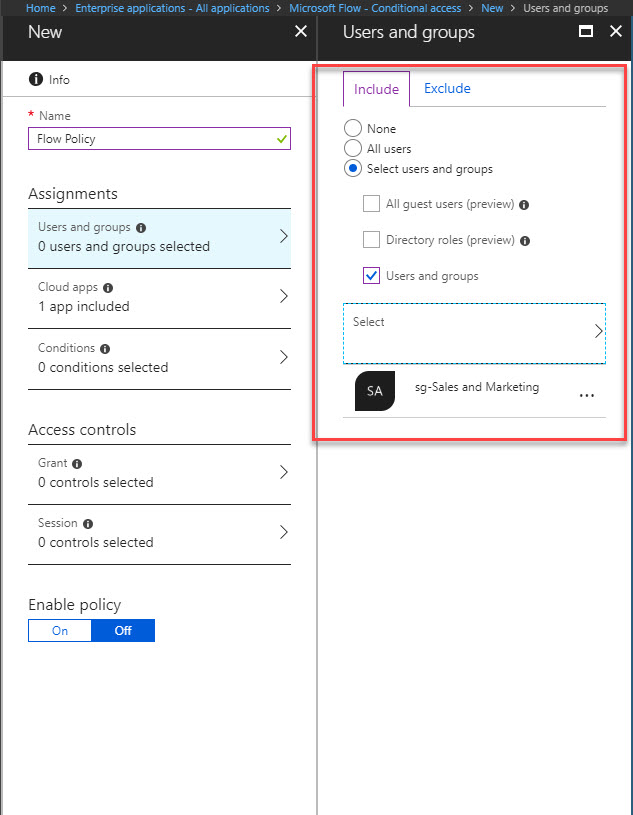
11. In new wizard, type name for the policy first. Then under users & groups, I have select sales & marketing group.
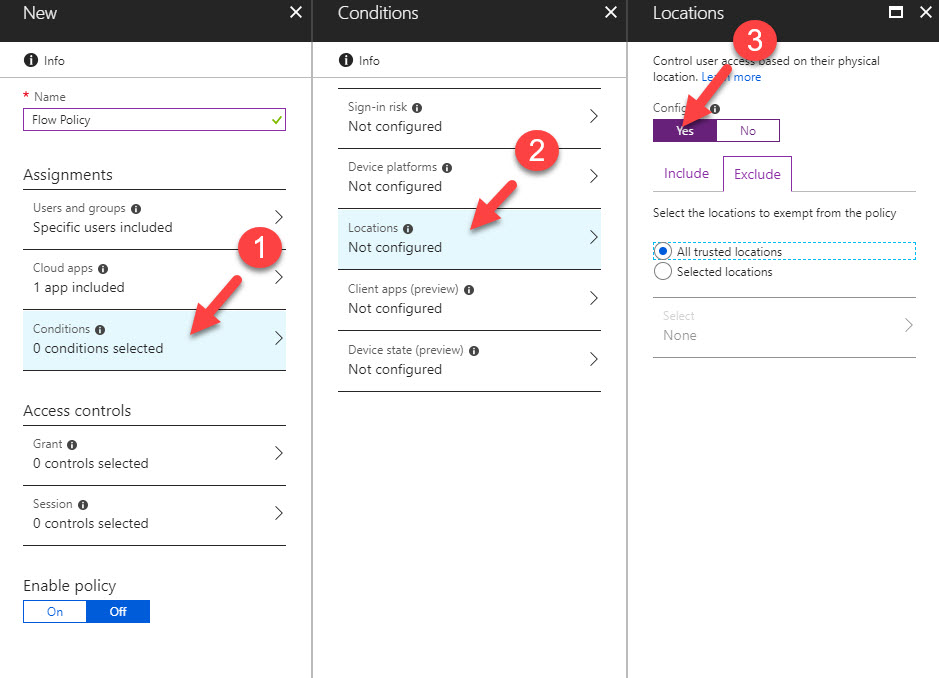
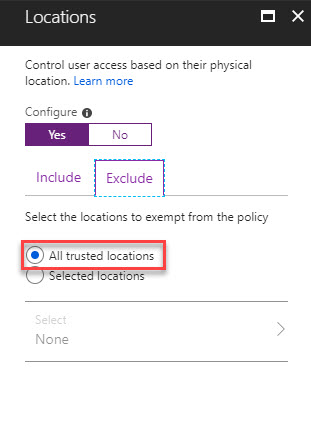
12. Then go to Conditions | Locations and click on Yes under configure tab.
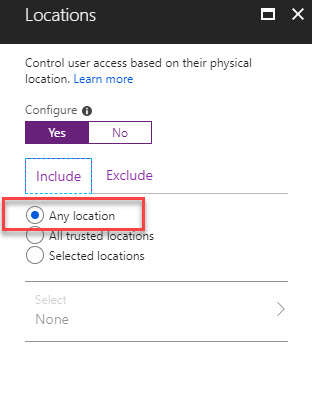
13. Under Include tab select Any location
14. Under exclude tab, select All trusted locations
15. Then keep clicking Done to apply the configuration.
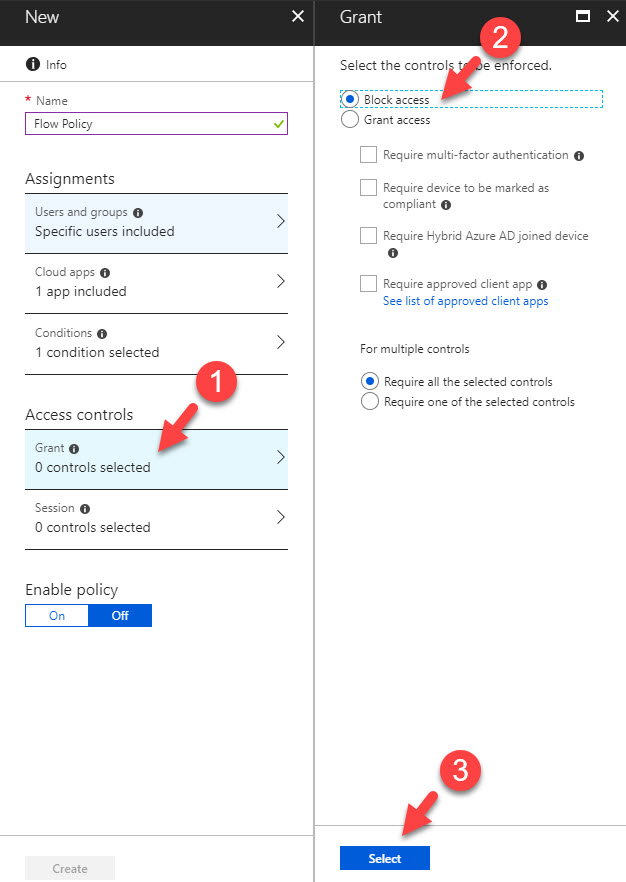
16. Then click on Grant under access controls and then click on Block access.
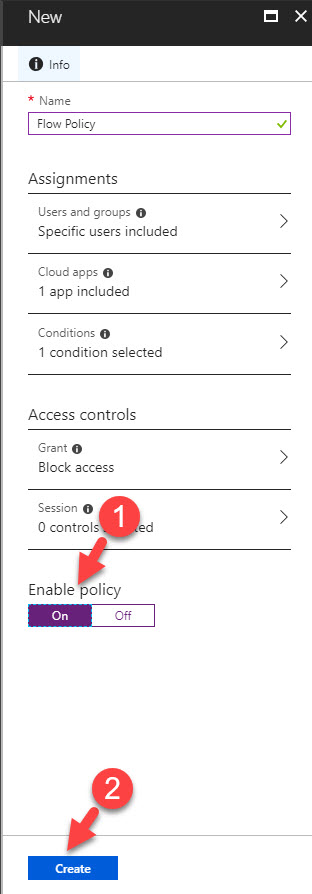
17. At last, click on On under enable policy and then click on Create to complete the policy wizard.
18. Now we have the policy in place. According to policy it will only allow the access from the trusted location.
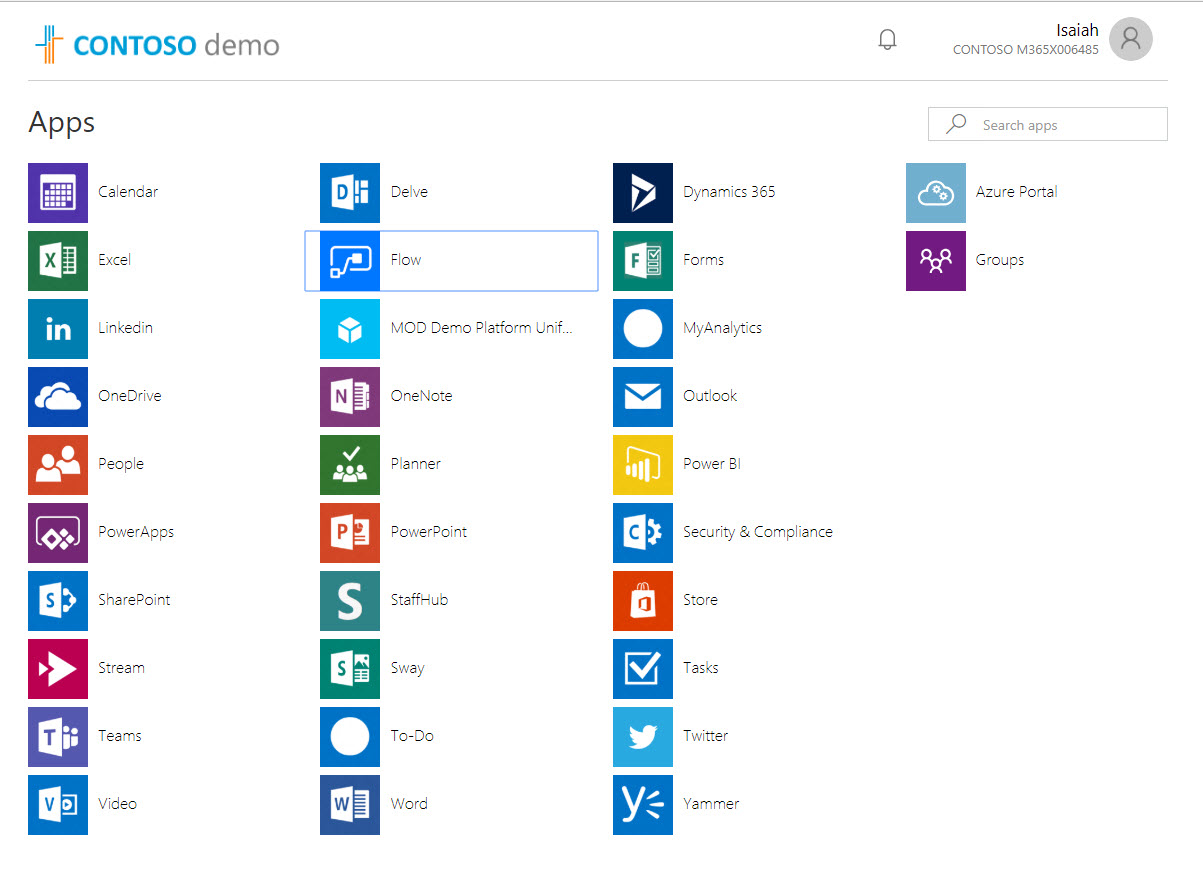
19. To test it, I logged in to https://myapps.microsoft.com using user account belongs to sales & marketing group.
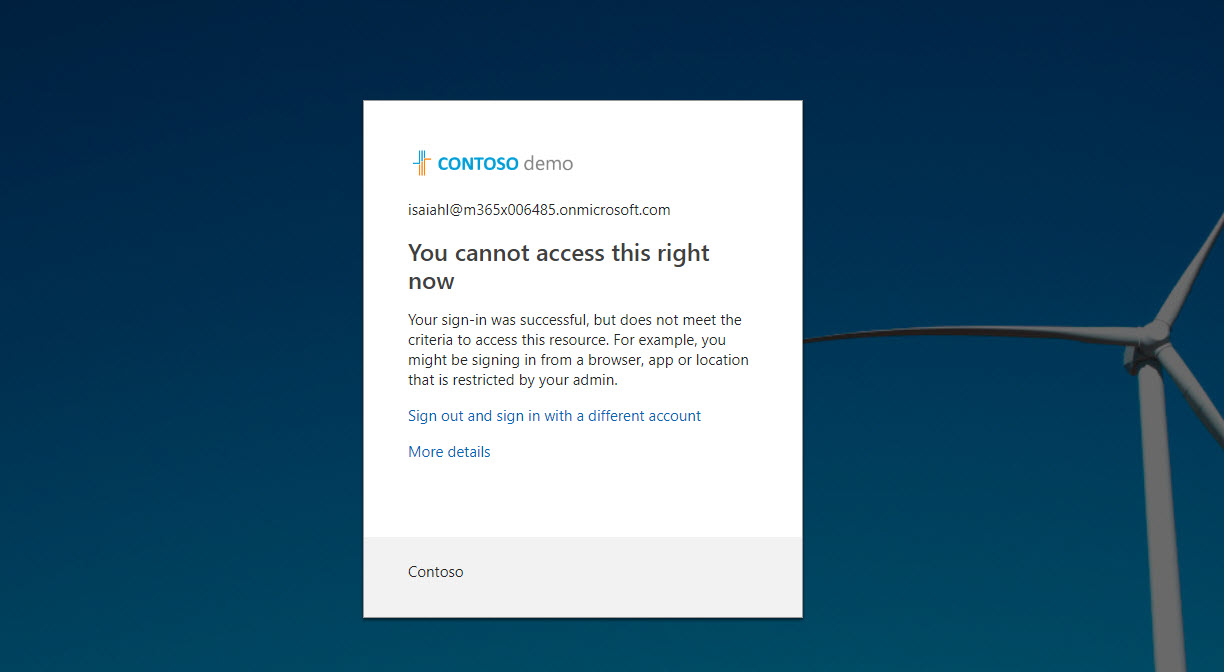
20. Then I click on Flow app, as expected my access was blocked as I am login from a IP not belong to trusted range.
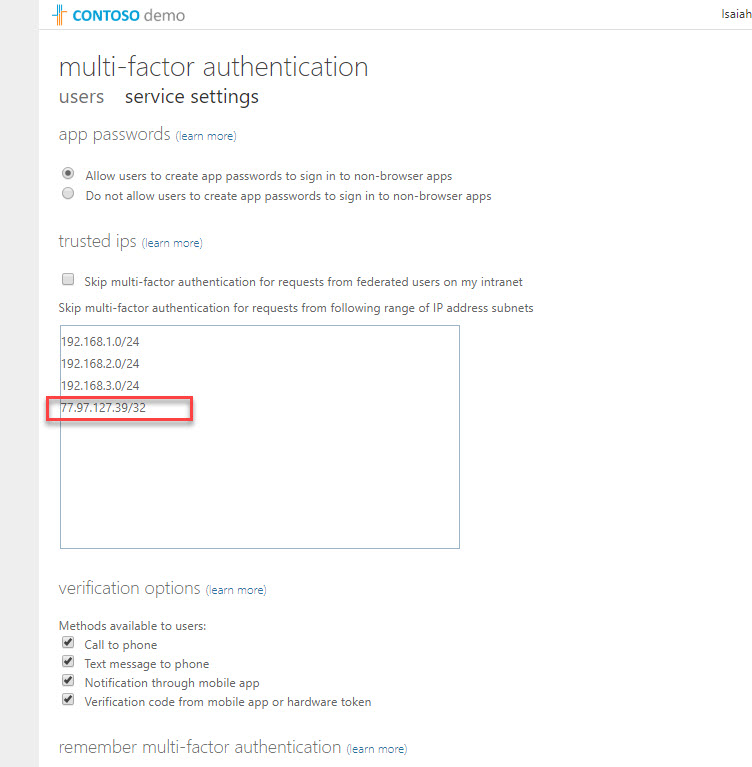
21. Then I go back to Named locations page and add my current ip 77.97.127.39 in to trusted list.
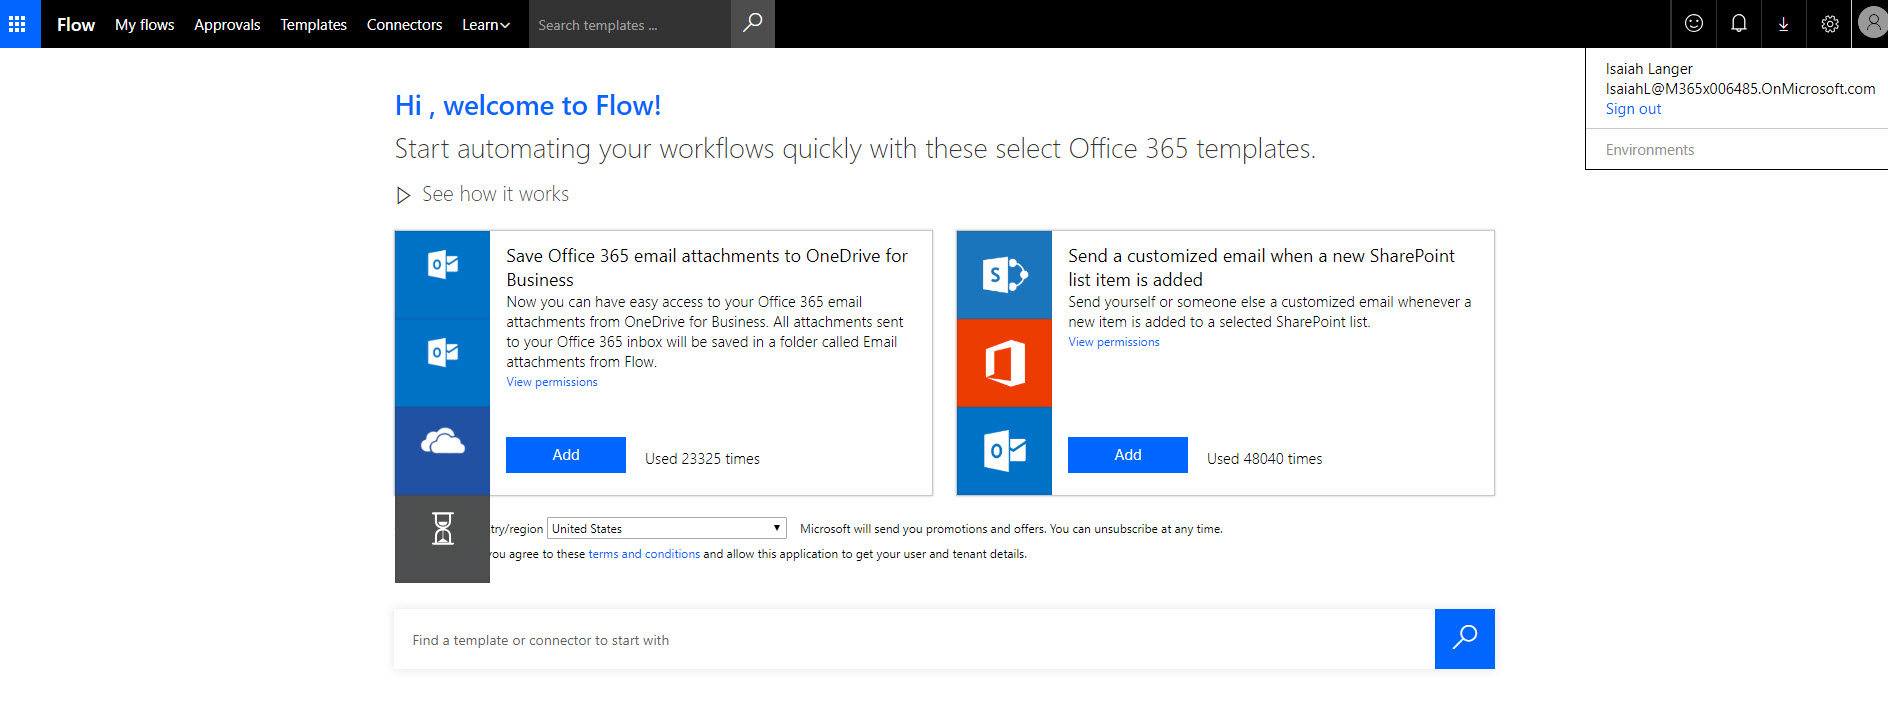
22. After that, as expected I can access the flow portal.
This marks the end of this blog post. Hope now you have better understanding how to create location based conditional access policy. If you have any questions feel free to contact me on rebeladm@live.com also follow me on twitter @rebeladm to get updates about new blog posts.

