Password resets requests are very common in any helpdesk. Azure AD self-service password reset service is allowing users to reset their passwords without IT helpdesk involvement. So far this was only supported on Windows 10 Azure AD join devices. Now with few modifications we can do the same thing with Windows 7 or Windows 8.1 devices. In this demo I am going to demonstrate how we can do self-service password reset with these non-windows 10 devices.
This process required few prerequisites.
1) Enable SSPR in Azure AD – We need to enable SSPR service in Azure AD first. I have explain those steps in here http://www.rebeladmin.com/2017/11/step-step-guide-reset-user-password-azure-ad-joined-windows-10-device/
2) Up to date Patches – Make sure the latest windows updates are applied to Windows 7/ Windows 8.1 devices.
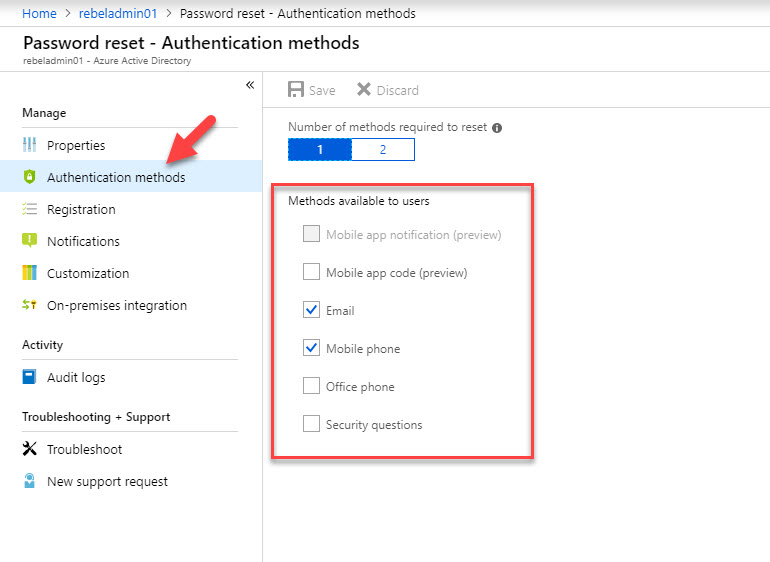
3) Users need to register with additional verification methods – As part enabling SSPR process, we also need to define how many methods it should use for user verifications.
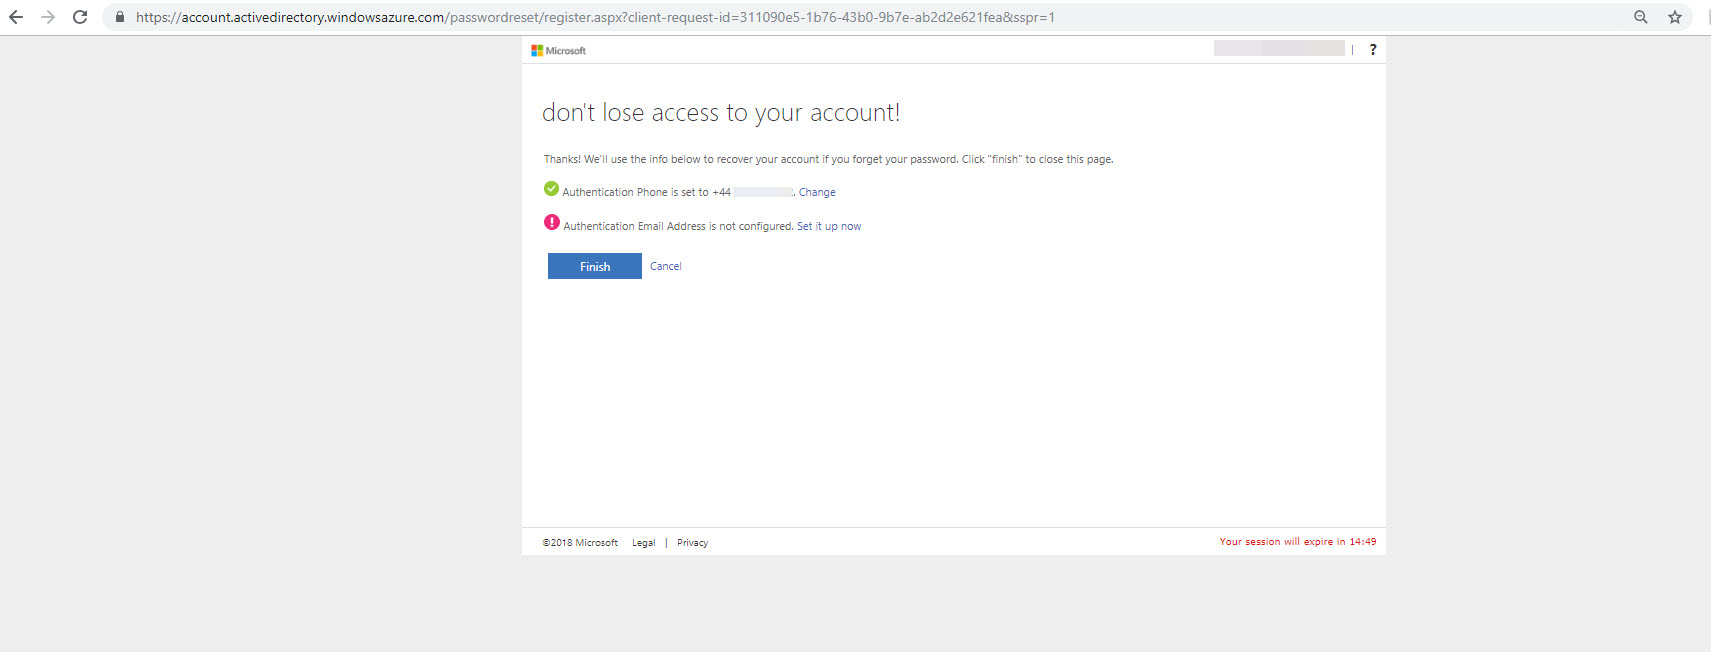
If you using multiple methods, make sure user is register with those method before use SSPR service.
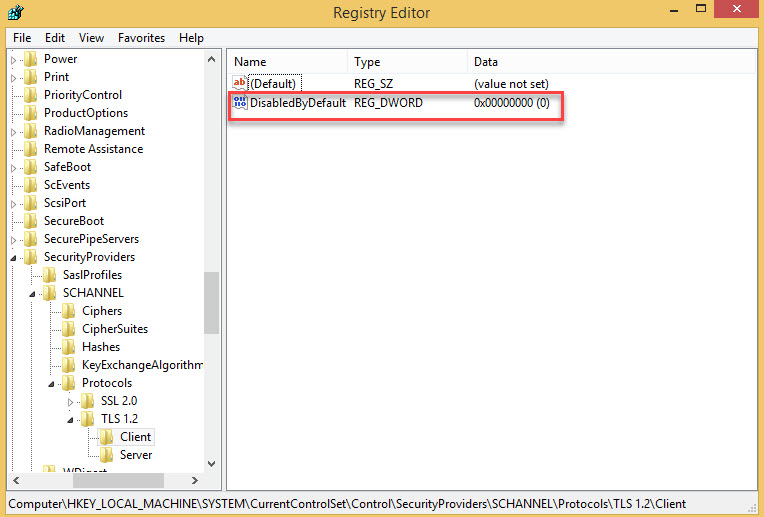
4) TLS 1.2 enabled – In Windows PC you must have TLS 1.2 enabled. It should not just set to auto negotiate. This can be done by using registry entries.
Under HKLM SYSTEM\CurrentControlSet\Control\SecurityProviders\SCHANNEL\Protocols you will be able to see TLS 1.2 (if it is not, go ahead and create a key). under that folder there will be two sub folders called client & server. I prefer to do changes under both roles. In there we need to create a key with following values.
DisabledByDefault – DWORD value 0
5) KB 3140245 – This update is available on https://www.catalog.update.microsoft.com/search.aspx?q=kb3140245
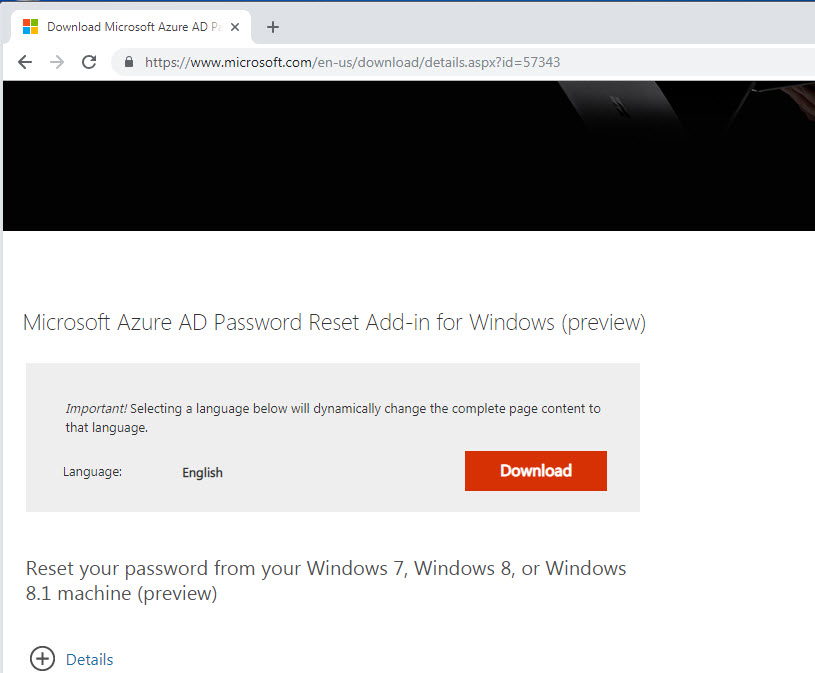
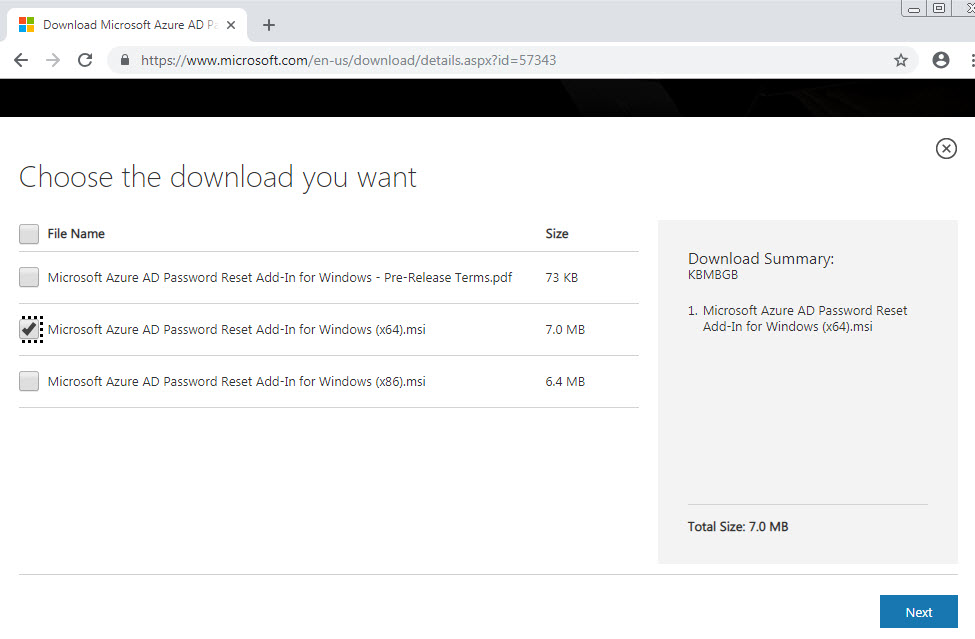
6) Once all above steps are completed, log in to Windows 8.1 machines as administrator and download the plugin from https://aka.ms/sspraddin
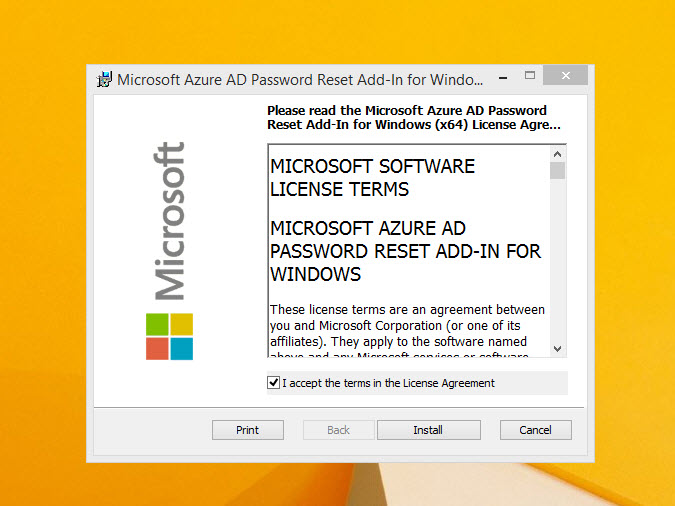
7) Then double click on installation file to proceed.
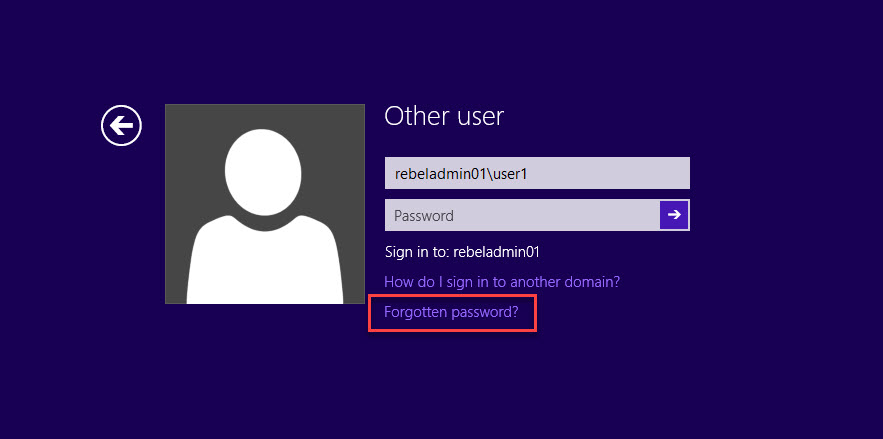
8) Once installation is done, it is ready for testing. In my demo machine, I type regular user name and then click on forgotten password option
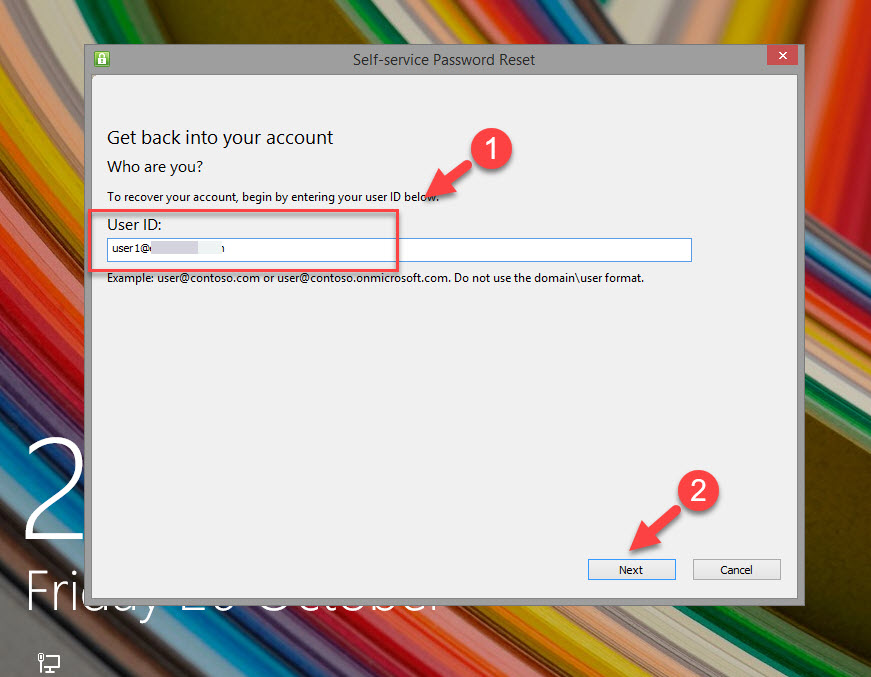
9) Then it opens up a new wizard, type the user id in there and click on next.
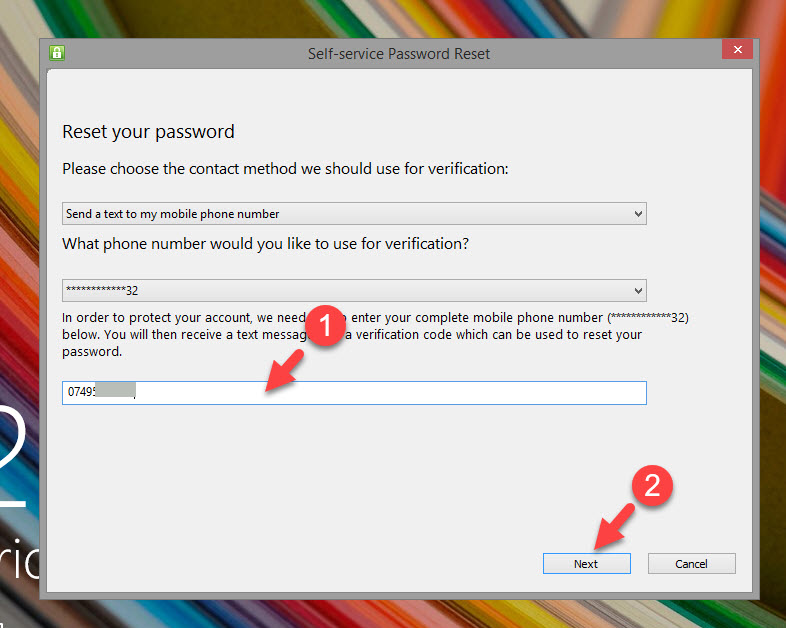
10) In next window we have to verify user identity. In my demo I am using SMS option.
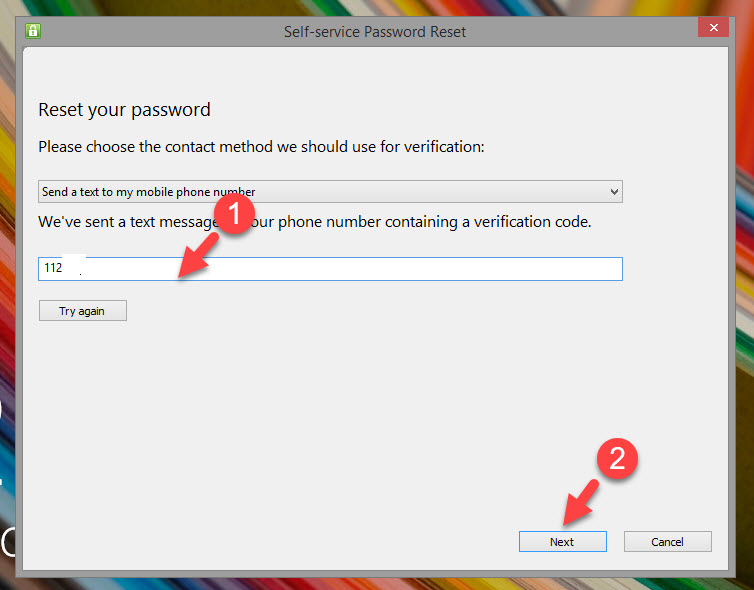
11) In next window type the code and click on next.
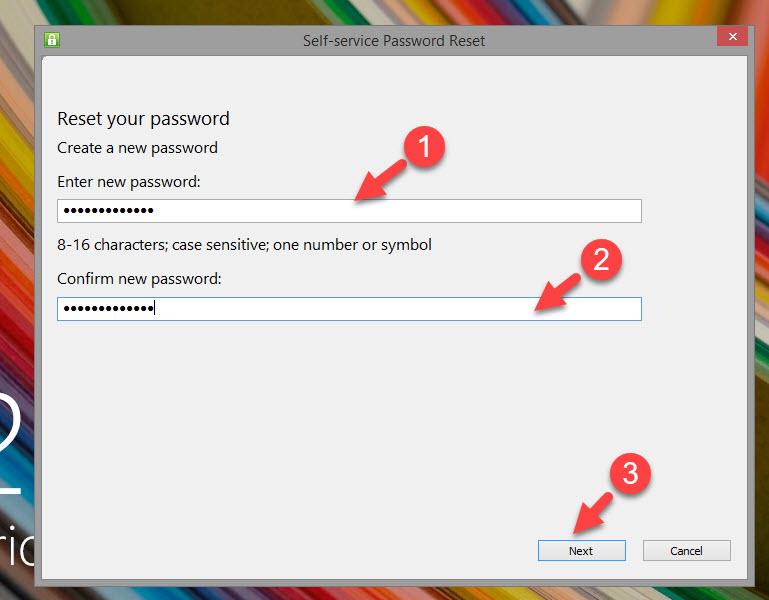
12) Then it is time to define new password. Type a new password and click on next.
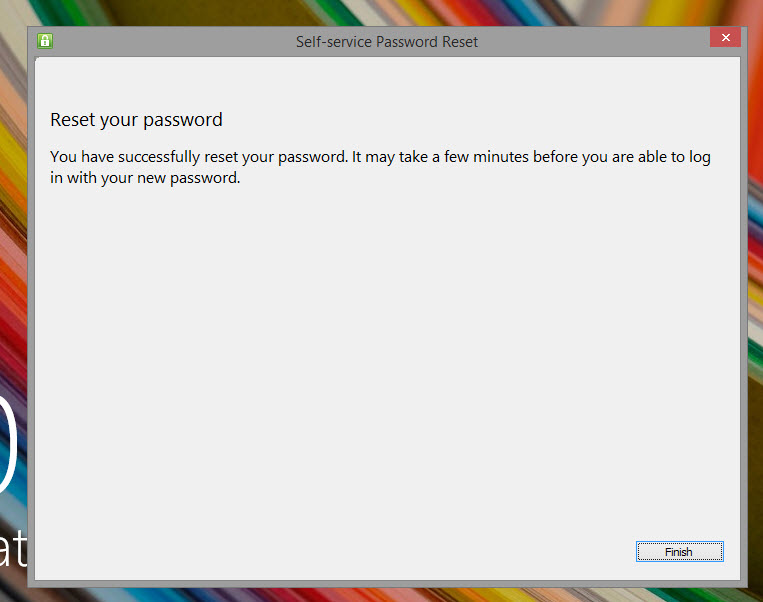
13) Now we have completed the password reset process. click on finish to exit from the wizard.
14) I go back to login screen and type the new password. as expected it allow me to log in.
Cool ha?? This marks the end of this blog post. If you have any further questions feel free to contact me on rebeladm@live.com also follow me on twitter @rebeladm to get updates about new blog posts.

