When we talk about active directory we refer it as one service but AD DS attached to many other components as well. DNS, Group Policies, SYSVOL replication are few example for this. Each of these components need to operate well in order to run healthy active directory environment. It doesn’t come easy, its involve with investment on resources, time and skills. In Active Directory Service, the core values are centralized identity management, authentication and authorization capabilities. All these extra components make it easy to archive its core values but same time it also opens up risks such as dependencies and security. Failure or compromise of these components/service will make impact on entire active directory infrastructure.
Microsoft Windows Core and Nano Servers also count as “Operating Systems”. These doesn’t have fancy GUIs, sparkly applications running. But it is still doing the job of operating system. It allows users to build it from scratch according to their requirements. It also increases the server up time (less updates), reliability, performance and security. Soon after Microsoft releases the First Active Directory version, there were conversation start specially from application developers by requesting a version with pure LDAP capabilities. They wanted to element all these dependencies and management requirements, so they can focus on application development upon core AD functions. After windows server 2003, Microsoft releases Active Directory Application Mode (ADAM) which allowed administrators to run “cut down” version of active directory without group policies, Kerberos, file replication etc. It can run on desktop computer or member server similar to any other windows service. Same time it was providing all core values of Active Directory Service. With Windows server 2008, Microsoft renamed it to “Active Directory Lightweight Directory Services” and allow to install the role using Server Manager. This version provided more control and visibility to administrators to deploy and managed LDS instances. This was continued with all the AD DS versions after that and included in windows server 2016 too.
LDS installation
In Windows server 2016 Operating system, it can install using Server Manager. in order to install LDS, User need to log in with local administrator privileges.
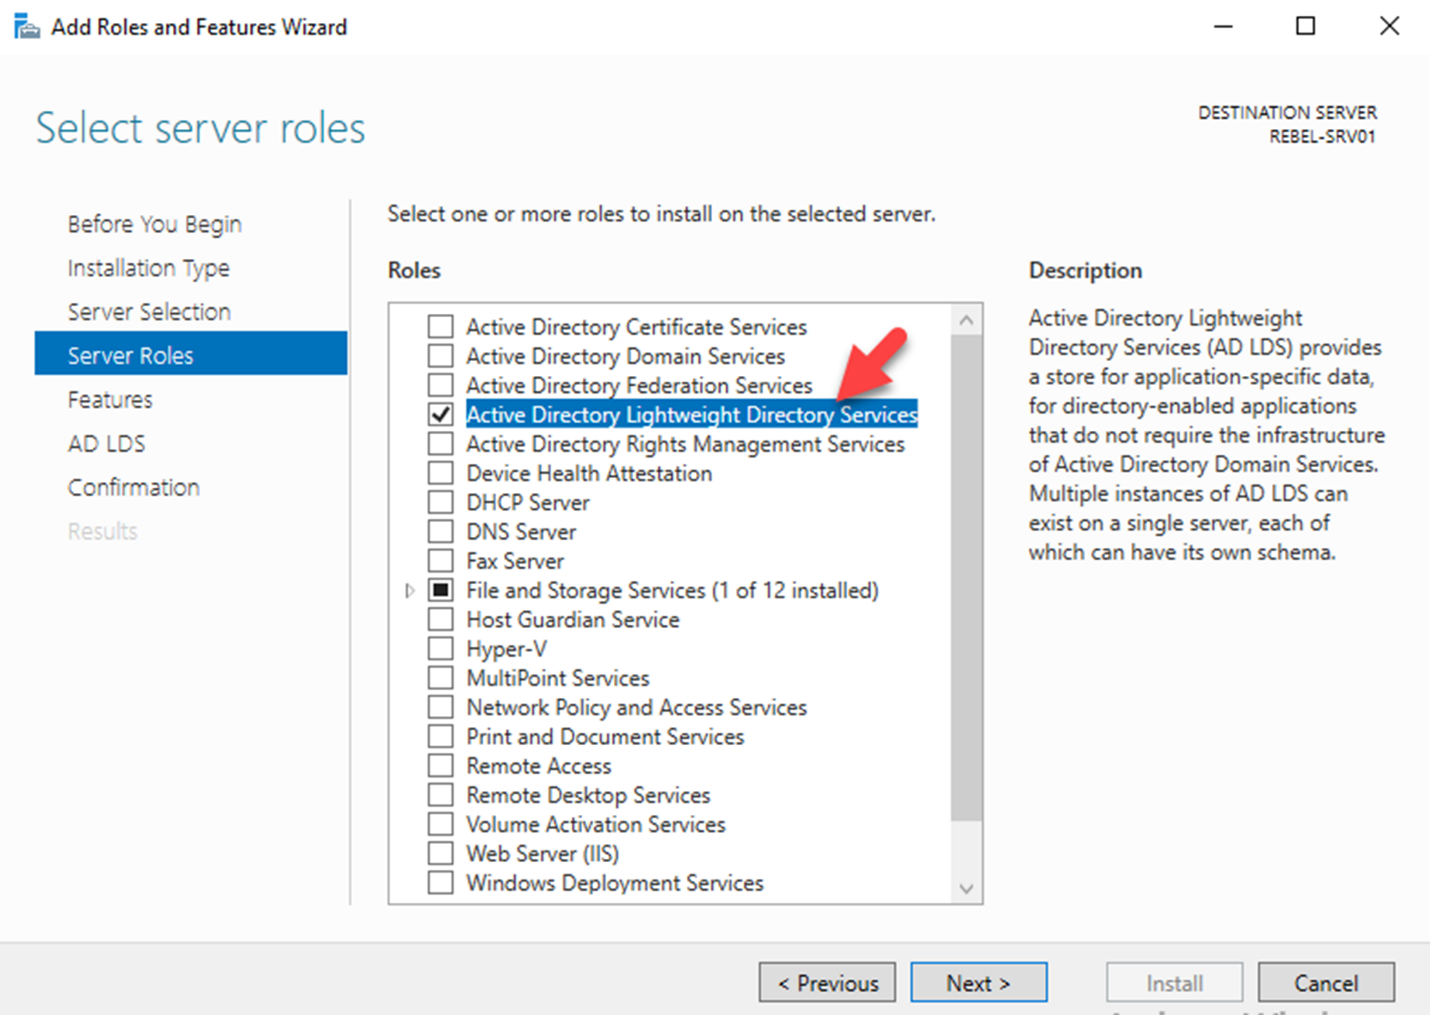
Once log in to the Server Manager, click on Add Roles and Features. Then follow the wizard and select Active Directory Lightweight Directory Services under server roles and proceed with the enabling the role.
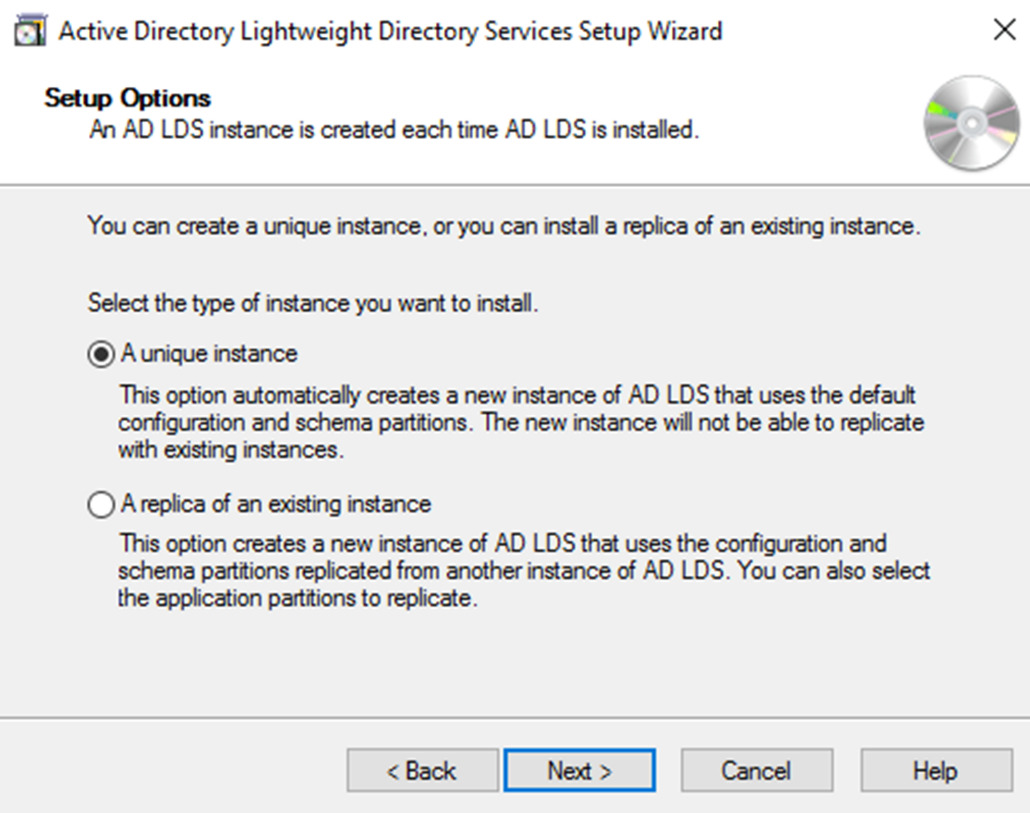
Once the role is installed, click on Post-Deployment Configuration wizard in Server Manager. LDS can setup two way. One is as a unique instance and other one as a replica of an existing instance. Replica option is similar to clone copy of an existing instance. This is useful especially in development environment where engineers can maintain number of application versions.
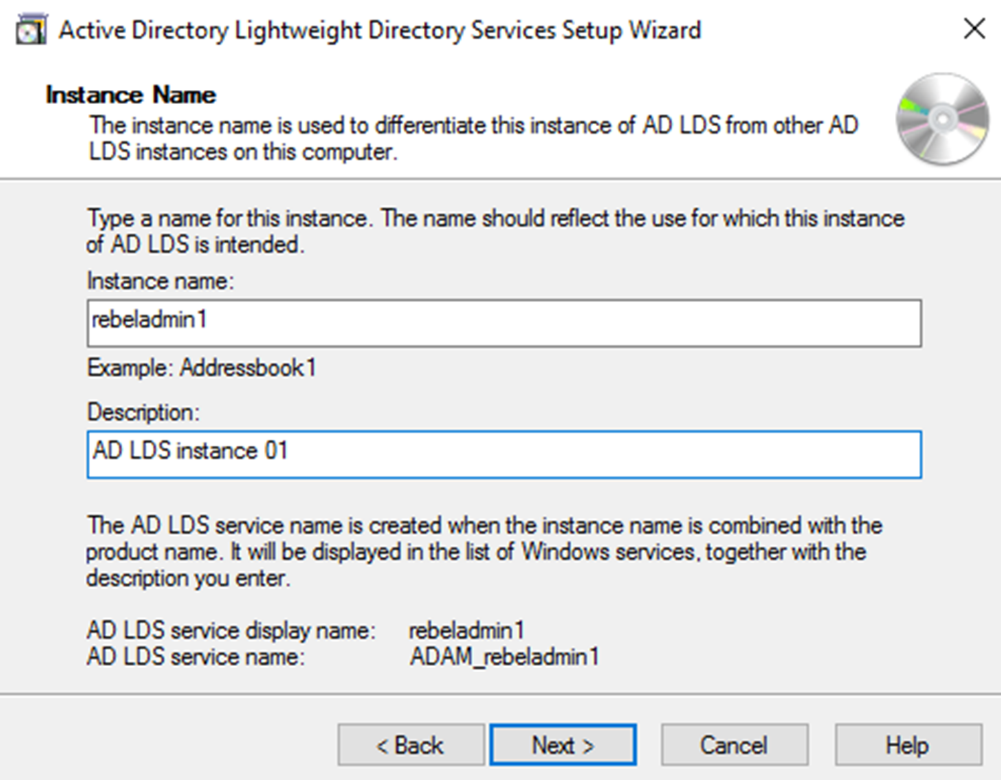
In next window, we can define name and description for the LDS instance.
In next window, we can define the LDS port. By default, LDAP port is set to 389 and SSL port is set to 636. if you running multiple instance these can be change accordingly.
After that, we can create application directory partition. This allows applications to use this partition as data repository to store application related data. If application is capable of creating partition this step is not necessary and can create relevant partition during the application deployment process. When defining the application partition name, it need to provide as distinguished name format.
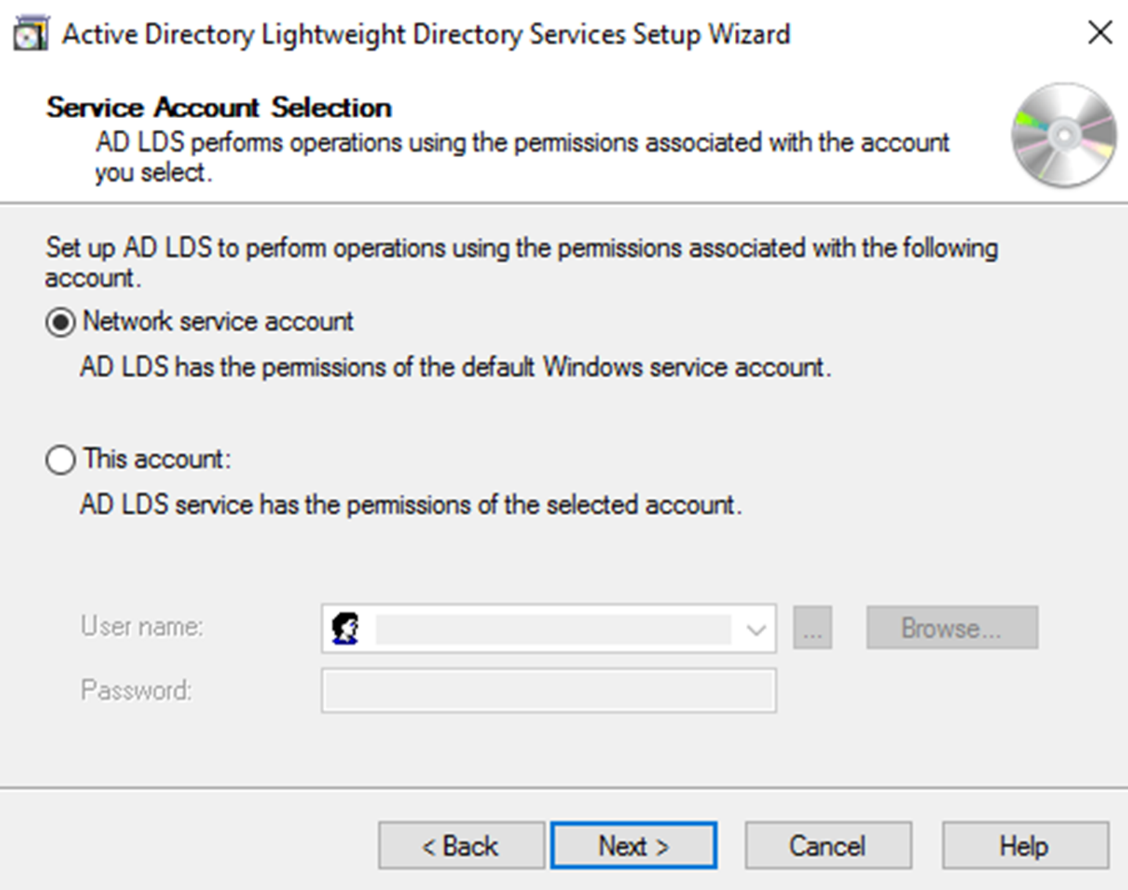
Next step is to define location to store LDS data files. After that it gives option to specify service account for LDS. If its workgroup environment you can use network service account or local user account for it. if its domain environment it can be AD user account.
After that we need to define AD LDS administrator account. By default, it selects the user account that used for the installation. If needs it can change to different account or group.
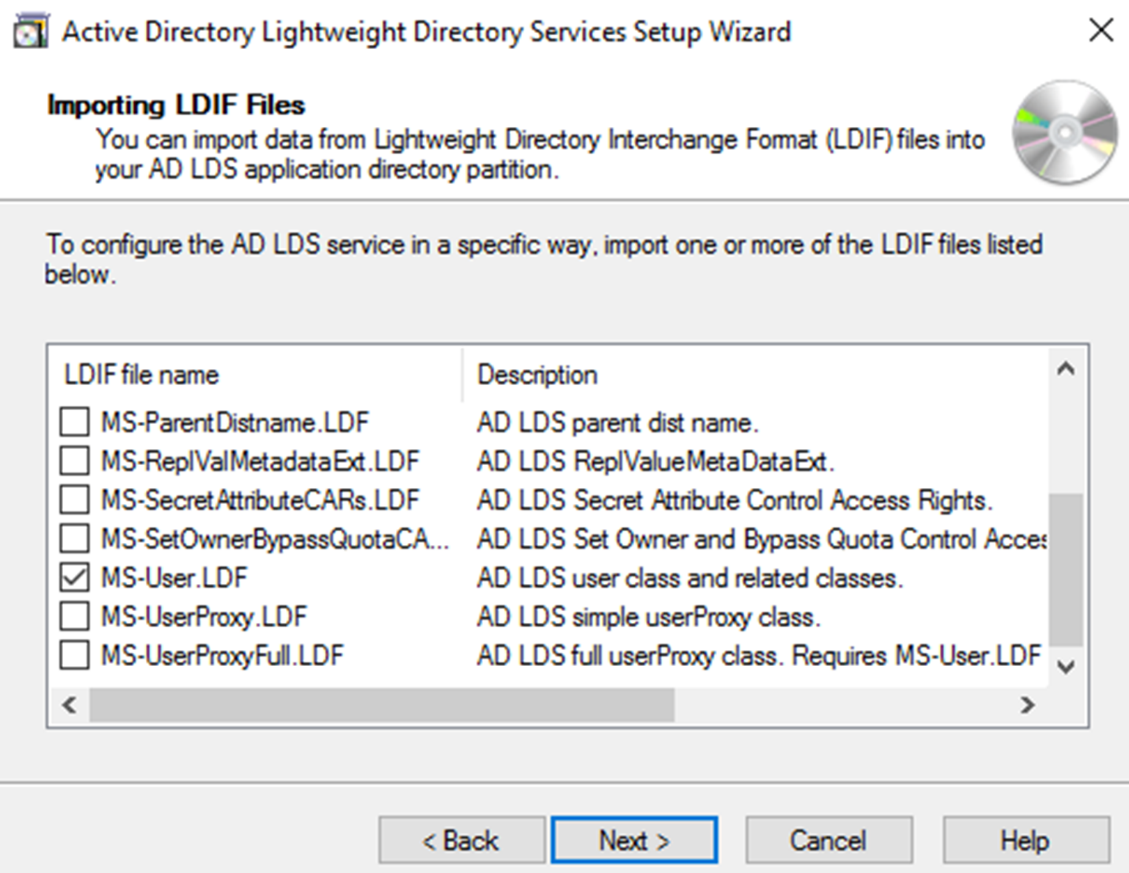
Once we define the administrator account, next step is to define which LDIF file to import. It is a text file which represent data and commands which will use by LDAP instance. It can contain one or more LDIF files. These files are depending on application requirements. As example if its users’ functionalities the relevant file will be MS-User.LDF.
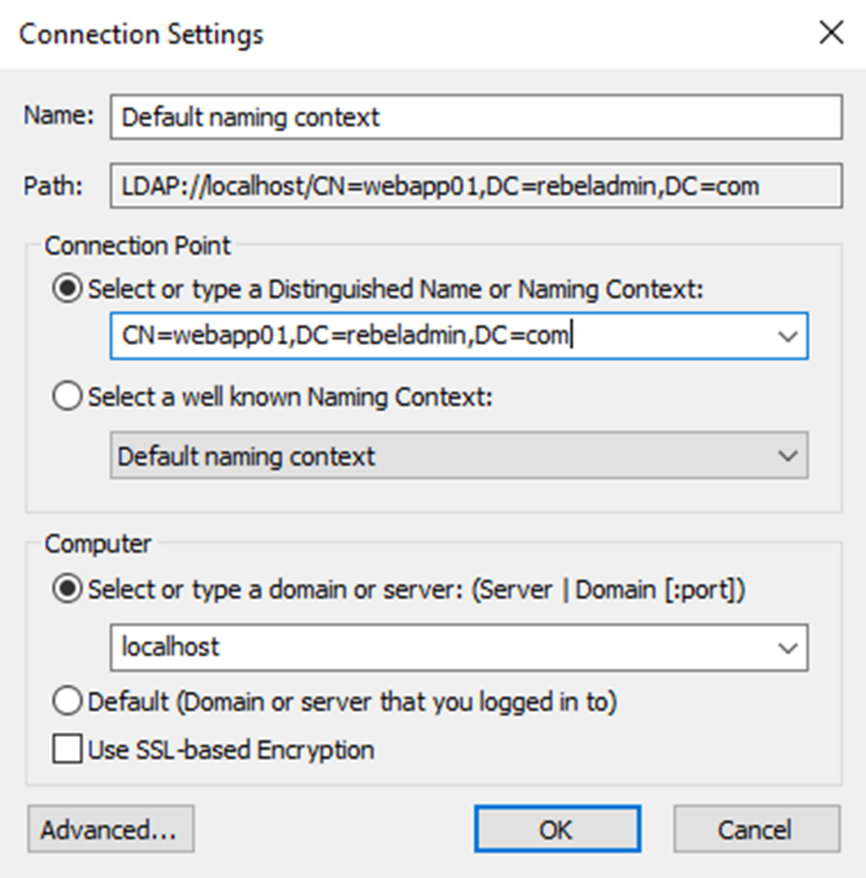
This will complete the AD LDS installation and once it completed we can create relevant object and manage them. There is two way to connect to it. one way is to connect using ADSI edit tool.
LDS objects also can manage using PowerShell cmdlets. It is same commands which users for AD DS and only difference is to define the DN and Server.
New-ADUser -name “tidris” -Displayname “Talib Idris” -server ‘localhost:389’ -path “CN=webapp01,DC=rebeladmin,DC=com”
The above command will create user account called tidris on local LDS instance runs on 389. Its DNS path is “CN=webapp01,DC=rebeladmin,DC=com”
Get-ADUser -Filter * -SearchBase "CN=webapp01,DC=rebeladmin,DC=com" -server ‘localhost:389’
Above command going to list all the user accounts in LDS instance CN=webapp01,DC=rebeladmin,DC=com
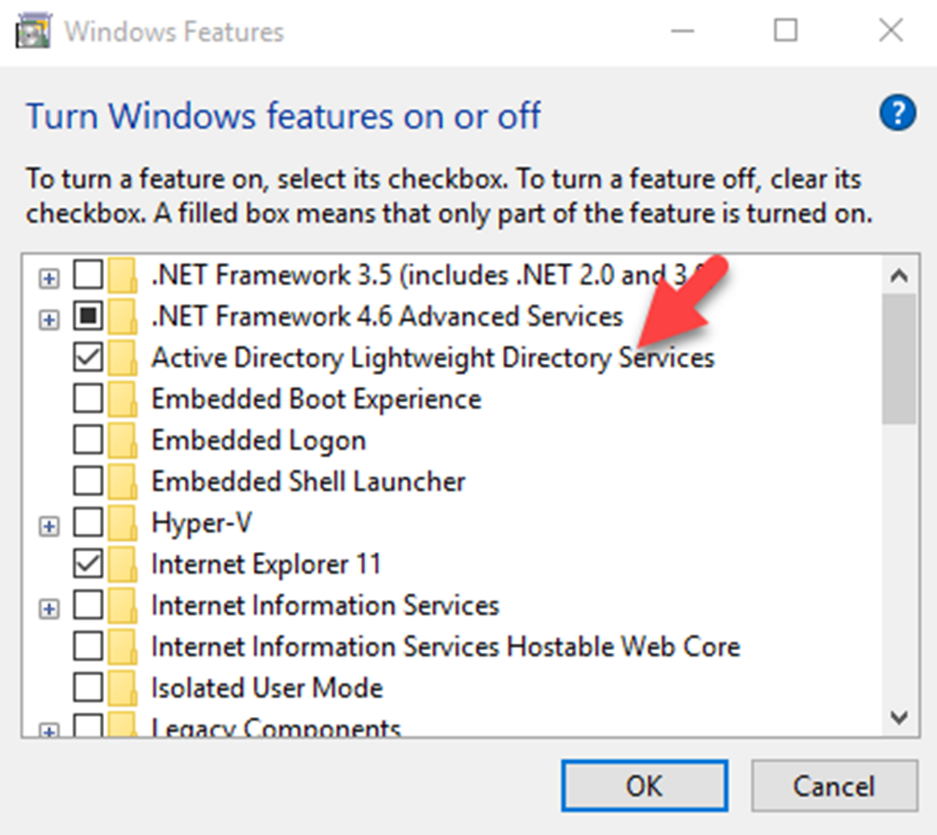
AD LDS also can install in desktop operating system using windows features option under Program and Features. The installation steps are similar to server version. once enabled the feature, the setup wizard can find under Administrative Tools.
This marks the end of this blog post. If you have any questions feel free to contact me on rebeladm@live.com also follow me on twitter @rebeladm to get updates about new blog posts.





Hi is it common for all the servers ?
Thank you Blogger