In my previous blog post I explained how to protect sensitive email data using Azure information protection. Using data classifications and policies we can prevent users from sharing sensitive information via email. You can read more about it using http://www.rebeladmin.com/2019/01/step-step-guide-protect-confidential-emails-using-azure-information-protection/. Azure information protection can do many things to protect sensitive data in an organization. Email protection is just one feature of it. it even can protect data in hybrid environments.
Data loss prevention (DLP) policies also capable of preventing sensitive data sharing via email. But it is only applying to office 365 services. Also, it doesn’t include classification, it only works with real-time data. let’s see some of the capabilities of DLP policies.
• Support pre-defined data patterns on custom data patterns – Organizations can use pre-defined data patterns comes with DLP policies such as U.S Financial Data, HIPPA or create custom patterns to identify different type of data across different locations such as Exchange Online, OneDrive etc.
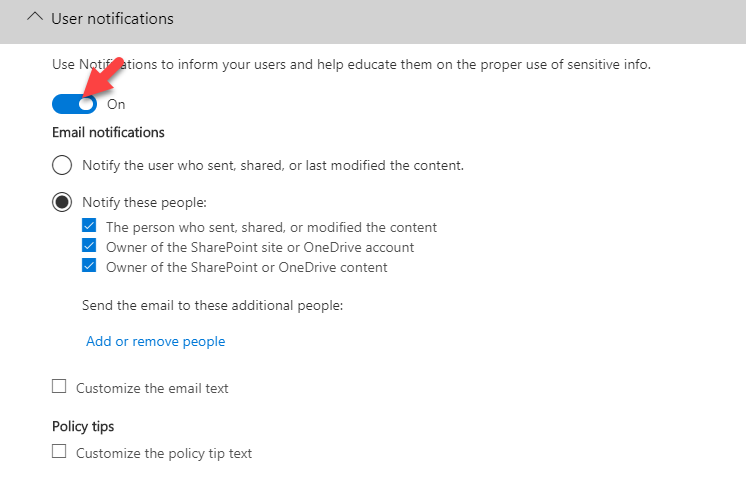
• Educate Users – Using DLP policies we can send notifications to senders in a policy breach. These notifications will include, data types, reason for block etc. So next time users can prevent doing it.
• Reporting – DLP policy can send detailed email report to administrators in a policy breach.
• Support Office Apps – DLP policies supports Office 2016 and later desktop clients.
In today demo I am going to setup a DLP policy to detect credit card details in emails. Also, if someone try to send it to external user via email, policy should block it. in policy breach it will send notification to sender and a detailed report to administrator.
1. To start, log in to https://portal.office.com as Global Administrator & open Admin Center
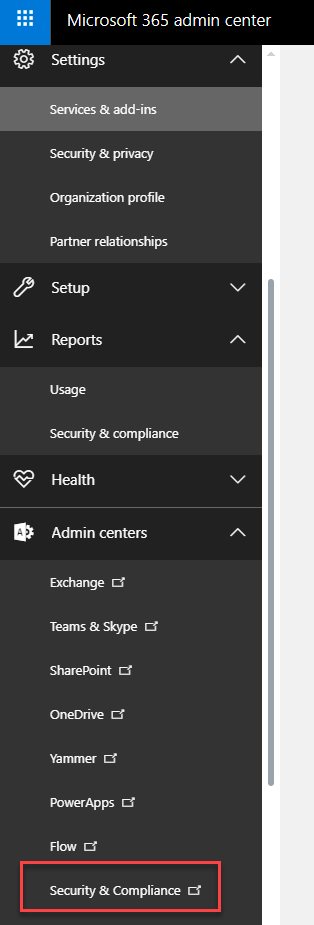
2. Then go to Admin Centers | Security and Compliances
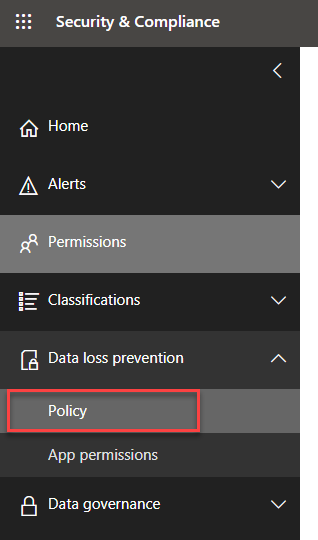
3. It will open up a new window, in there go to Data loss prevention | Policy
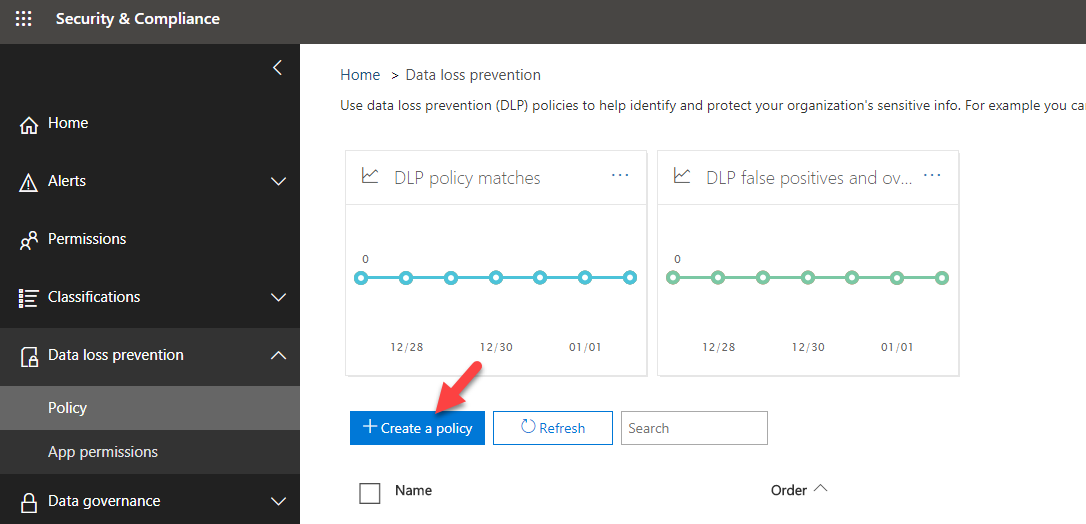
4. Then click on Create a policy
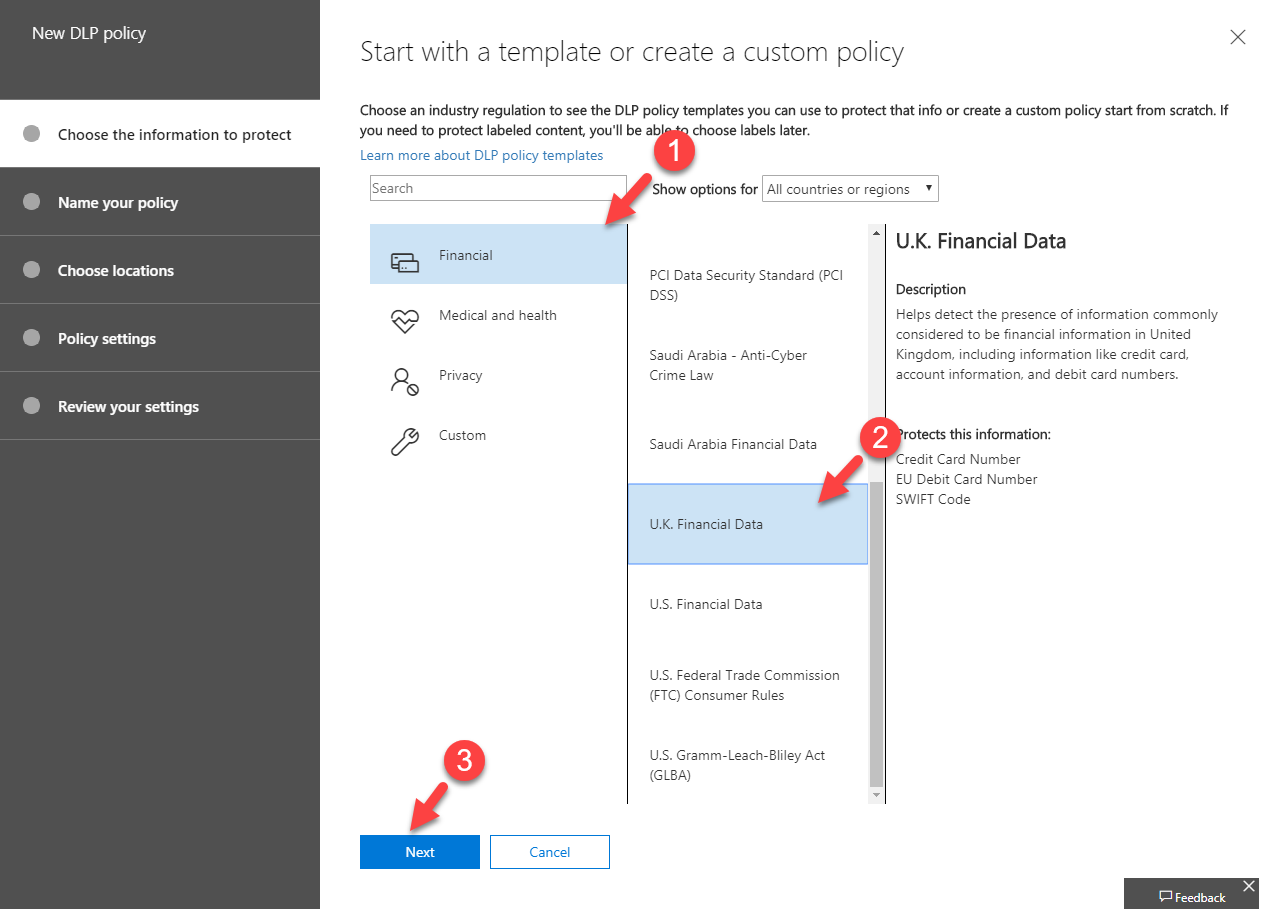
5. It will open up new wizard. To detect Credit card data, I am going to use predefined data pattern. To do that go to Financial | U.K Financial Data and click Next.
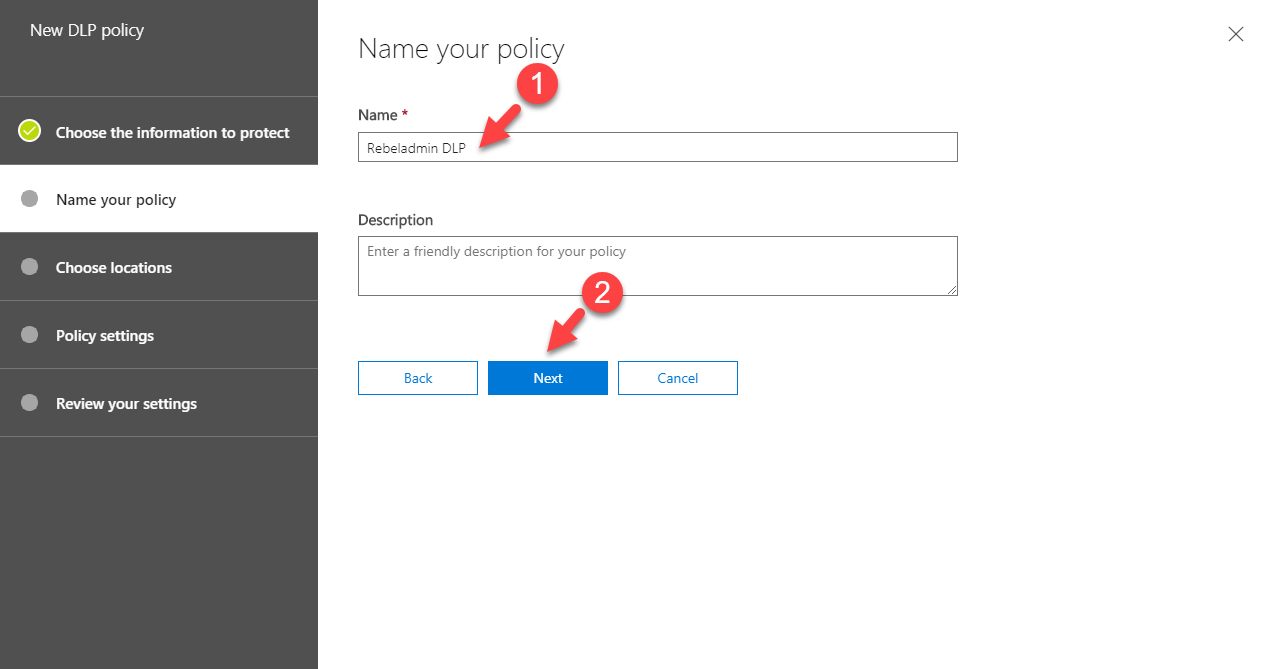
6. In next window define name for the policy and click on Next.
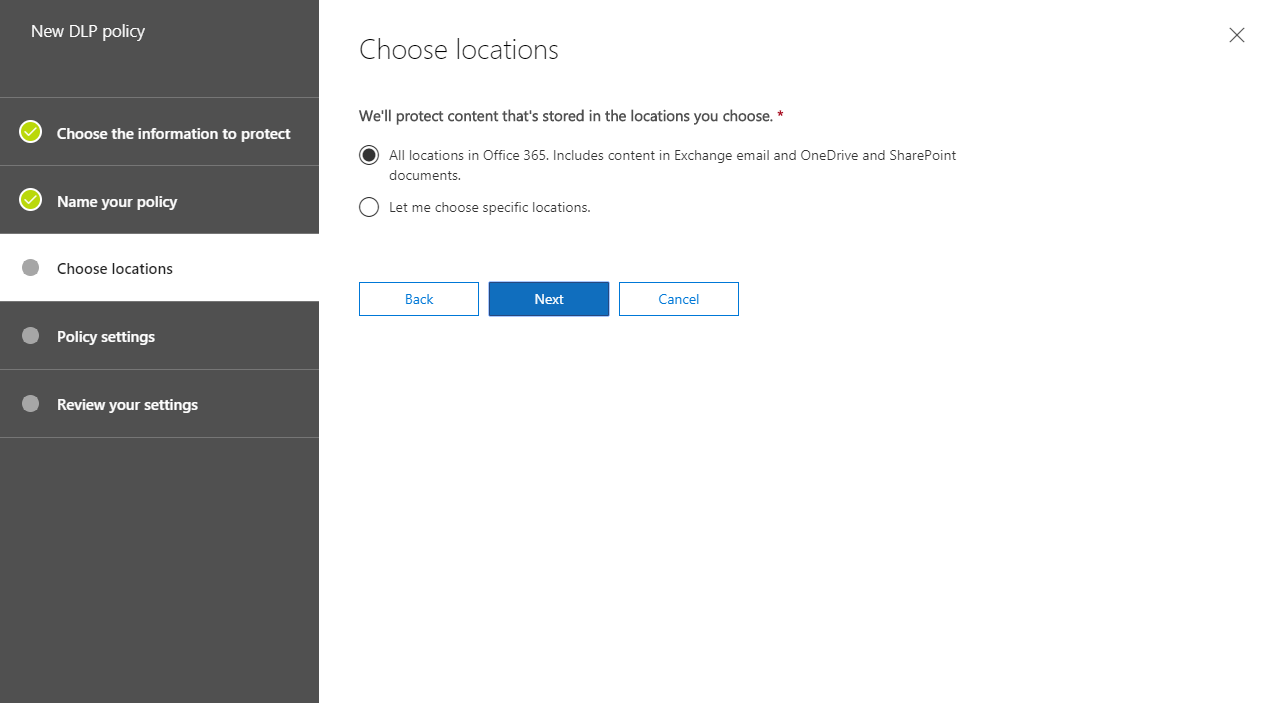
7. Then we need to select the locations. I will apply policy to All locations. Once selection is done click on Next.
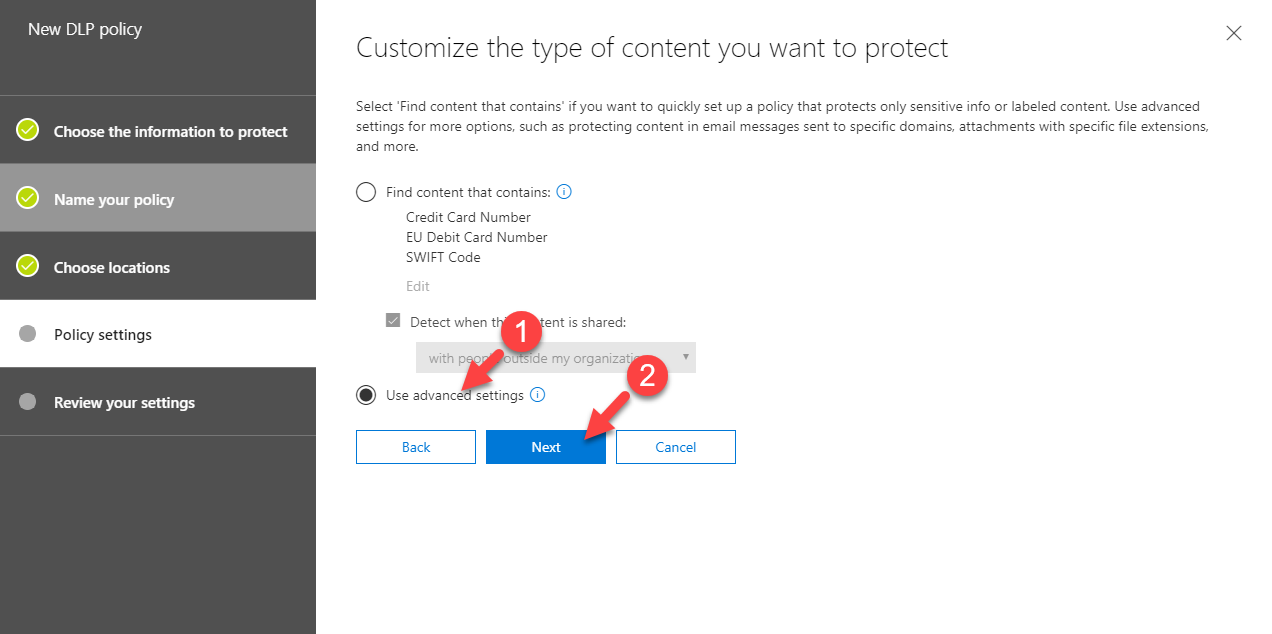
8. In next window, it asks about policy settings. We are going to setup advanced policy so select option Use advanced settings and click on Next.
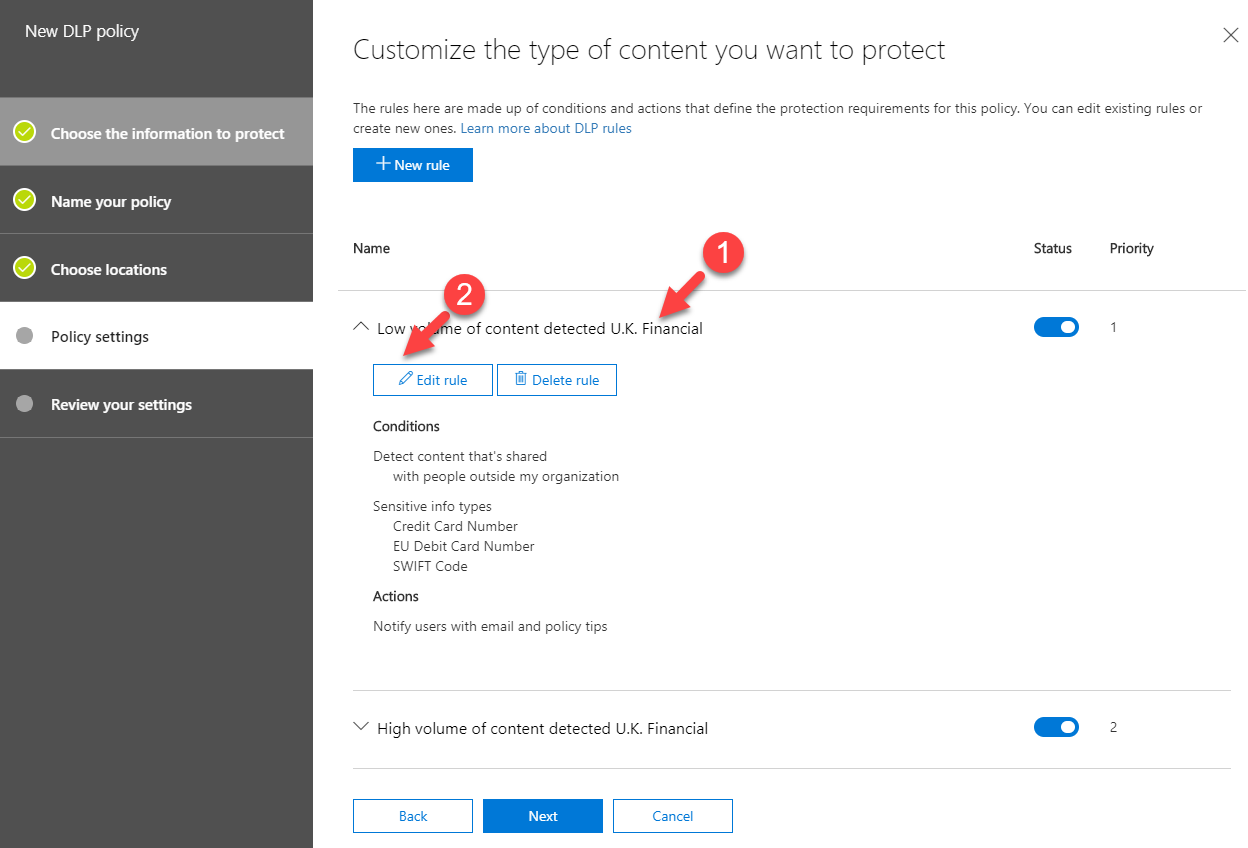
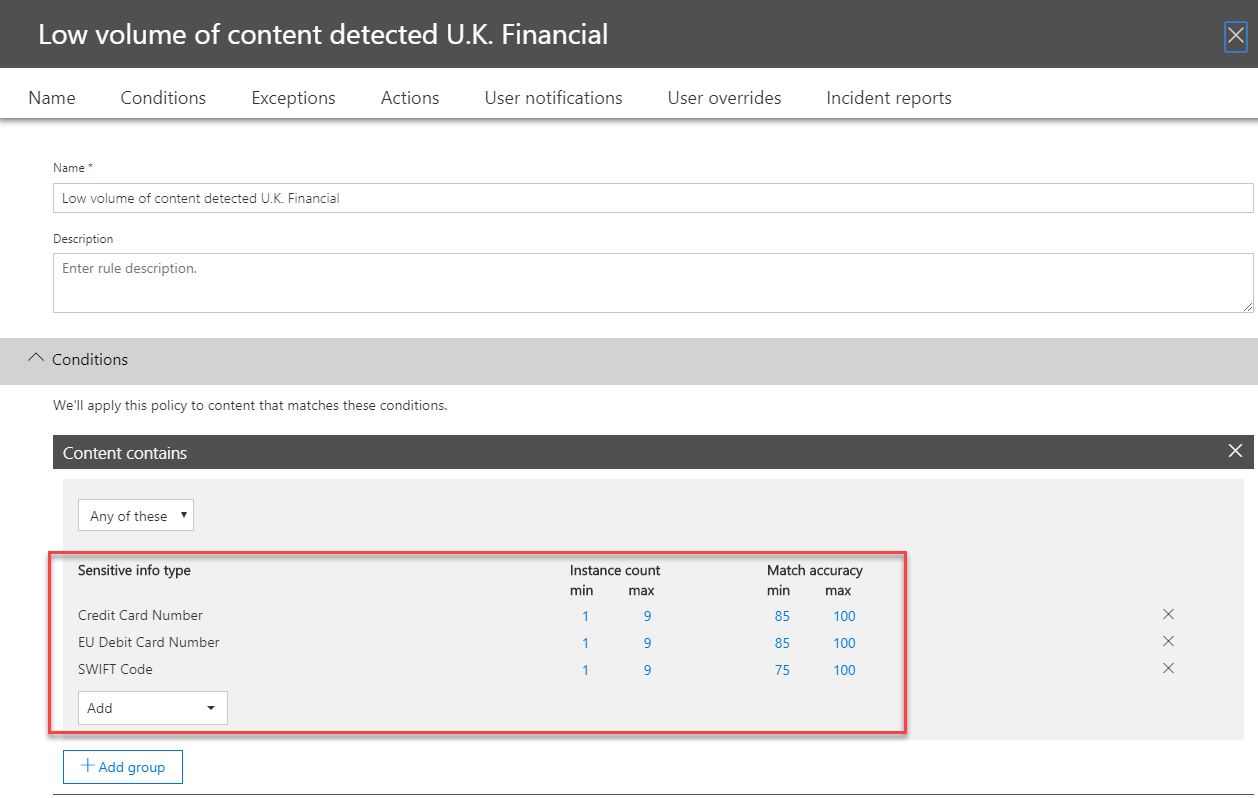
9. Then expand the Low volume of content detected U.K. Financial rule and click on Edit rule
10. According to this rule, when some one-use credit card details between 1 to 9 instances, it will treat it as breach.
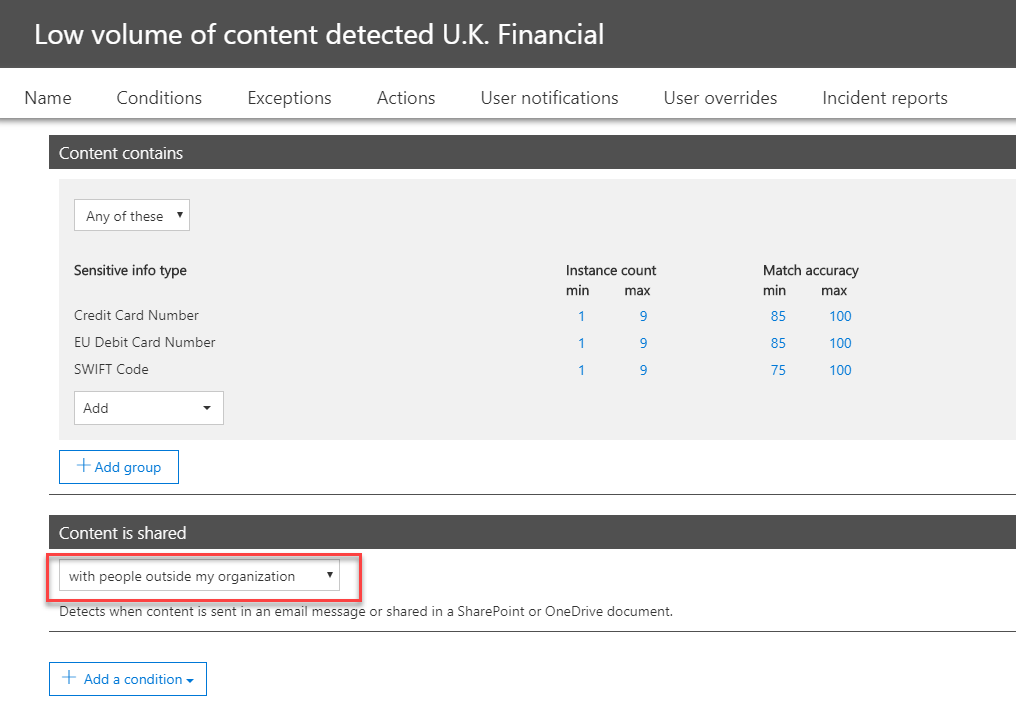
11. Under content is shared section make sure it is set to with people outside my organization. With this setting policy will only consider emails to external organizations.
12. Under actions, select Block people from sharing and restrict access to shared content and set it to Only people outside your organization. According to this, in a breach, policy will block the email.
13. To enable User notification, do the following,
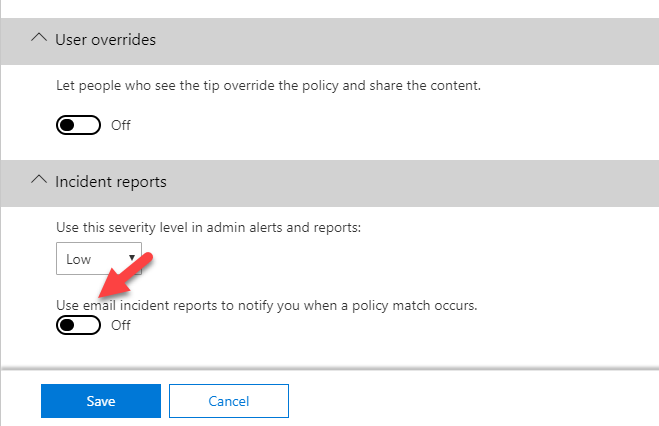
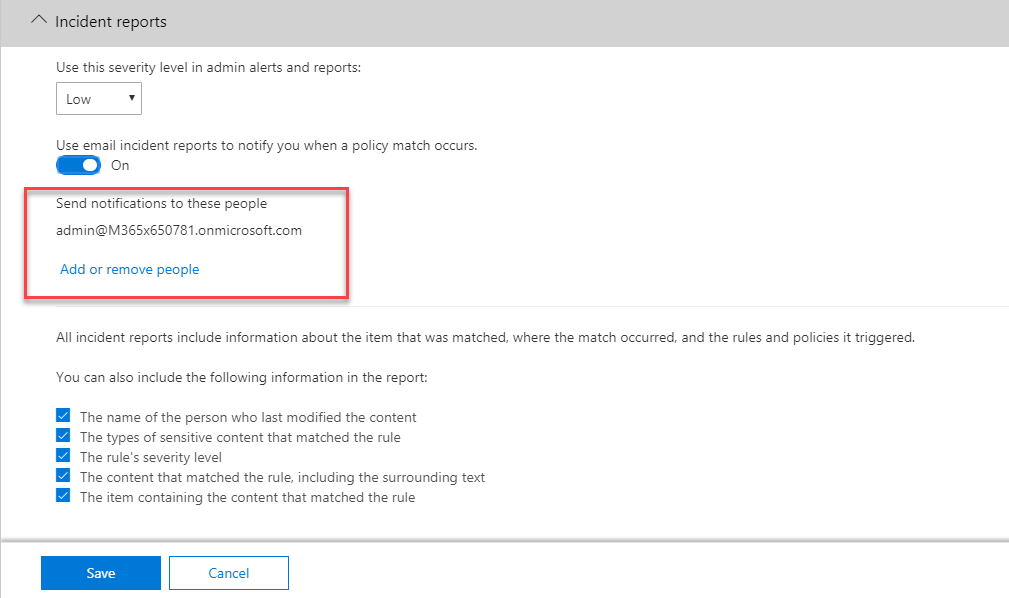
14. To send report to administrator, turn on setting Use email incident reports to notify you when a policy match occurs.
15. Then add the administrator account to the notification list.
16. To apply policy settings, click on Save
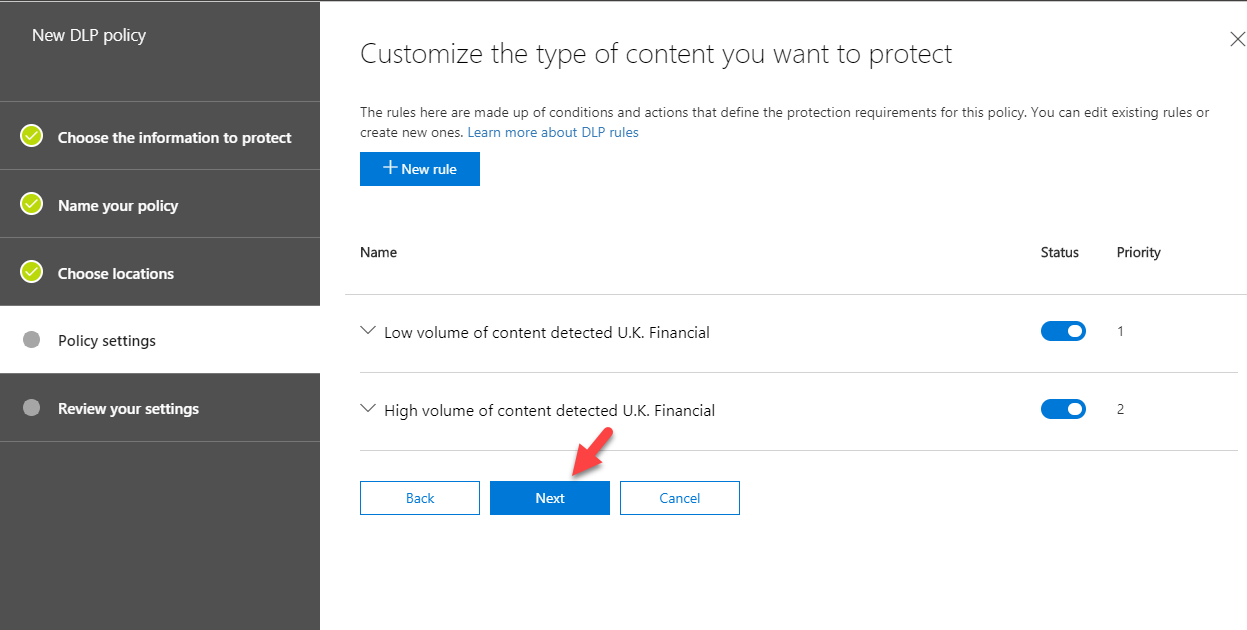
17. Then apply same to High volume of content detected U.K. Financial rule and click Next to continue.
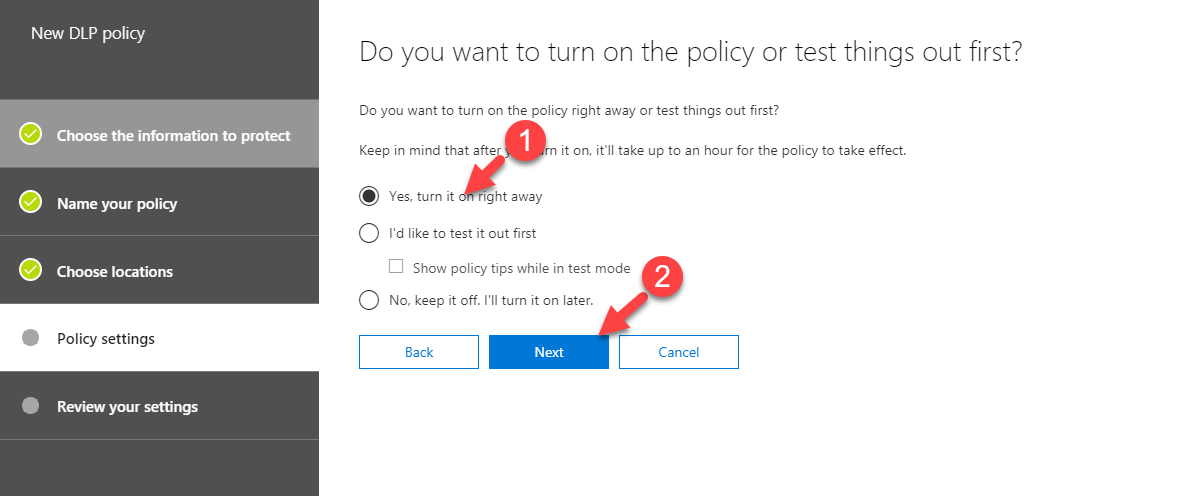
18. In next window select Yes, turn it on right away to activate policy right away and click Next to proceed.
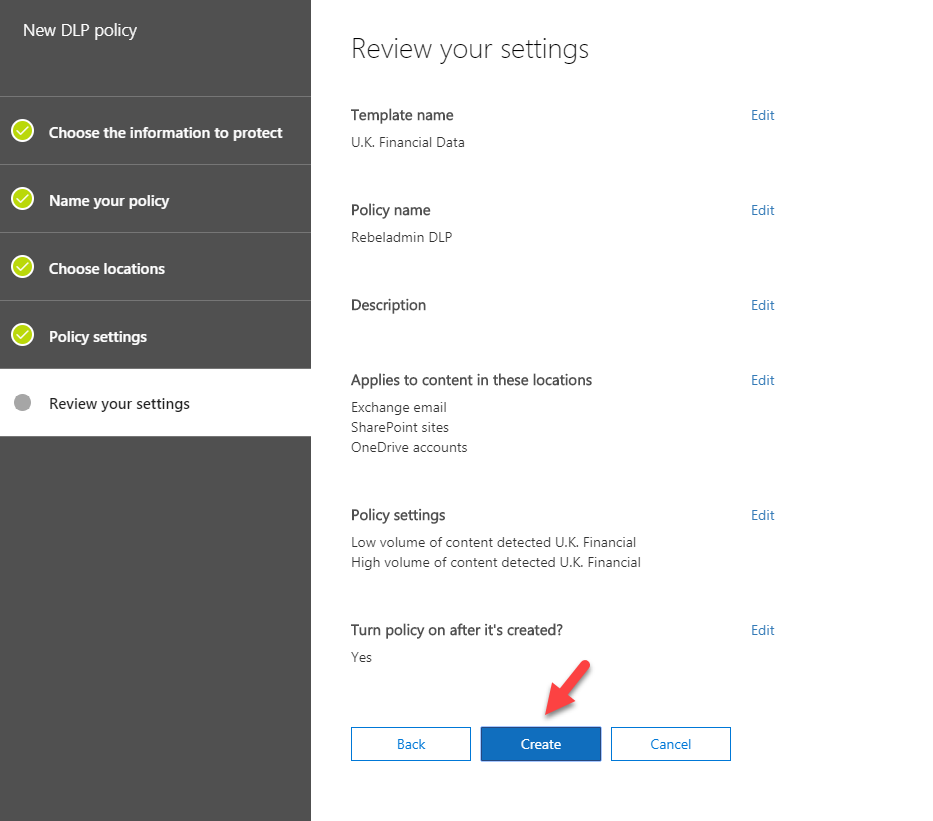
19. In last window click on Create to finish the configuration.
Now we have the policy, lets do some testing to make sure it is working.
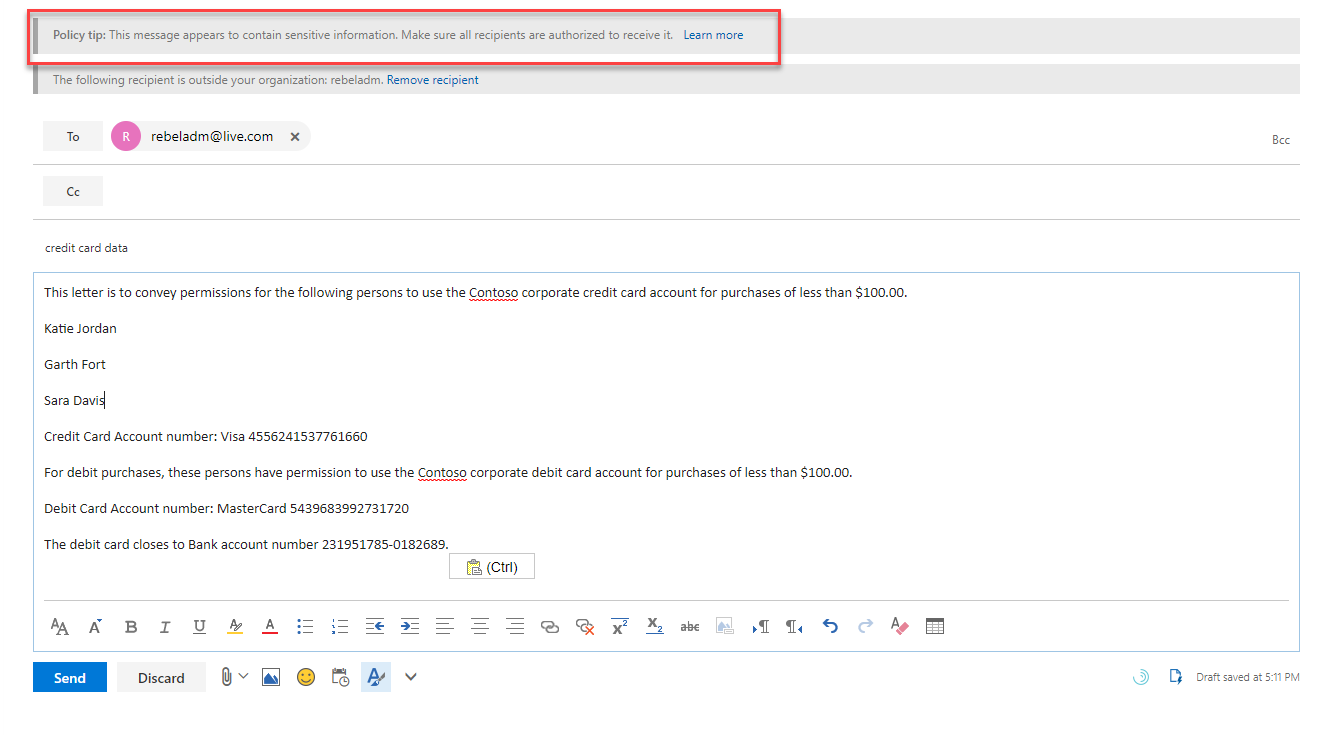
I log in to Megan’s mail box and try to send credit card details to rebeladm@live.com
As you can see it gives policy tip right away saying it contain sensitive data.
As soon as I click on send, I gets a bounce back saying it is blocked and why its blocked.
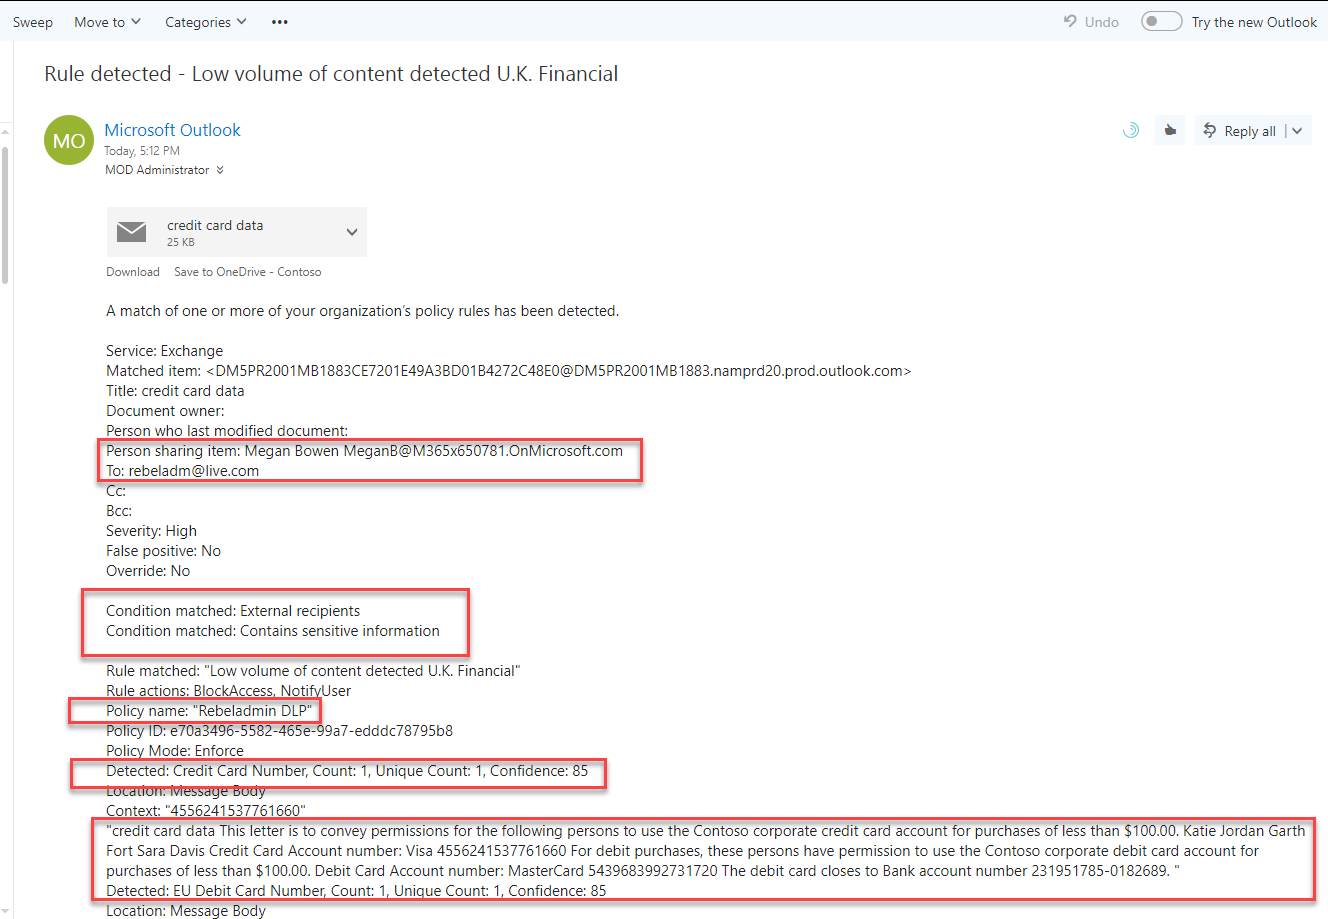
As expected, administrator also got a detailed report of the breach.
This confirms DLP policy is working as expected. If you have any further questions feel free to contact me on rebeladm@live.com also follow me on twitter @rebeladm to get updates about new blog posts.

