Azure services

Step-by-Step guide to configure Azure File Sync (preview)

In one of my previous blog post I have explained what is Azure File Share and how it can use to replace traditional on-premises file server. if you not read it yet please check it before we go further on this post as this feature is depend on Azure File Share. You can access article using http://www.rebeladmin.com/2018/03/step-step-guide-create-azure-file-share-map-windows-10/ 

With Azure File Sync we can make on-premises windows server to act as a cache copy holder for your Azure file share.  It allows users to access files locally using protocol such as SMB, NFS and FTPS. In this blog we going to look in to Azure file sync implementation.

Before we start configuration, we need to familiarizes with some terms associated with this feature. 

Azure File Sync Agent

It is an agent which we need to install in on-premises windows server in order to enable sync with Azure file share. It includes three components, 

1. FileSyncSvc.exe – This is the service responsible for monitoring changes in local server initiate sync with Azure file share. 

2. StorageSync.sys – This component is responsible for tiering files to Azure files. Cloud tiering is additional feature of Azure File Sync. It can use with not frequently used files greater than 64Kb. When this enabled, local file replaced with url to files in Azure file share. When user access it, in background it recalls the file from Azure file share. End user will not have any difference experience as it all happens in back end. 

3. PowerShell cmdlets – This helps to manage Microsoft.StorageSync Azure resource provider using PowerShell commands. These cmdlet files are located in

C:\Program Files\Azure\StorageSyncAgent\StorageSync.Management.PowerShell.Cmdlets.dll

C:\Program Files\Azure\StorageSyncAgent\StorageSync.Management.ServerCmdlets.dll

This agent is only supported in Windows server 2012 R2 / 2016 standard and datacenter versions only. It is not supported on core version either. 

Storage Sync Service 

According to Microsoft “The Storage Sync Service is the top-level Azure resource for Azure File Sync. The Storage Sync Service resource is a peer of the storage account resource, and can similarly be deployed to Azure resource groups. A distinct top-level resource from the storage account resource is required because the Storage Sync Service can create sync relationships with multiple storage accounts via multiple sync groups. A subscription can have multiple Storage Sync Service resources deployed.”

Sync group 

Sync group defines the boundaries of sync job. A sync group includes cloud endpoint and server end point. Storage sync service can have multiple sync group. 

Cloud endpoint

Cloud endpoint represent an Azure file share. One cloud endpoint can only have one file share which means one Azure file share responsible for one sync group. 

Server endpoint

Server endpoint represent the local server directory which will cache files from Azure file share. A one server can hold multiple server endpoints but one endpoint can’t be part of multiple sync groups. If it’s still added, it will merge with the files belongs to other endpoints in same sync group. 

Registered Server 

Registered server represents the trust relationship between on-premise server and storage sync service. It is one-to-one connection. However, one storage sync service can have many servers registered with it. 

Now we know the component and how each component involves in sync operation between Azure file share and on-premises server. Next step is to get it configured. 

Setup Azure File Share

As first step of the demo I am going to create Azure file share. Steps for this task is already explained on one of my previous blog post. http://www.rebeladmin.com/2018/03/step-step-guide-create-azure-file-share-map-windows-10/

Azure file sync preview feature is only supported in Australia East, Canada Central, East US, Southeast Asia, UK South, West Europe, West US regions. There for azure file share also need to be in same regions. 

For this demo I have created a file share called “rebelshare”. It is associated with westus region. 

async1

Create Storage Sync Service
 
1) Log in to Azure Portal as global administrator
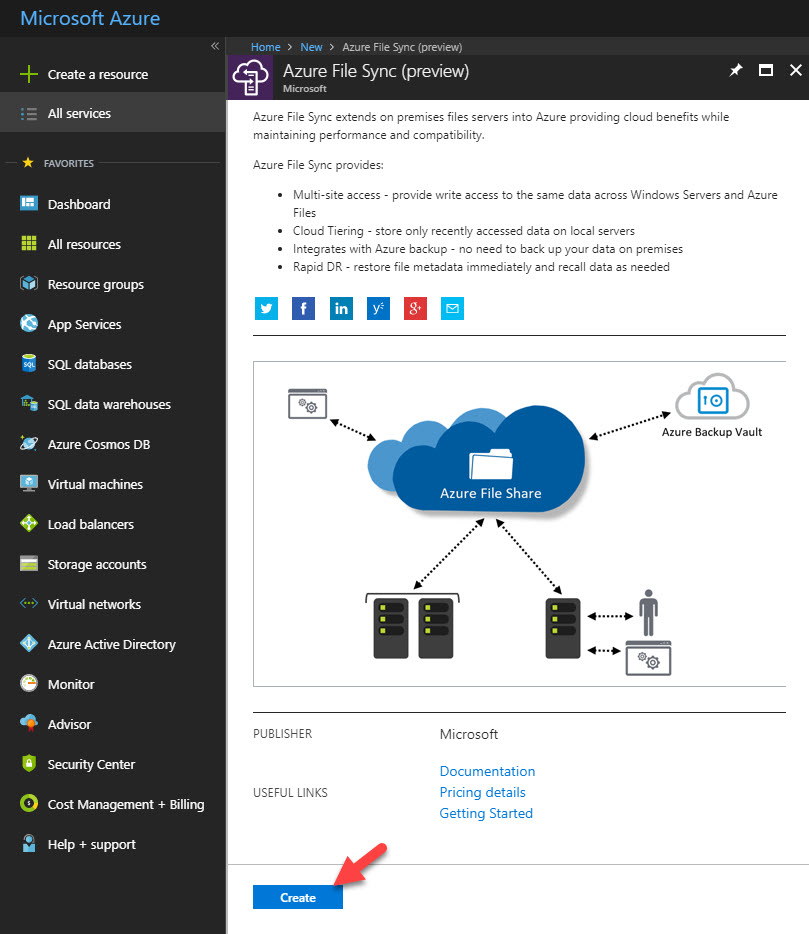
2) Go to New | Create a resource | Azure File Sync (Preview) | Create
 
asyncnew1
 
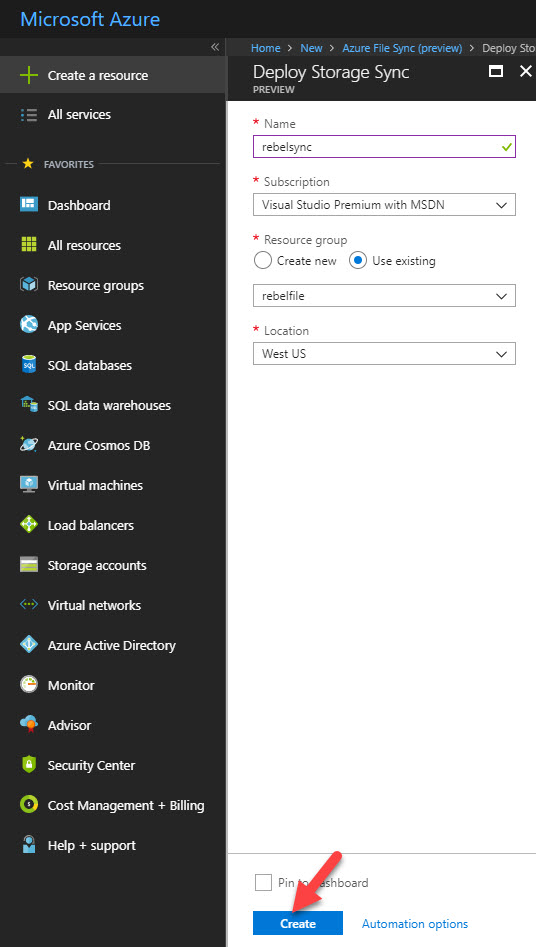
3) In new window type name for sync service and select relevant resource group for it. if required can create new resource group. once you fill in info, click on create
 
asyncnew2
 
Install Azure File Sync Agent
 
Next step in configuration is to install azure file sync agent in on-premises server. In this demo I am using server which running windows server 2016 datacenter edition. 
 
Before install agent,
 
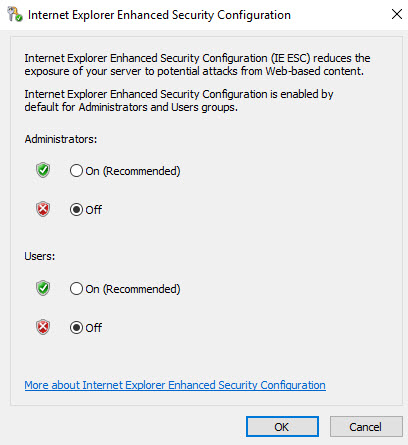
Log in to server and disabled Internet Explorer Enhanced Security Configuration for administrators and users. This can re-enable after installation. 
 
async2
 
Verify PowerShell version its running. At least it need to run version 5.1
 
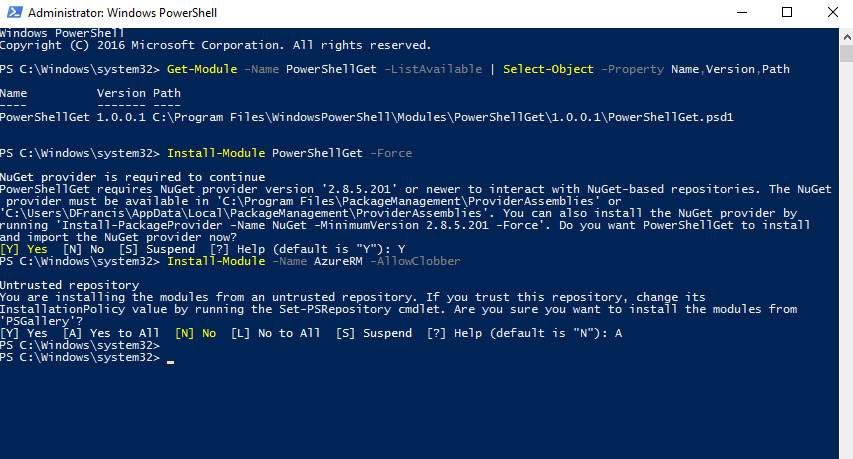
Install Azure PowerShell Module – Guide for it available in https://docs.microsoft.com/powershell/azure/install-azurerm-ps 
 
async3
 
Once above in place, go and download file sync agent from https://www.microsoft.com/en-us/download/details.aspx?id=55988
 
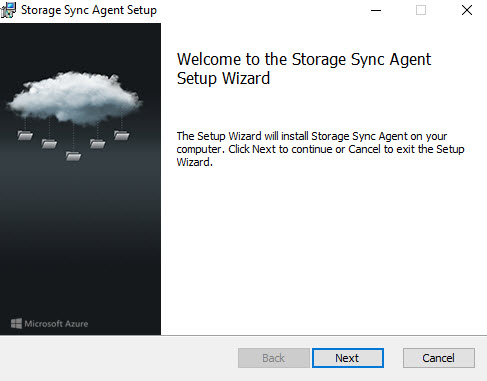
Once download is completed, double click to start the installation. In initial page, click Next to continue.
 
async4
 
In next page, accept the license agreement and click on Next.
 
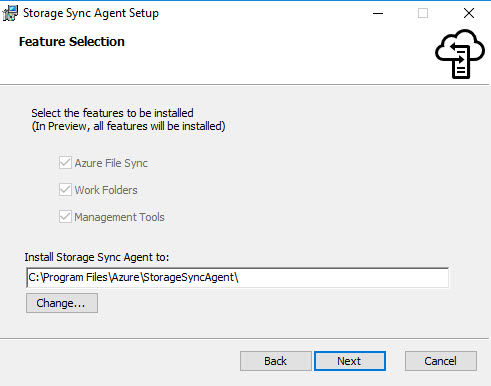
After that in next window we can select the path for installation.
 
async5
 
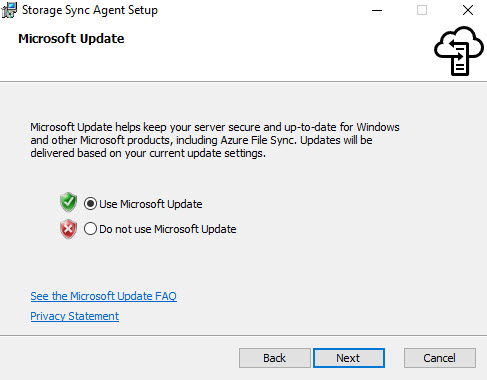
In next window it asks in future how you need to update the agent version. It can be done using windows update. 
 
async6
 
In next window, keep default settings and click on Install to begin installation. 
 
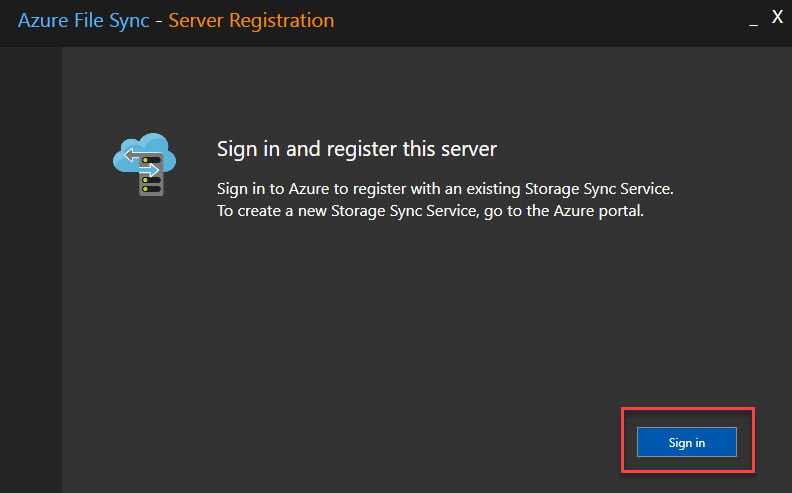
Once installation is completed, it opens up Azure File Sync agent wizard. First step is to register the server. in window click on Sign in to start the process. 
 
async7
 
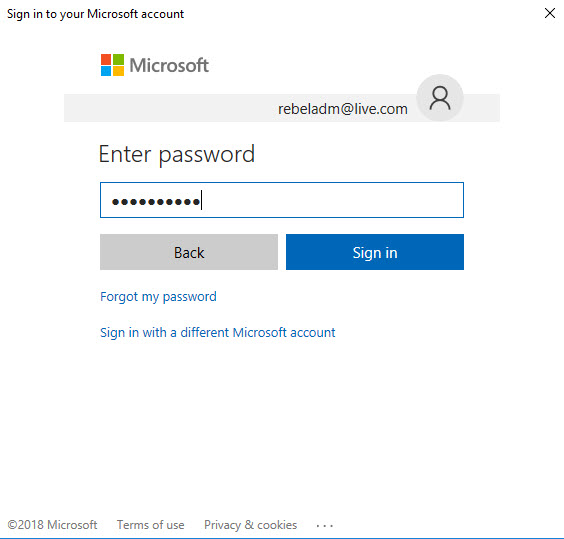
Then sign in using your Azure global administrator account. 
 
async8
 
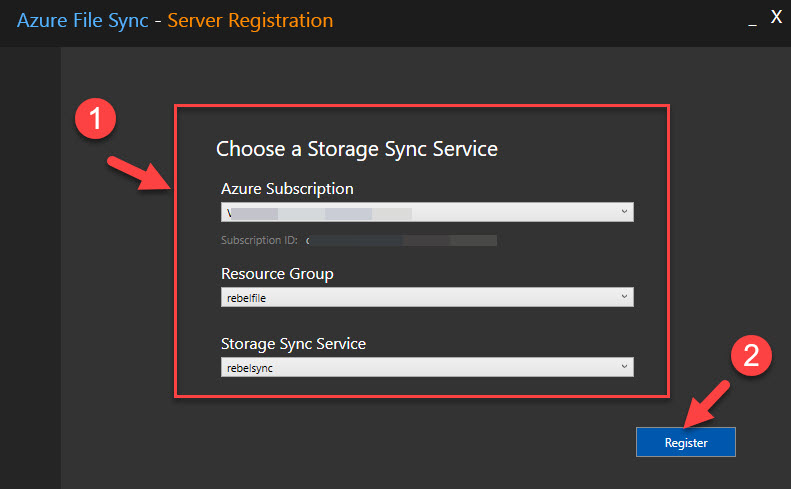
In next window select the Azure Subscription, Resource group, Storage Sync service and click on Register
 
async9
 
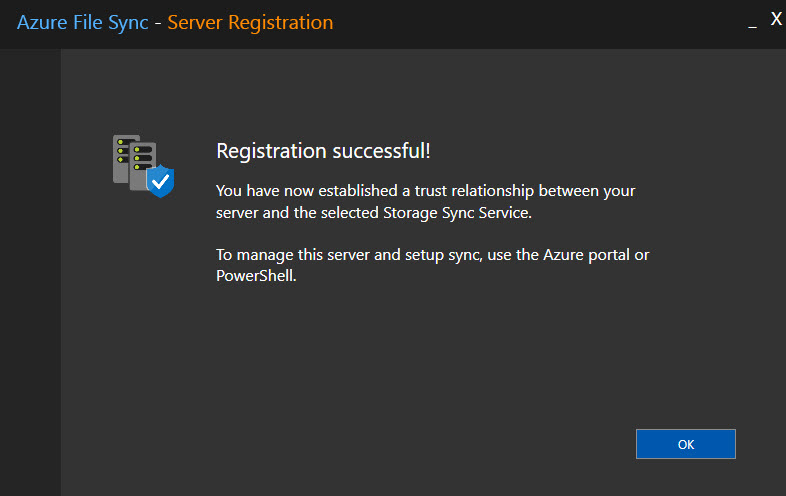
Then it will ask again for login, once it is done it will complete the registration process. 
 
async10
 
Create Sync Group
 
Next step of the process is to create sync group. to do that.
 
1) Log in to Azure Portal as global administrator
2) Go to All Services and search for Storage Sync Services
3) In Storage Sync Services page click on the Storage Sync Service we created on earlier step. 
 
async11
 
4) In new window click on Sync Group icon.
 
async12
 
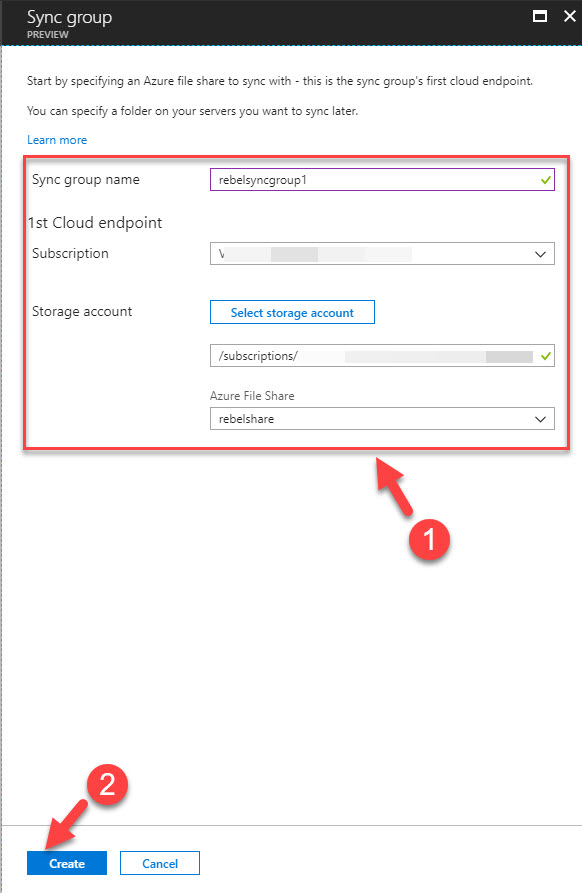
5) In next window, define name for sync group and select the subscription. Then select the storage account and Azure file share. At the end click on Create
 
async13
 
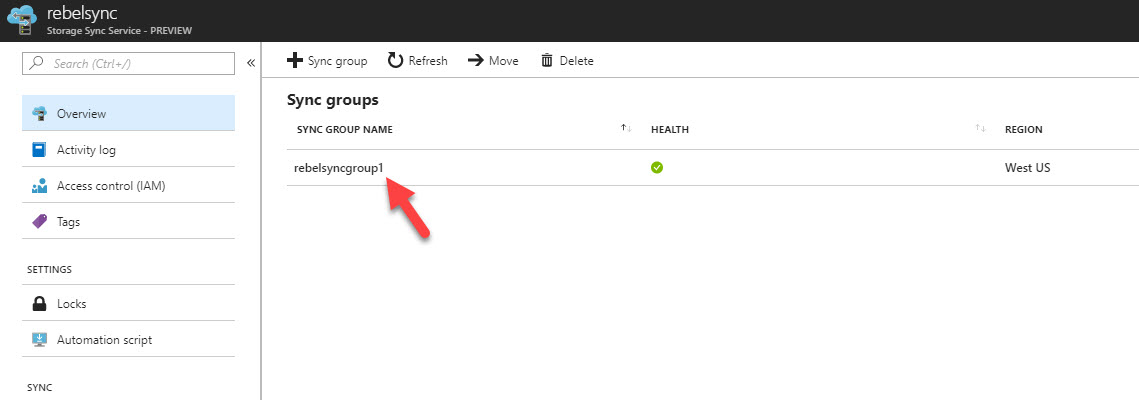
6) Once group is added, click on the new group
 
async14
 
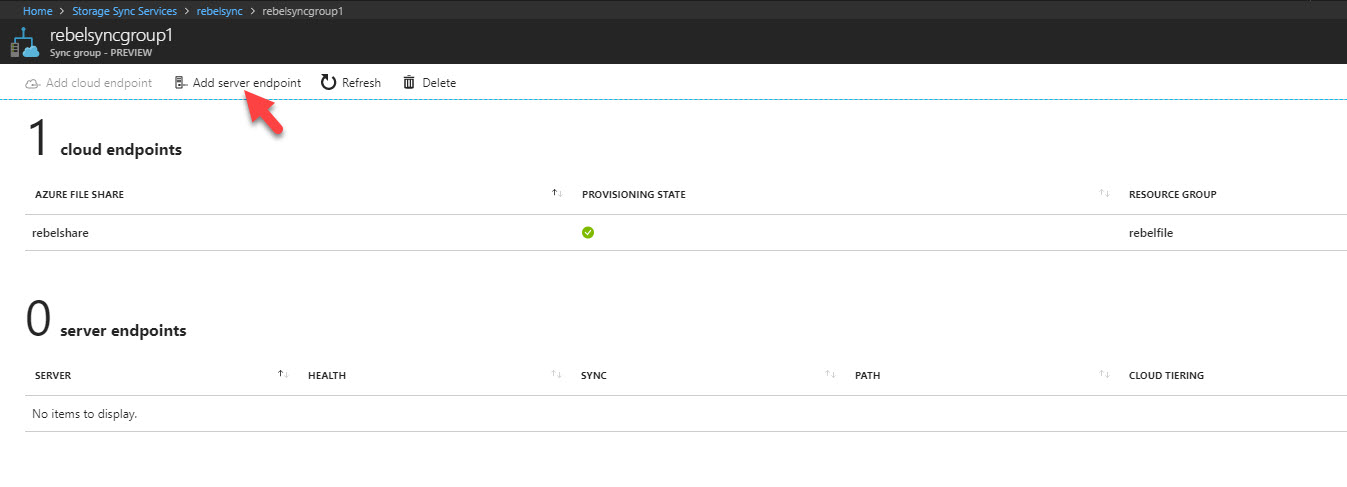
7) In new window, click on add server endpoint option. 
 
async15
 
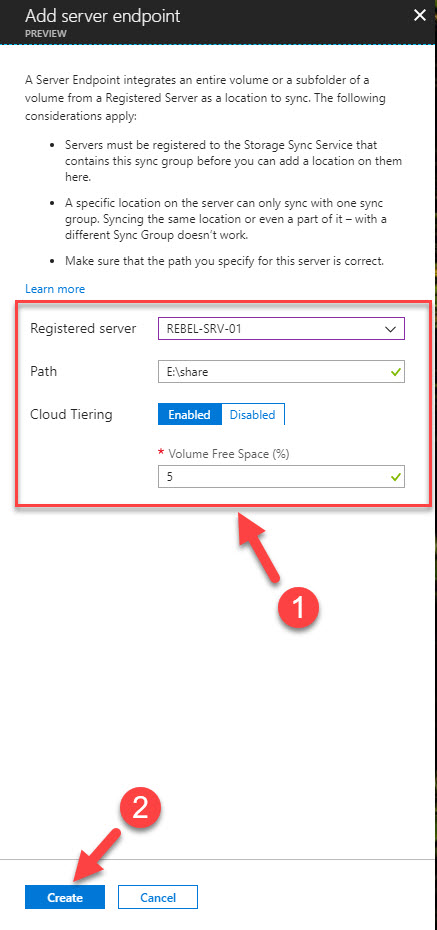
8) Then in new window select the registered server from the list and then define folder path for local cache copy. In my demo I am using E:\share path. I also enable cloud tiering feature. Once info is in click on create
 
async16
 
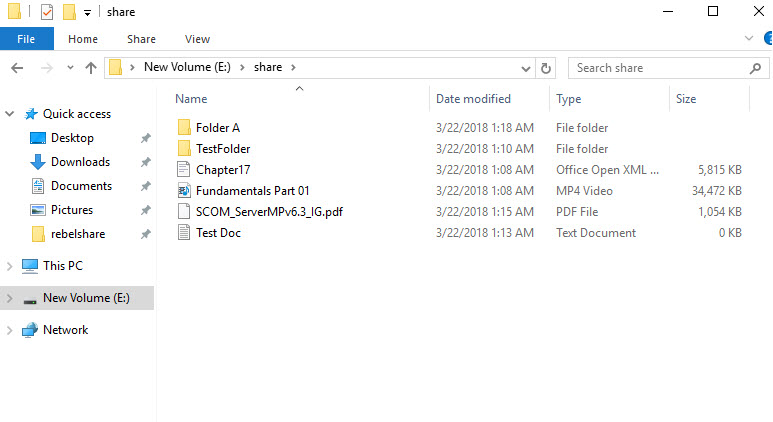
9) After initial sync we can see same files in two endpoints. 
 
async17
async18
 
10) You also can review status of endpoint sync using Storage Sync Services | Sync_Account | Sync_group

async19
 
This marks the end of this blog post. If you have any questions feel free to contact me on rebeladm@live.com also follow me on twitter @rebeladm to get updates about new blog posts.
Related posts
Azure servicesMicrosoft Entra IDMicrosoft Technologies

Step-by-Step Guide: Configure Entra ID lifecycle workflow to trigger mover task on user profile changes

The Entra ID lifecycle workflow is a feature of Microsoft Entra ID identity governance and Microsoft…
Read more
Azure servicesCyber SecurityMicrosoft Entra IDMicrosoft Technologies

Microsoft Entra Permissions Management – Part 01 – How to onboard Azure Subscription ?

Today’s rapidly changing digital landscape creates new identity and access challenges. Microsoft…
Read more
Azure servicesMicrosoft Entra IDMicrosoft Technologies

Step-by-Step Guide : How to Automate JML process with Microsoft Entra lifecycle workflows ?

JML (Joiners/Movers/Leavers) process of an organization has a major impact on its security and…
Read more
Newsletter
Become a Trendsetter

Sign up and get the best of RebelAdmin, tailored for you.

1 Comment

Leave a Reply

Your email address will not be published. Required fields are marked *