Recently I was working on a project for a customer and I thought to share the problem and solution so in future it will help my blog readers.
Problem
My client has an on-premises Microsoft exchange 2013. Recently they are acquiring a company. This company is using Office 365. The both companies like to see calendar free/busy information when they schedules meetings etc.
Solution
Exchange 2013 offers a feature called “federation trust”. Federation trust will create trust relationship between on-premises exchange server and Azure active directory authentication system. Then it can use to create federated sharing with other federated organizations to share calendar free/busy information. The same method can use to create federated sharing between on-premises exchange server and office 365.
What you need?
Before start the configuration we need to have following ready,
1) Exchange administrator Privileges for on-premises exchange setup
2) Global administrator privileges for Office 365 portal
3) Access to DNS Zones to add TXT record for the on-premises exchange domain ( it is public dns entry )
4) Auto discovery should be fully functioning with on-premises exchange setup. If you got problem with it need to fix before start this configuration as you will end up with one way calendar free/busy info sharing.
Configuration on on-premises Exchange 2013
1) Log in to EAC as exchange administrator
2) Go to organization > sharing
3) Then click on enable (if you not using any federation trusts already) and start the federation trust wizard. It is straight forward setup and once wizard completes click on close.
4) Then under the federation trust click on modify
5) In new window Sharing-Enabled Domains, next to step 1 click on brows
6) In Select Accepted Domains, select the primary domain name of the on-premises exchange setup and click OK
7) This will create a federation trust with Azure AD authentication system. Please make note of the TXT record in the windows. Then add it to DNS zone (it should resolve via public dns). Make sure this record is created correctly as you will not be able to verify domain ownership with Azure AD authentication system. Sometime DNS propagation can take up to 24 hours and it’s all depend on your DNS provider. Once record is created click on Update
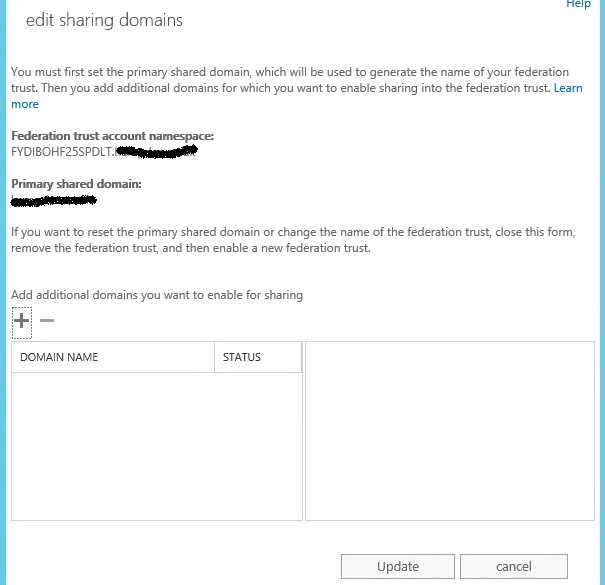
8) Once it’s done it will looks like following. It creates unique federation trust namespace and will register with Azure AD authentication system.
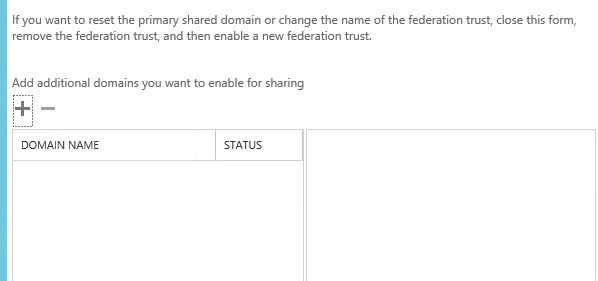
9) If you got additional domains, click on + mark to add. Once done click on update and exit from the window.
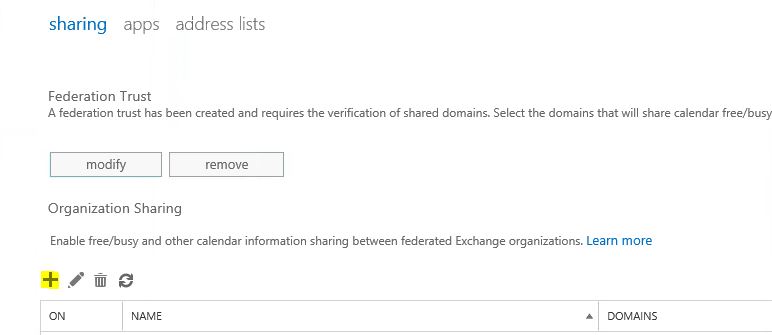
10) Now we need to add office 365 domain and allow them to see the free busy information. To do that on same sharing window, under the Organization sharing click on + mark
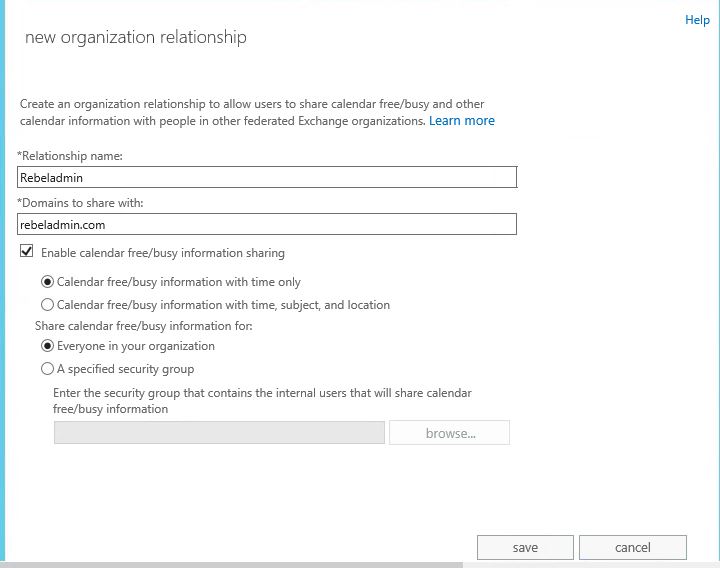
11) In new window, fill the info about the office 365 domain and set the sharing permissions as you desired. But I highly recommend to use same permissions in both ends to avoid issues. Of policies mismatch it may work on one-way only. Once changes are done click on save.
12) That’s it, it completes the federation trust setup on on-premises exchange 2013 end.
Configuration on Office 365 end
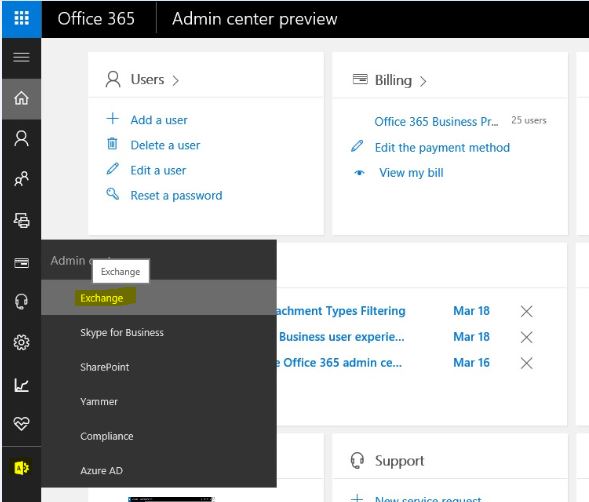
1) Log in to Office 365 portal and click on exchange admin center
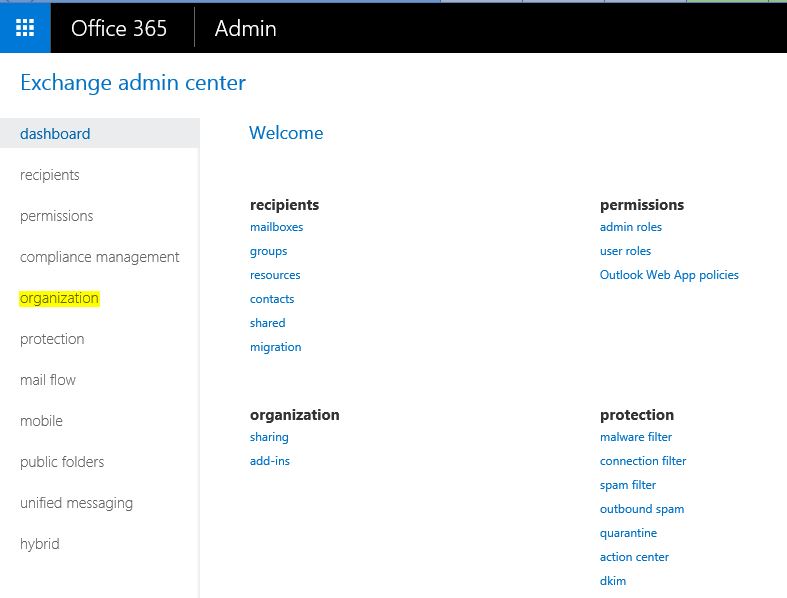
2) In EAC go to the Organization
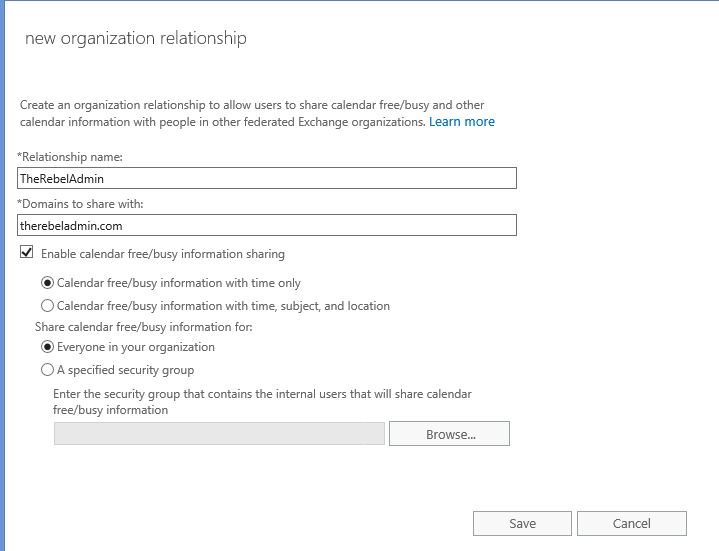
3) Under the organization sharing click on + to add on-premises exchange domain
4) In new window add the info about on-premises domain and also set sharing permissions, once done click on save.
Now it’s all done, it’s time for testing.
Some time you may notice the even after setup office 365 users may not be able to see the calendar free/busy info while it work from the other end. So best way to start troubleshooting this problem is to follow this troubleshoot link https://support.microsoft.com/en-us/help/10092/troubleshooting-free-busy-issues-in-exchange-hybrid-environment
But I have notice sometime you need to restart IIS on on-premises exchange 2013 CAS to get this working.
Hope this help and if you have any questions feel free to contact me on rebeladm@live.com





Good article, also provide the steps in order to setup Free/Busy with exchange 2010 to O365.
Thanks for the article !
For complete and detailed configuration via PowerShell :
https://docs.microsoft.com/en-us/powershell/module/exchange/new-organizationrelationship?view=exchange-ps
https://docs.microsoft.com/en-us/exchange/sharing/organization-relationships/modify-an-organization-relationship