


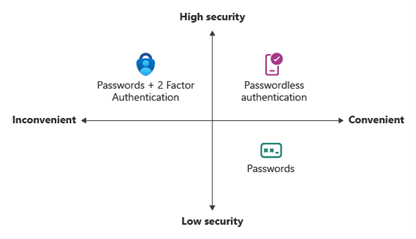
Passwords are inherently weak and susceptible to being broken. Even strengthening a password only slows down an attack; it does not make it unbreakable. Today, multi-factor authentication (MFA) is the cornerstone of identity protection. However, it still relies on the use of passwords. This is why passwordless authentication is a more secure and convenient alternative to the other two options. With passwordless authentication, the process shifts from “something you know” to “something you have” or “something you are.”

Microsoft Entra ID supports five passwordless authentication option to choose from. The method organization use is depend on the business needs and organization readiness.
- Windows Hello for Business
- Platform Credential for macOS
- Platform single sign-on (PSSO) for macOS with smart card authentication
- Microsoft Authenticator
- Passkeys (FIDO2)
- Certificate-based authentication
Although each method achieves the same outcome, the technology behind them varies. Among the five options, passwordless authentication using Microsoft Authenticator is relatively easy to implement. This is due to its minimal reliance on other hardware components or resources. As long as users have an iOS or Android device with Microsoft Authenticator installed, they can use passwordless authentication.
Authentication Strength and Passwordless authentication
We can use conditional access policies to enforce authentication strength. Rather than relying solely on MFA, this approach allows us to select a stronger authentication method based on business needs. There are three authentication strengths to choose from.
- MFA strength
- Passwordless MFA strength
- Phishing-resistant MFA strength
Among the three options, the second and third utilize passwordless authentication. However, not all passwordless authentication methods support these strength levels. For instance, Microsoft Authenticator’s passwordless authentication can only be used with the Passwordless MFA strength. This is an important consideration when selecting the appropriate passwordless authentication method for your business. More info : https://learn.microsoft.com/en-us/entra/identity/authentication/concept-authentication-strengths
Passwordless authentication with Microsoft Authenticator
Microsoft Authenticator employs technology similar to Windows Hello for Business, utilizing key-based authentication. However, because it involves a mobile device and an application, the authentication process is a bit more complex.

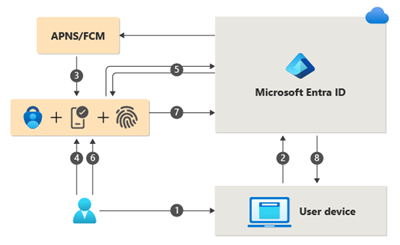
- The user inputs their username.
- Microsoft Entra ID detects the presence of a strong credential and initiates the Strong Credential flow.
- A notification is sent to the app through Apple Push Notification Service (APNS) for iOS devices or Firebase Cloud Messaging (FCM) for Android devices.
- The user receives the push notification and opens the app.
- The app connects to Microsoft Entra ID and receives a proof-of-presence challenge and nonce.
- The user completes the challenge by entering their biometric data or PIN to unlock the private key.
- The nonce is signed with the private key and sent back to Microsoft Entra ID.
- Microsoft Entra ID validates the public/private key pair and issues a token.
Another advantage of this method is that it allows the same device to be used for passwordless authentication across multiple accounts.
In this blog, I will demonstrate how to enable passwordless authentication with Microsoft Authenticator.
Enable Authentication Method
Let’s begin the configuration by enabling Microsoft Authenticator as an authentication method.
- Log in to Microsoft Entra as a Global Admin or Authentication Policy Administrator.
- Navigate to Protection > Authentication methods > Policies.

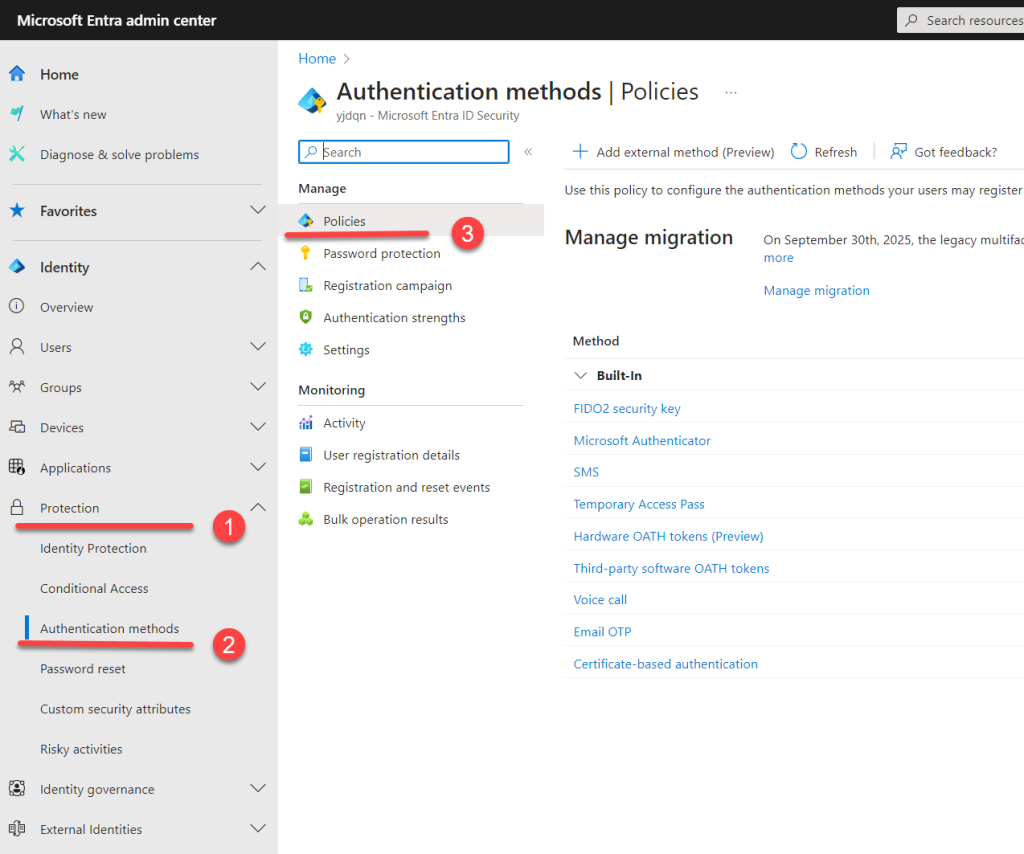
- Select Microsoft Authenticator from the list.

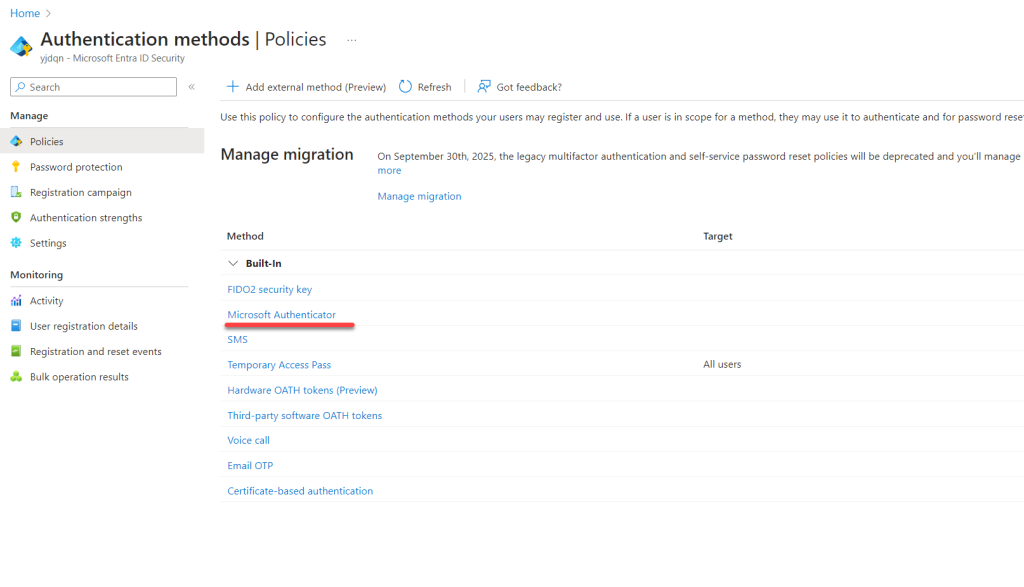
- In the next window, select “Enable” and set “All users” as the target. Keep the Authentication mode as “Any” and click Save.

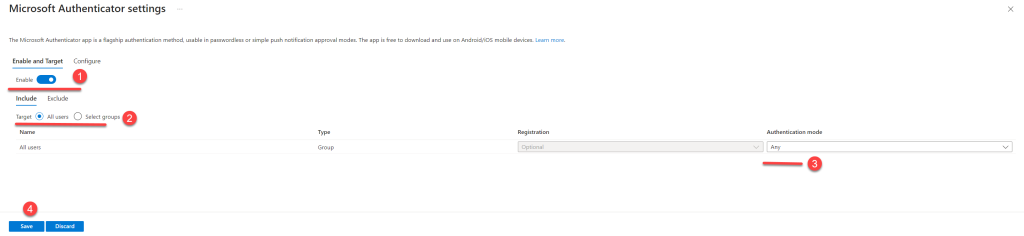
This allows all users to use Microsoft Authenticator as an authentication method.
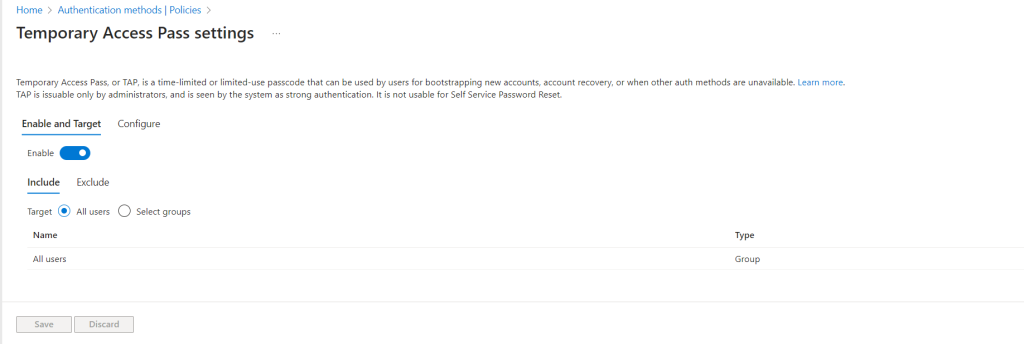
Temporary Access Pass
If we decide not to use passwords, it’s unnecessary to provide a password to the user during the initial setup. Instead, we can issue a Temporary Access Pass for setting up the Microsoft Authenticator app.
To enable Temporary Access Pass as an authentication method, follow the same steps as described above.

Setup Temporary Access Pass for User
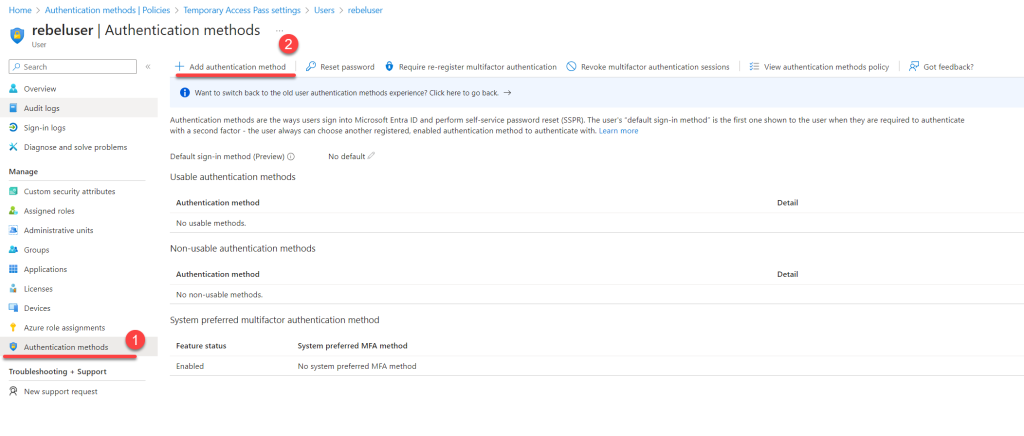
I have a test user created with a temporary password. The next step is to create a Temporary Access Pass. Here’s how you can do it:
- Log in to Microsoft Entra as an Authentication Administrator, Privileged Authentication Administrator, or Global Administrator.
- Navigate to Identity > Users.
- Click on the test user.
- Go to Authentication methods and click on + Add authentication method.

- From the dropdown menu, select “Temporary Access Pass.” Choose how long it should be valid and whether it should be a one-time code (I recommend using the one-time use option for additional security). Finally, click on Add.

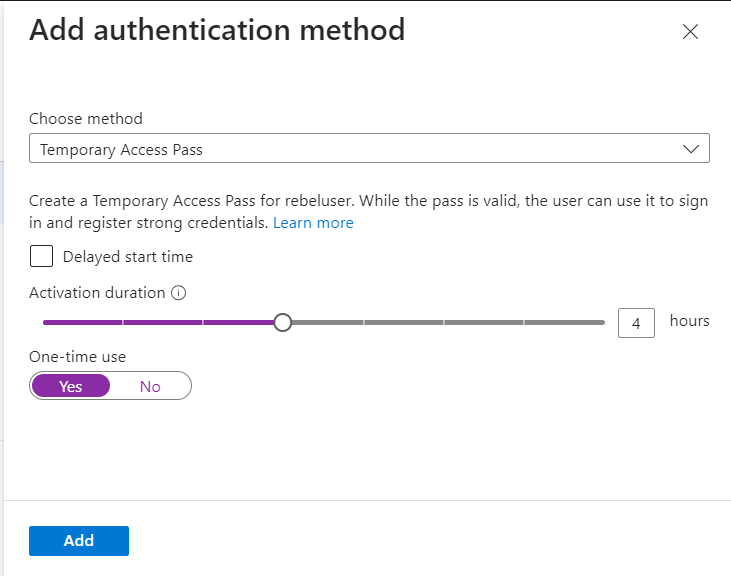
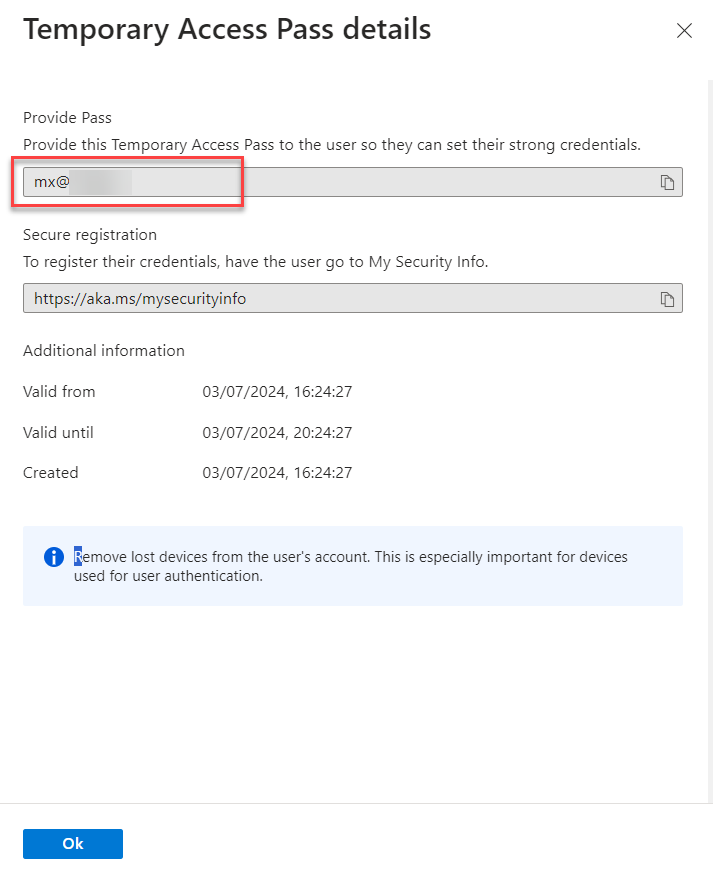
- The Access Pass details will be displayed. Note down the code and share it with the user.

User Registration
Now that we have a user and a temporary access pass, let’s see how we can register the user.
I’ll demonstrate this using an iPhone with the latest Microsoft Authenticator already installed.
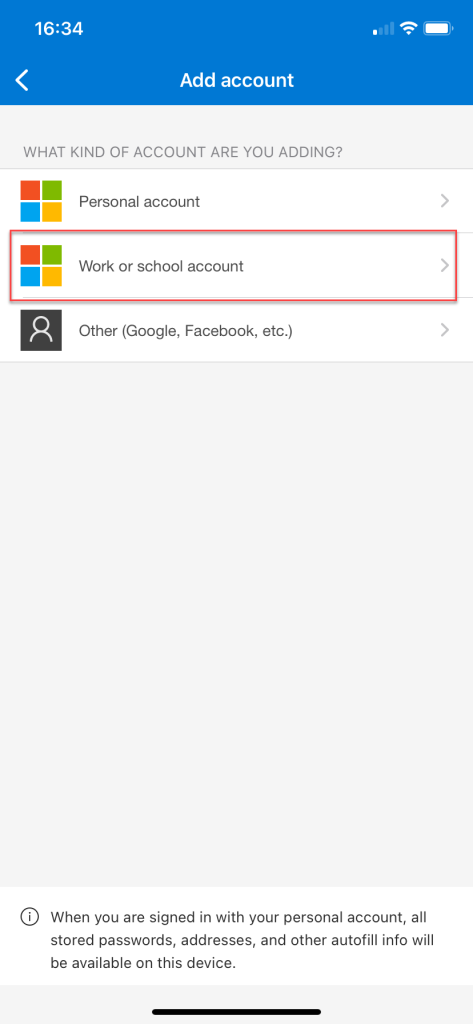
- Open Microsoft Authenticator, click on Add account, and then choose Work or school account.

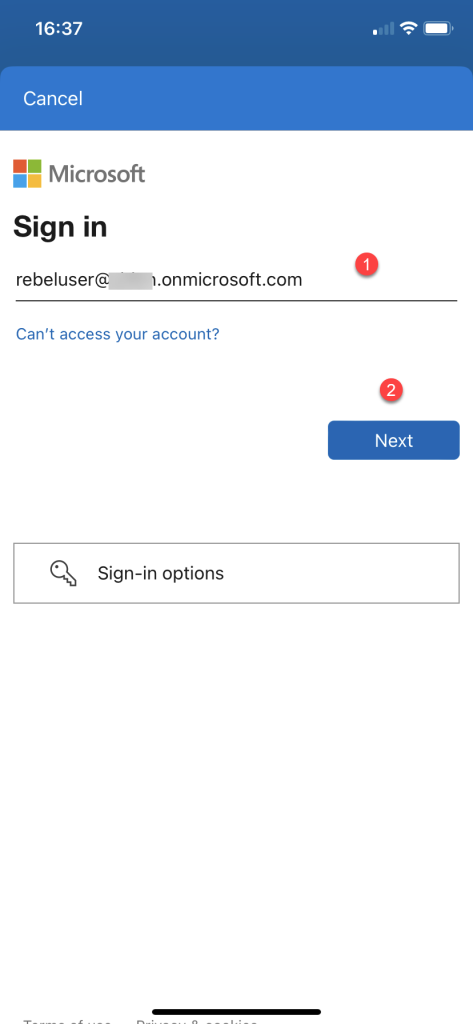
- Enter the username and click on Next.
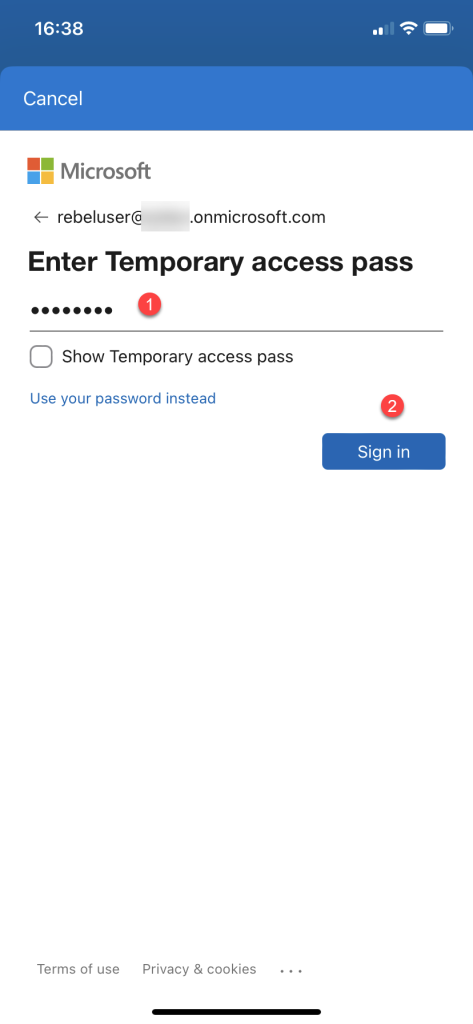
- On the next page, enter the Temporary Access Pass and click on Sign-In.
- Once logged in, click on Continue to register the device.
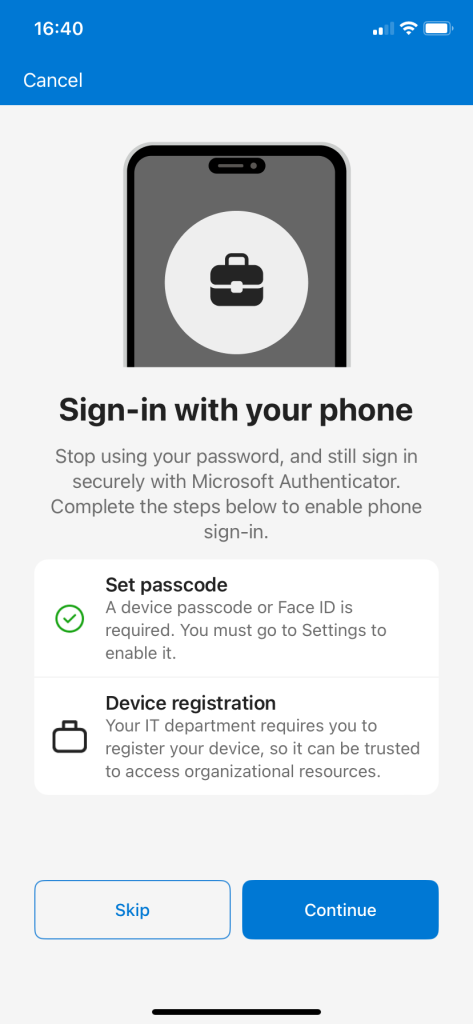
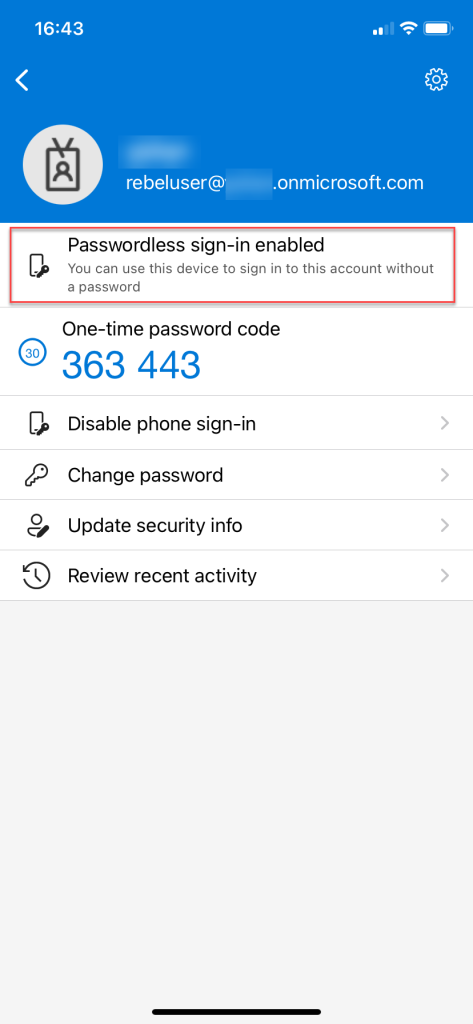
After registering the device, the account will be added. Now, the account is ready for passwordless sign-in.
Testing
Now that everything is set up for testing,
I visited https://portal.azure.com and entered the username of the test user, then clicked on Next.

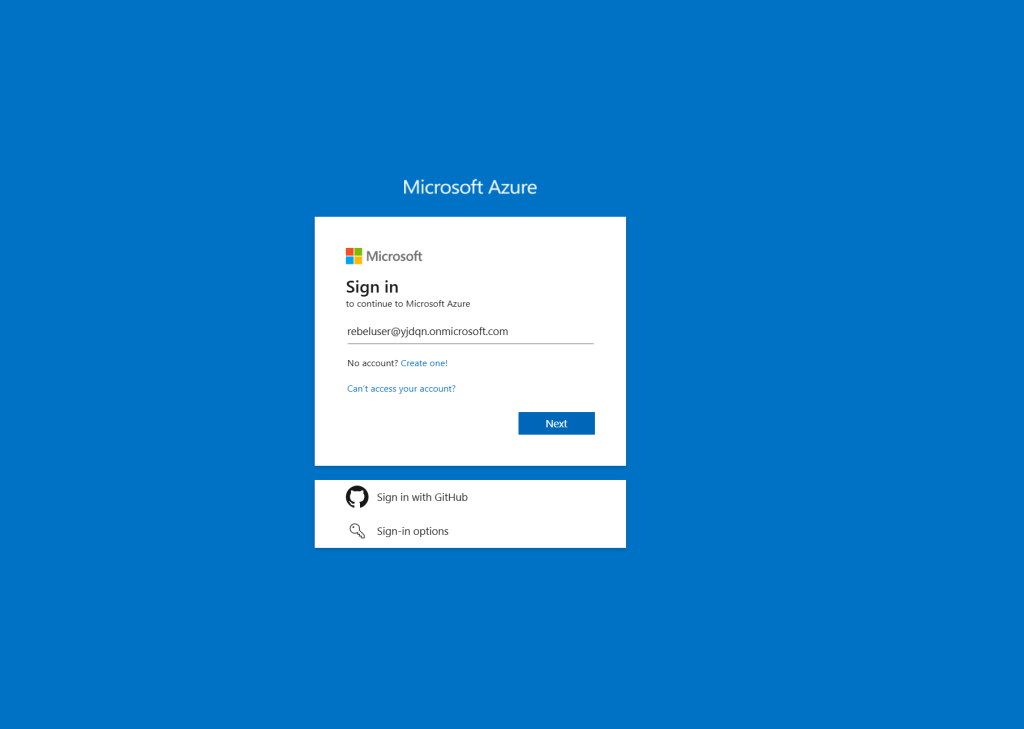
As expected, it prompted for phone sign-in.

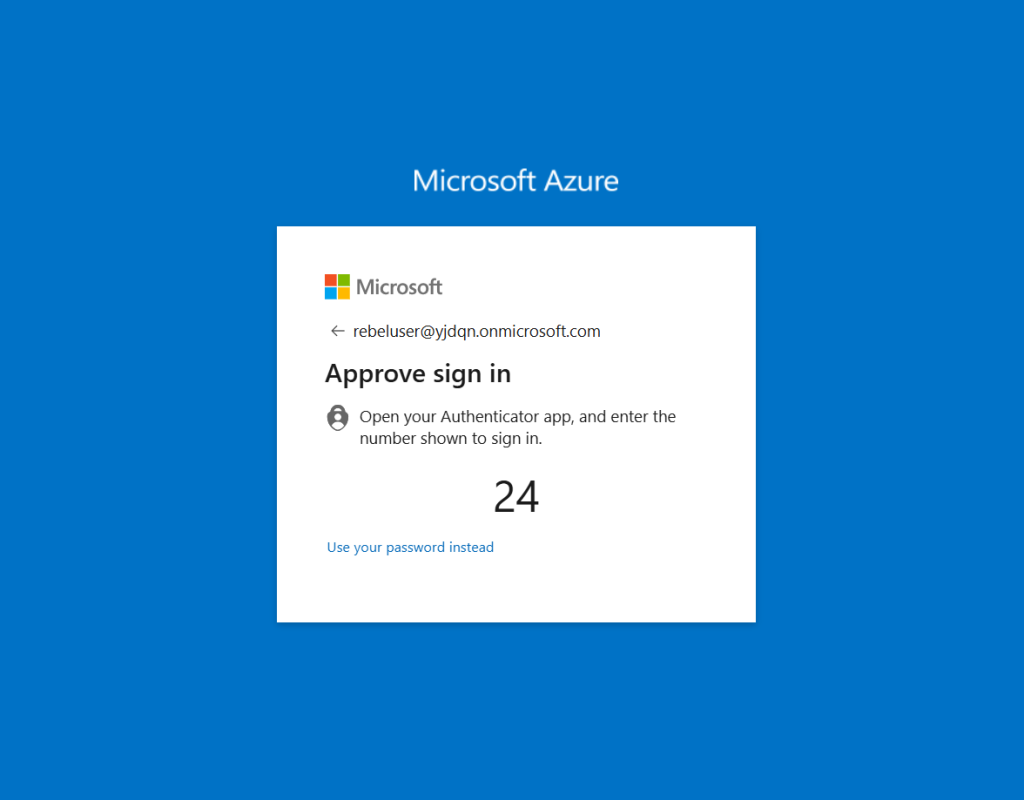
Once the login was approved through the Microsoft Authenticator app, I successfully logged in.
The passwordless sign-in using the Microsoft Authenticator app is functioning as anticipated. In this test, the end user never needed to know the temporary password and only used the one-time Temporary Access Pass to register the app.
For existing users, you can enable phone sign-in using the following steps:
- Open Microsoft Authenticator and select the registered account.
- Choose “Enable phone sign-in.”
- Follow the instructions in the app to complete the registration process.
This concludes the blog post, and I hope you now have a better understanding of how to enable passwordless authentication using Microsoft Authenticator. If you have any questions, feel free to contact me at rebeladm@live.com.