
In AD environment, FSMO role seize process only should use in a disaster where you cannot recover the FSMO role holder. It should be using for day to day operations. Some of the FSMO roles (RID, Domain Naming Master, Schema Master) can still afford few hours’ downtime with minimum business impacts. There for do not use the Seize option as the first option if still FSMO role holder can recover or fix.
Once seize process is completed, the old FSMO role holder should not bring online again. It is recommended to format and remove it from network. In any given time, it is not possible to have same FSMO role appear in two servers in same domain.
In following example, there are two domain controllers in the infrastructure. REBEL-SDC02 is the FSMO role holder and REBEL-PDC-01 is additional domain controller. Due to hardware failure, I cannot bring REBEL-SDC02 online and I need to seize the FSMO roles.

In order to seize the roles following command can use,
Move-ADDirectoryServerOperationMasterRole -Identity REBEL-PDC-01 -OperationMasterRole SchemaMaster, DomainNamingMaster, PDCEmulator, RIDMaster, InfrastructureMaster -Force

This command will take few minutes to complete as in background it will try to connect to original FSMO role holder.
The only change in the command from FSMO role transfer is the -Force at the end. Otherwise its exact same command. You also can seize individual role by using Move-ADDirectoryServerOperationMasterRole -Identity REBEL-PDC-01 -OperationMasterRole <FSMO Role> -Force
In their <FSMO Role> can be replaced by the actual FSMO role value.
Once command completed we can test the new FSMO role holder.
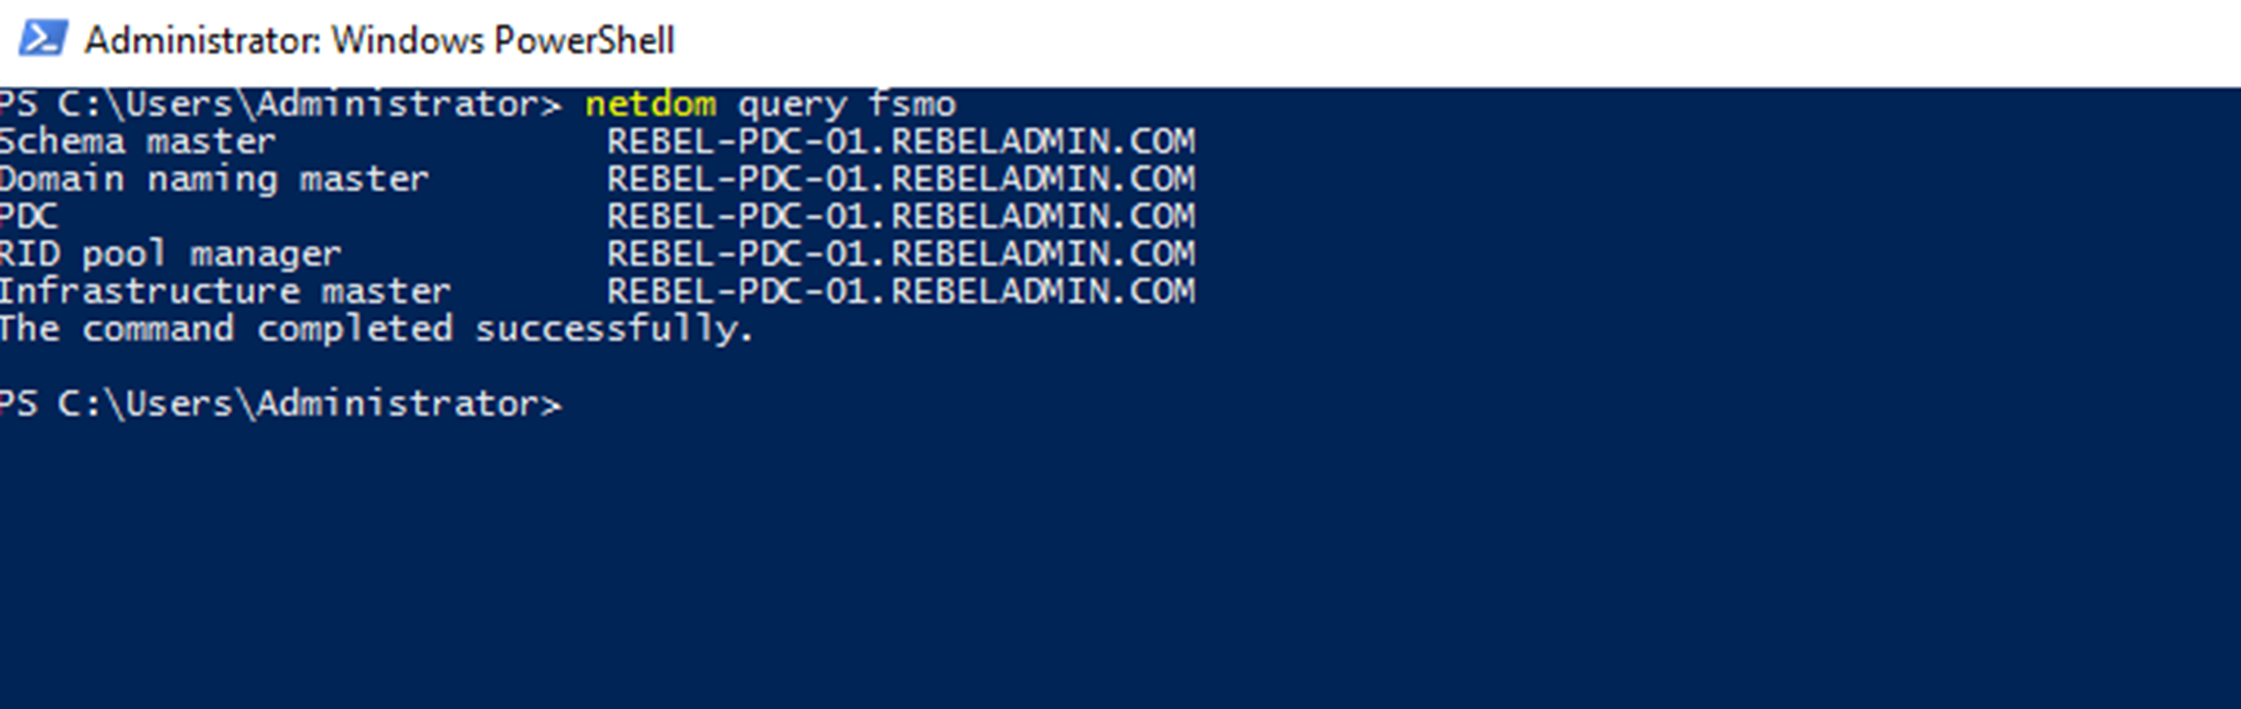
As we can see REBEL-PDC-01 become the new FSMO role holder.
This marks the end of this blog post. Hope this was useful. If you have any questions feel free to contact me on rebeladm@live.com also follow me on twitter @rebeladm to get updates about new blog posts.

