


The Entra ID lifecycle workflow is a feature of Microsoft Entra ID identity governance and Microsoft Entra Suite licences that helps automate the Joiner, Mover, and Leaver lifecycle processes. Within a lifecycle workflow, configured tasks are triggered when execution conditions are met. There are three types of triggers available in an Entra ID lifecycle workflow:
- Attribute changes – The lifecycle workflow is triggered when a user attribute changes.
- Group membership changes – The lifecycle workflow is triggered when a user is added to or removed from a specific group.
- Time-based attribute – The lifecycle workflow is triggered when a chosen date value is reached. As an example, 7 days before the employerHireDate attribute value.
In an organisation’s mover process, it is common for user attributes such as department, location, and job role to change. We can set up an Entra ID lifecycle workflow to trigger a mover task when a user attribute value changes. In this blog post, I will demonstrate how to set up an Entra ID Lifecycle Workflow to cover the following mover scenario:
Scenario: User Isaiah Langer is currently working in the Sales & Marketing department and is moving to the Engineering department. When the department in their profile changes to “Engineering”, the user should be added to the “Rebeladmin Engineers” security group.
Create Entra ID lifecycle workflow
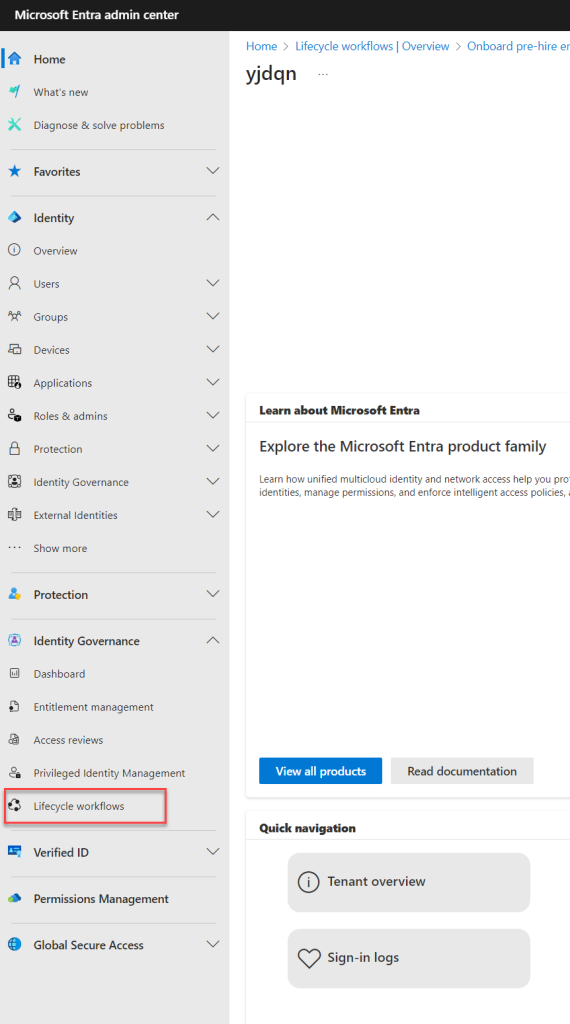
- Sign in to the Entra Admin portal at https://entra.microsoft.com/ as a Lifecycle Workflows Administrator or above.
- Navigate to Identity governance > Lifecycle workflows.

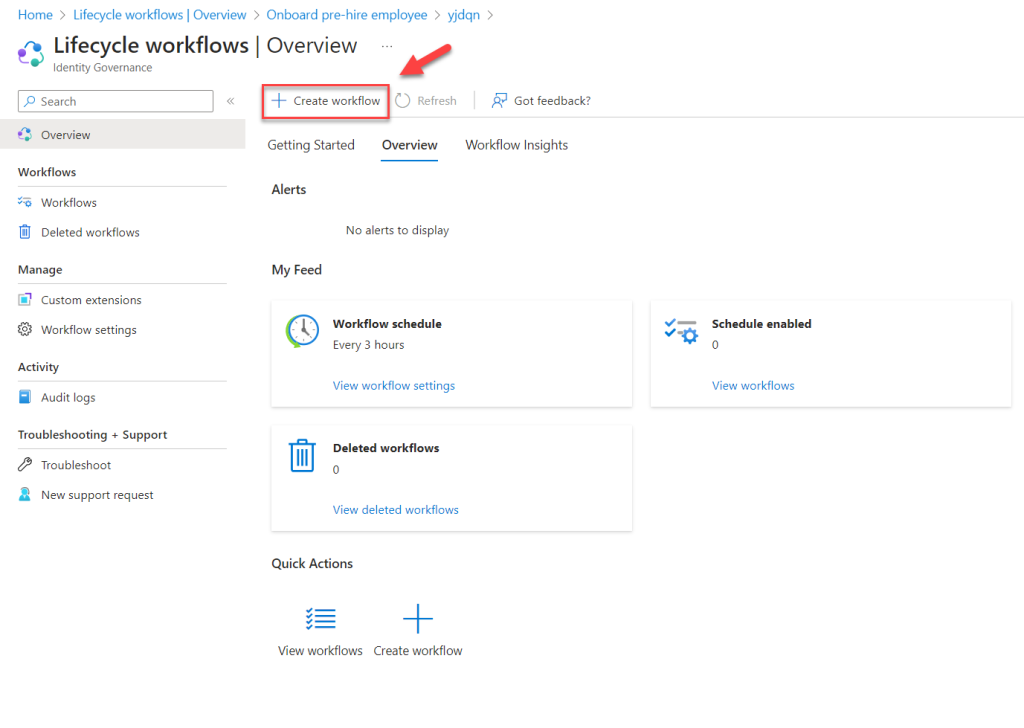
- Click on + Create workflow.

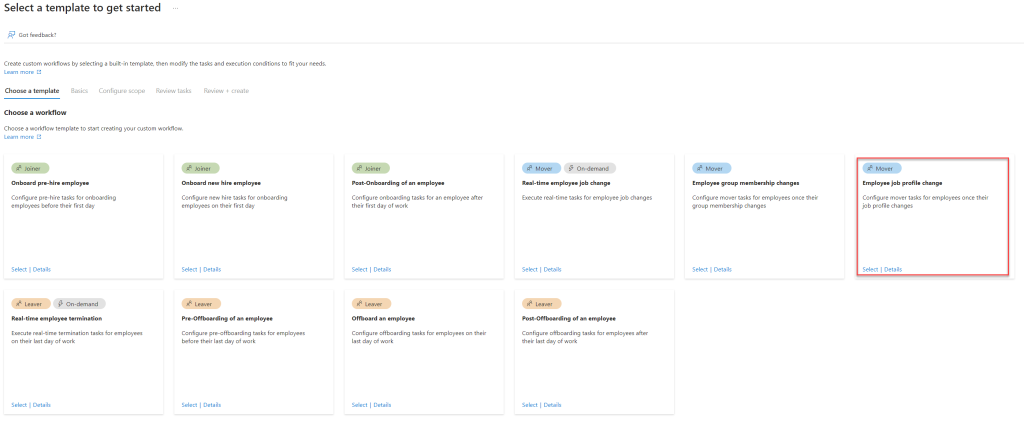
- From the list of templates, select the Employee job profile change template for the base workflow.

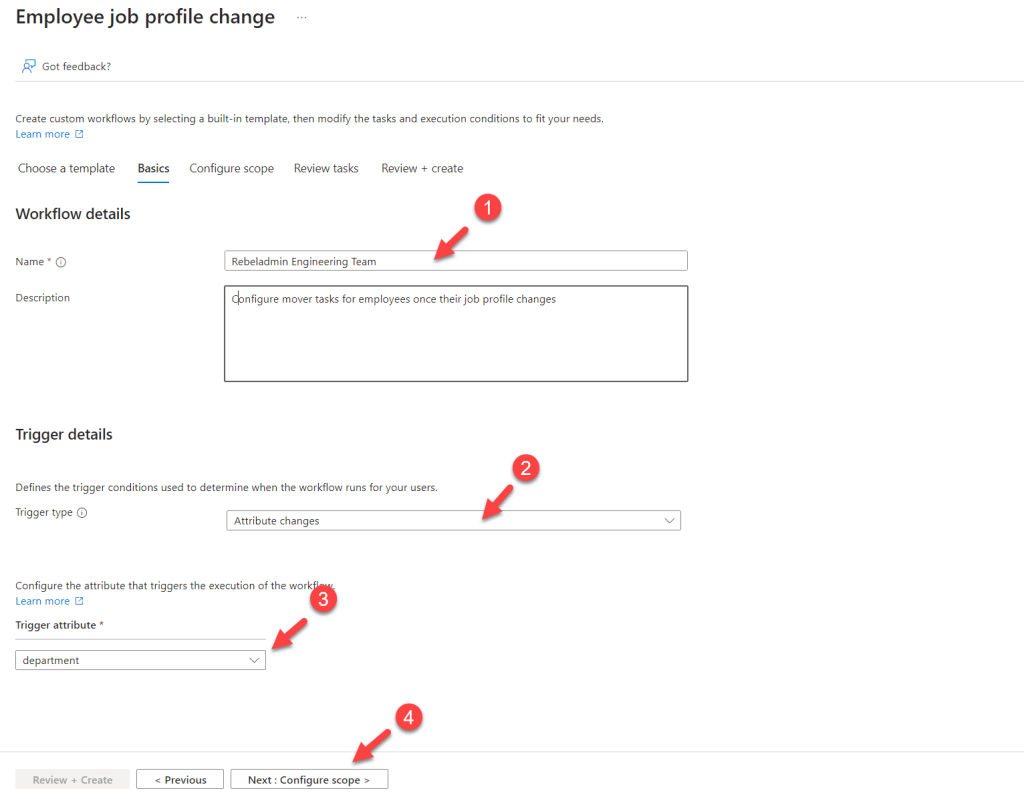
- In the new wizard, provide a Name for the workflow and select Attribute changes as the Trigger type. For the trigger attribute, select department and click Next: Configure scope > to proceed to the next step.

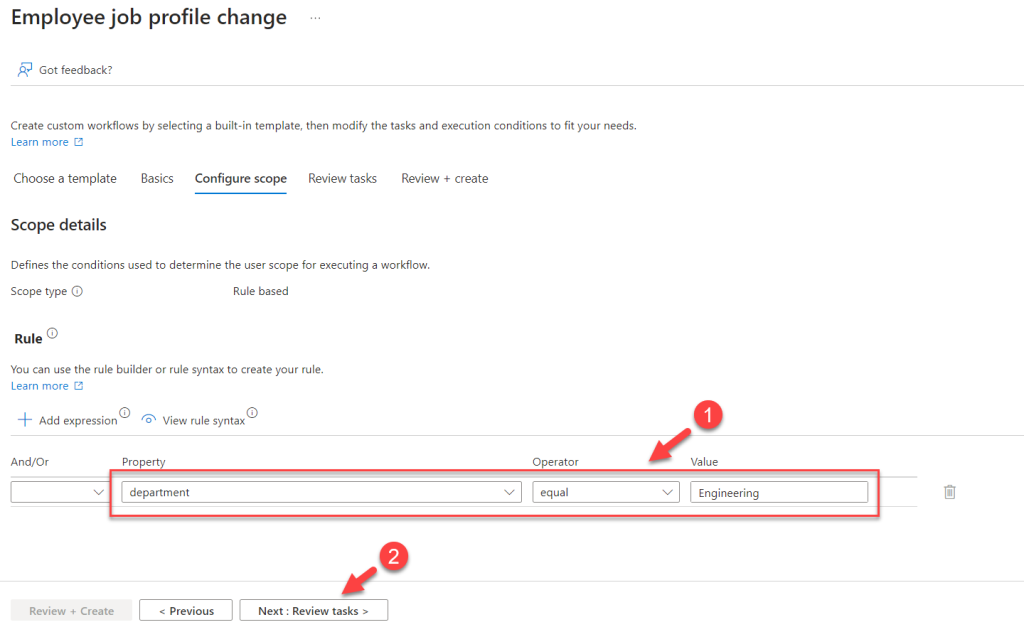
- On the Scope page, adjust the rule value to Engineering so the workflow will trigger when the new value is detected. Once the value is adjusted, click Next: Review tasks > to proceed to the next step of the configuration.

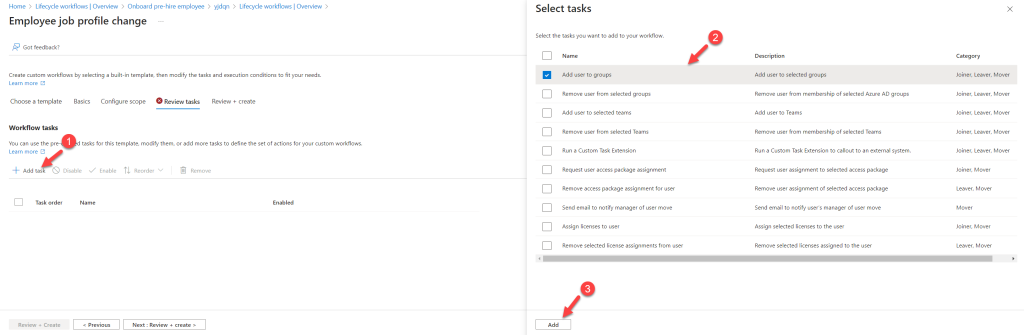
- From the list of tasks, remove all the default tasks. Then click on + Add task and select Add user to groups task. Click Add.

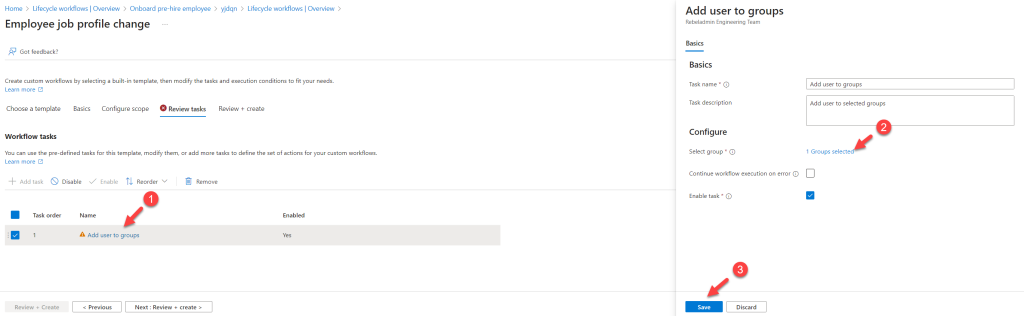
- Once the task is added to the list, click on Add user to groups task. In properties, click on Select group option to add the target group. In this demo, it will be the Rebeladmin Engineering group. Once the group is selected, click Save.

- Click on Next: Review + Create to proceed to the next step.
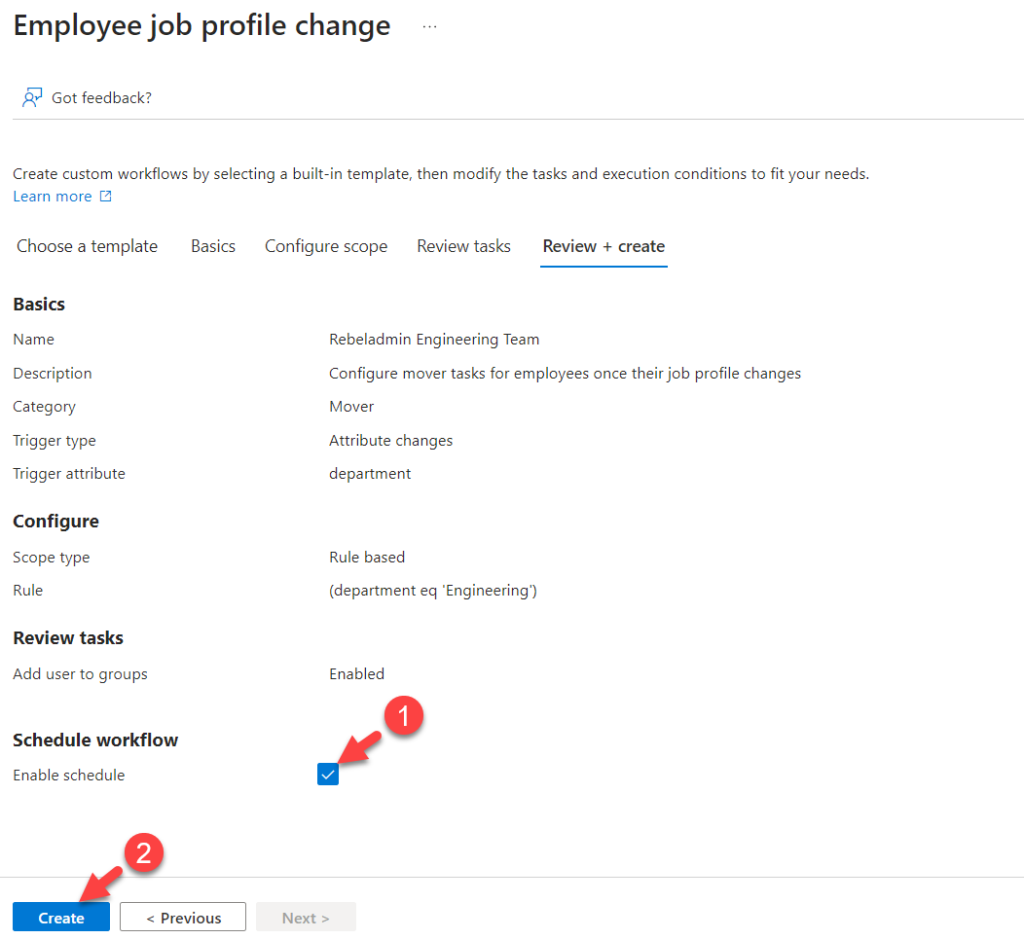
- On the Review page, confirm the settings and to add the workflow to the schedule, select Enable schedule option. Finally, click Create to complete the configuration.

By default, the workflow schedule is set to 3 hours, with a minimum value of 1 hour. Please note that this is a centralised setting and can be changed by going to Lifecycle workflows > Workflow settings.
Testing
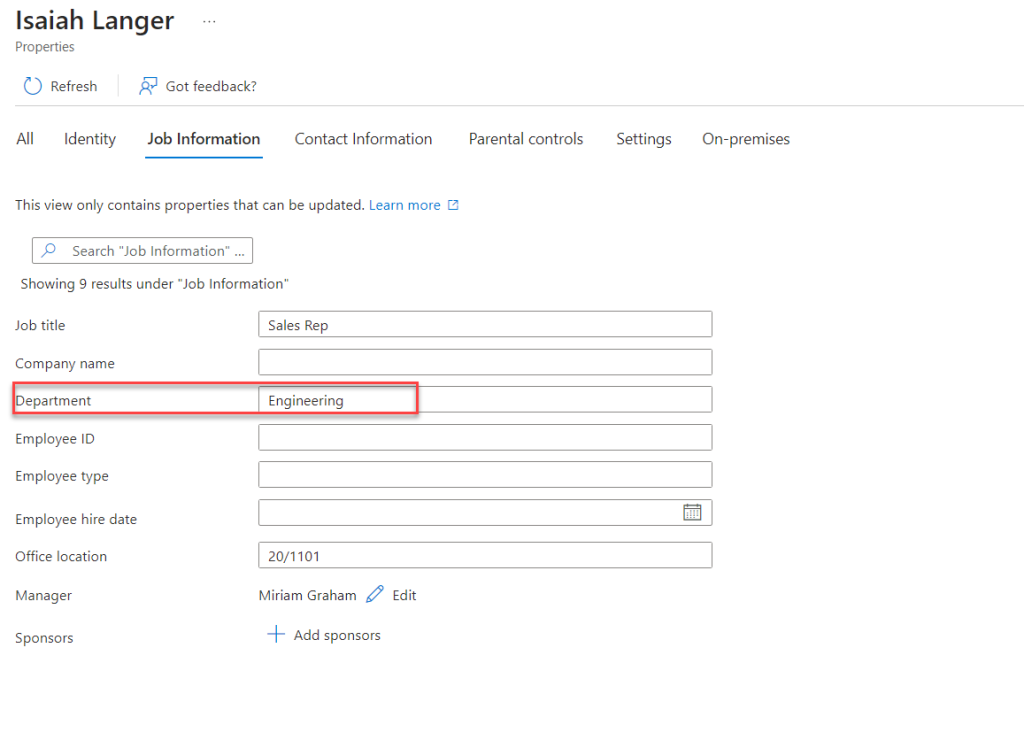
Now, my test user Isaiah has a new value for the department attribute.

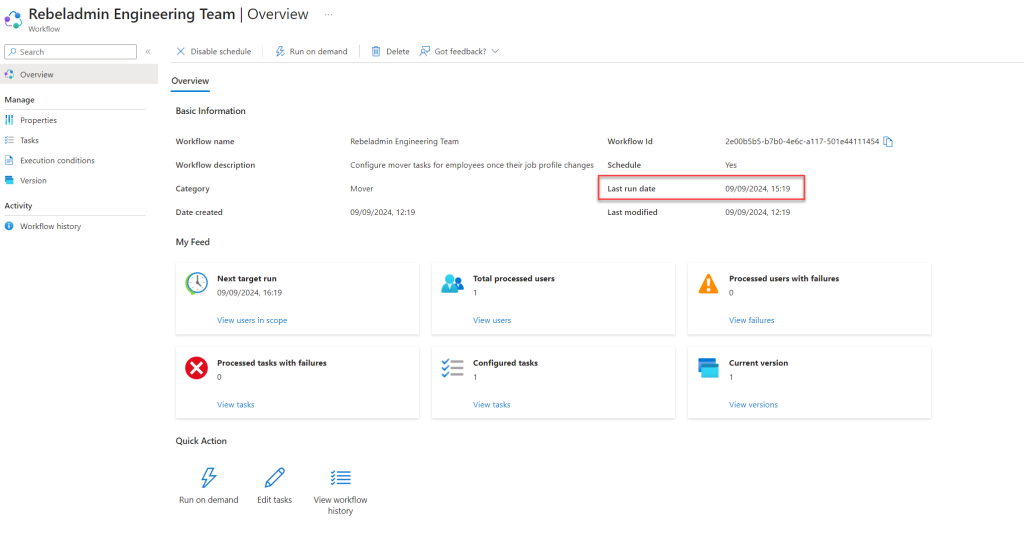
Once the schedule is processed, go to Lifecycle workflows and click on the Entra ID Lifecycle Workflow we have created.
Here, you can see when it was last triggered under the last run date value.

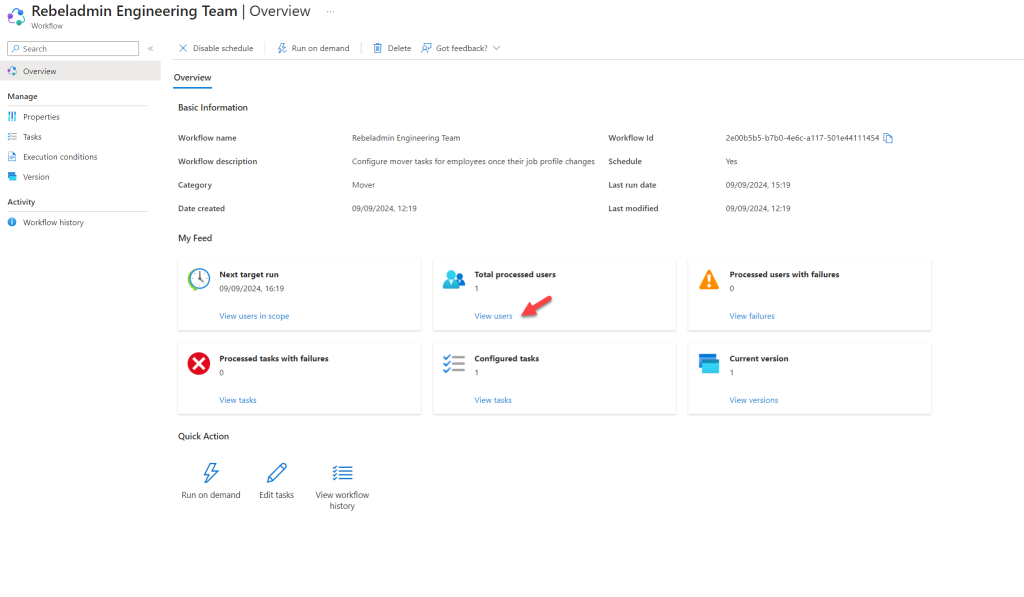
You can also see that one user has been processed. Click on View users under the Total processed users tile.

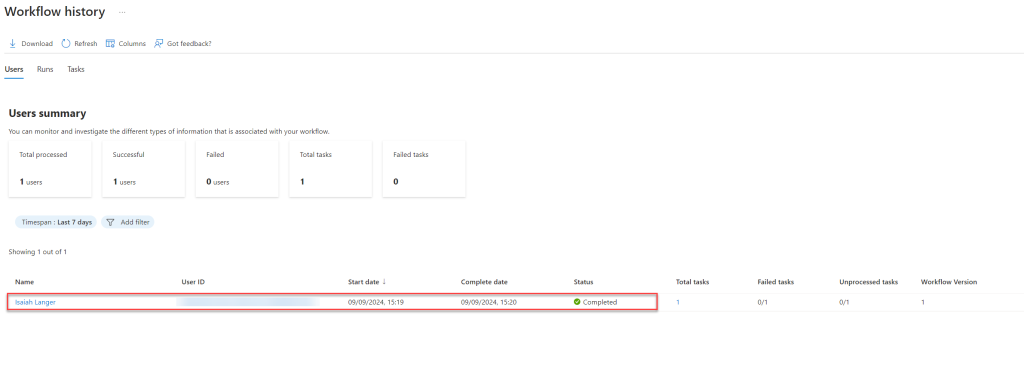
As we can see, the user has been processed successfully.

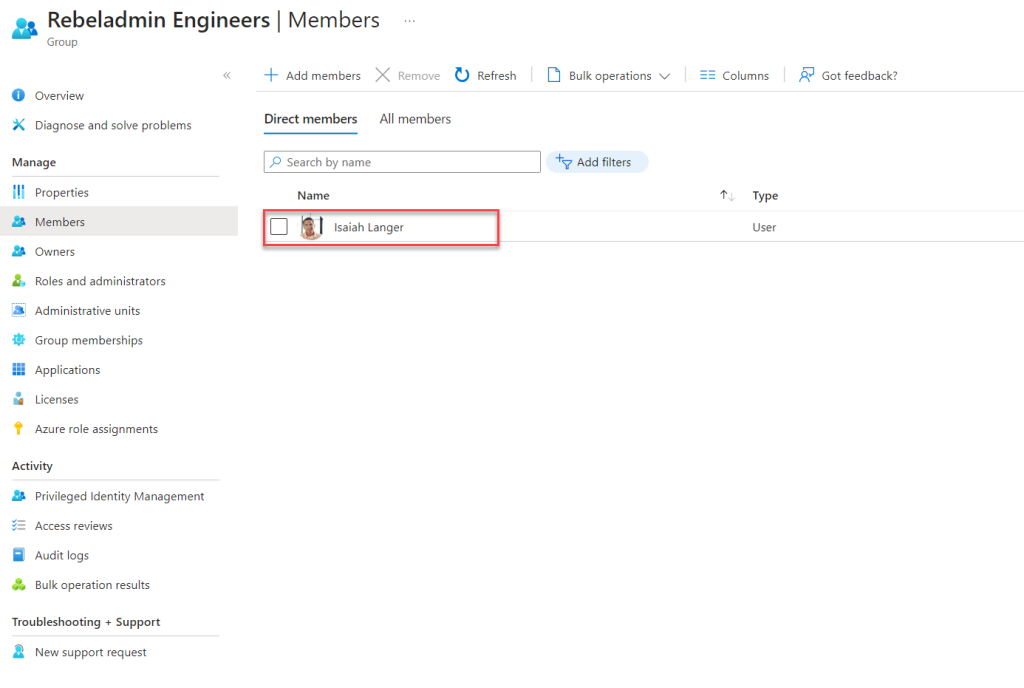
As expected, the user is now a member of the Rebeladmin Engineering group.

I hope you now have a better understanding of how to use Entra ID Lifecycle Workflow to automate movers lifecycle processes based on user profile changes. If you have any questions, feel free to contact me at rebeladm@live.com.