
In an organization, users are required access to many different groups, applications, and sites to do their day-to-day tasks. Sometimes there can be external organizations that also required access to these various resources. As access requirements change frequently, it is quite challenging for IT administrators to manage access. As a solution to this problem, we can use Entra ID access packages to govern access for internal users as well as external users. Each Access package can contain applications, and permissions required to perform specific tasks. In one of my previous blog posts, I explained how we can set up access packages. You can access it by using the following link https://www.rebeladmin.com/2020/02/step-step-guide-azure-ad-access-package/#more-4735
With the access package, we also can define the approval process. When the user request access to the package, the approver will get a notification, and then he/she can approve or deny the access request. This approver can be an internal or external user/group. So far, we were able to use a two-stage approval process but now access packages can have a three-stage approval process. This is quite important especially if you required a review from security personnel. In this blog post, I am going to demonstrate how to set up a three-stage approval process for the existing Entra ID Access package. To start the configuration process,
Update Entra ID Access Package
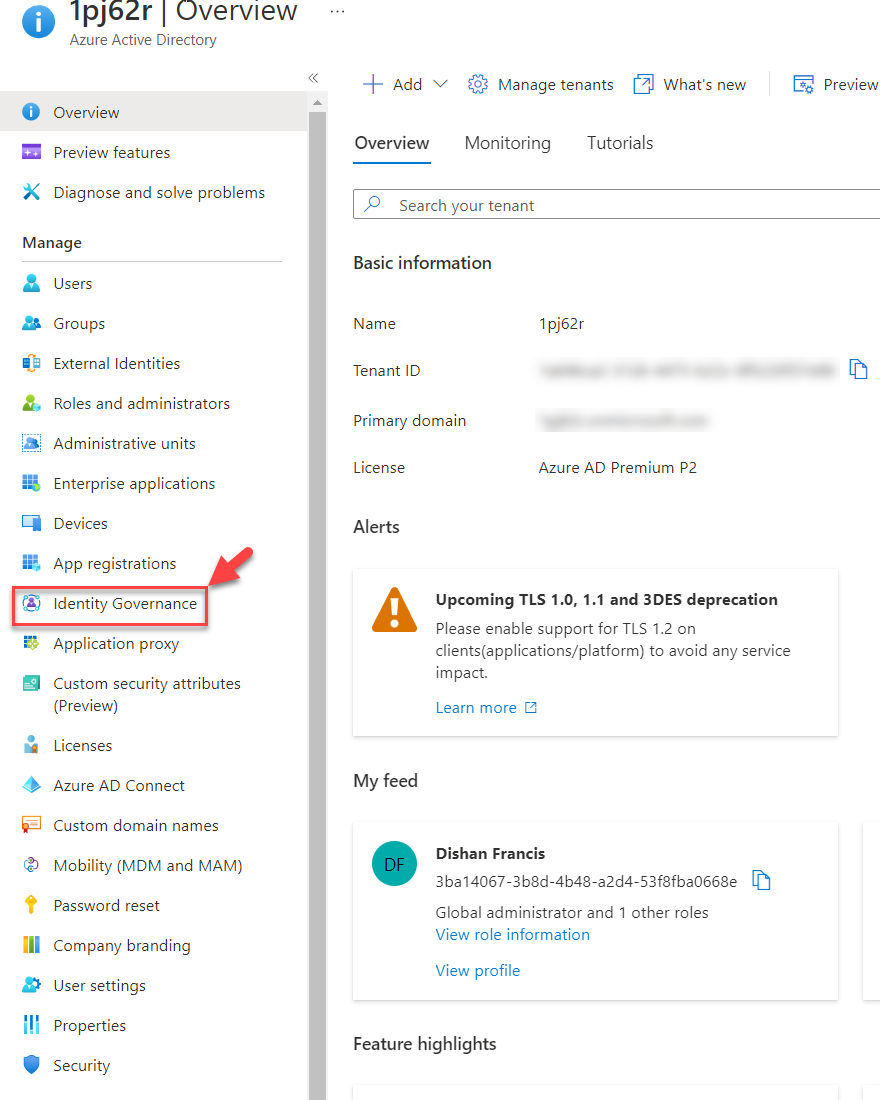
1) Log in to the Azure portal as a Global administrator, Identity Governance administrator, User administrator, Catalog owner, or Access package manager.
2) Then click on Entra ID | Identity Governance
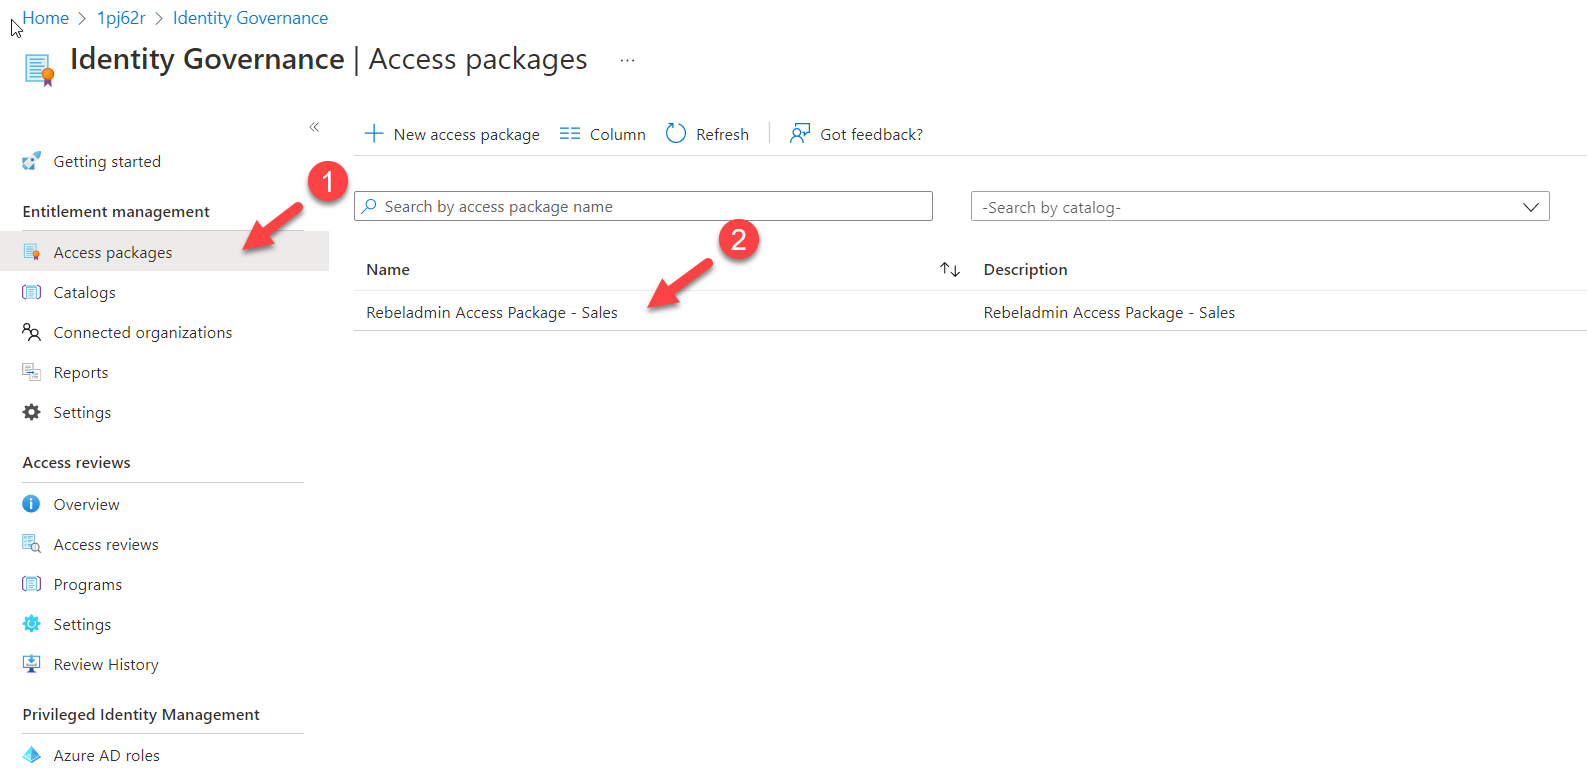
3) Next, click on Entra ID Access packages and then the access package we need to edit.
4) On new page click on Policies and then click on the existing policy
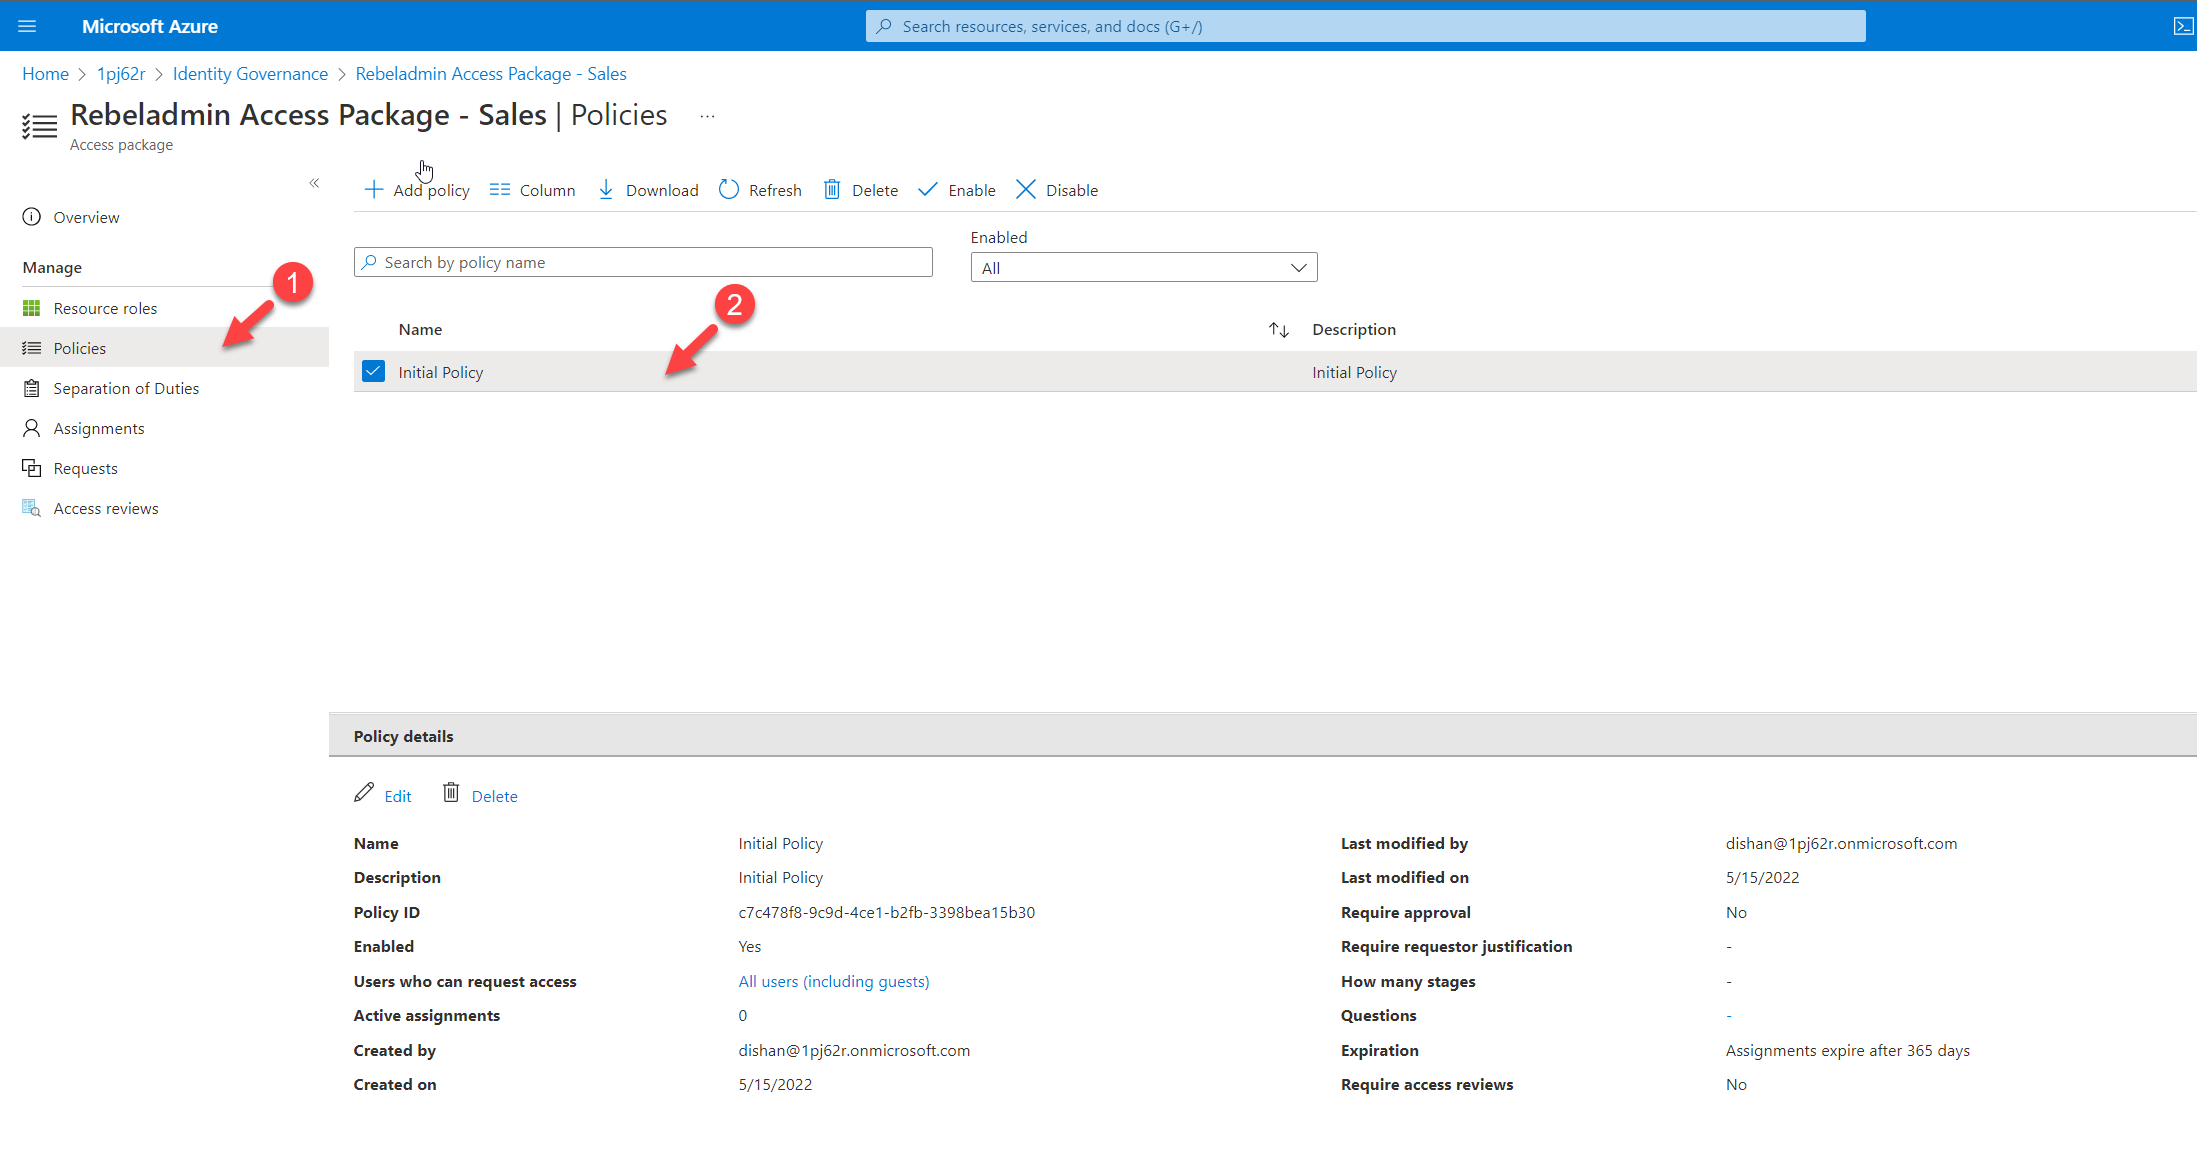
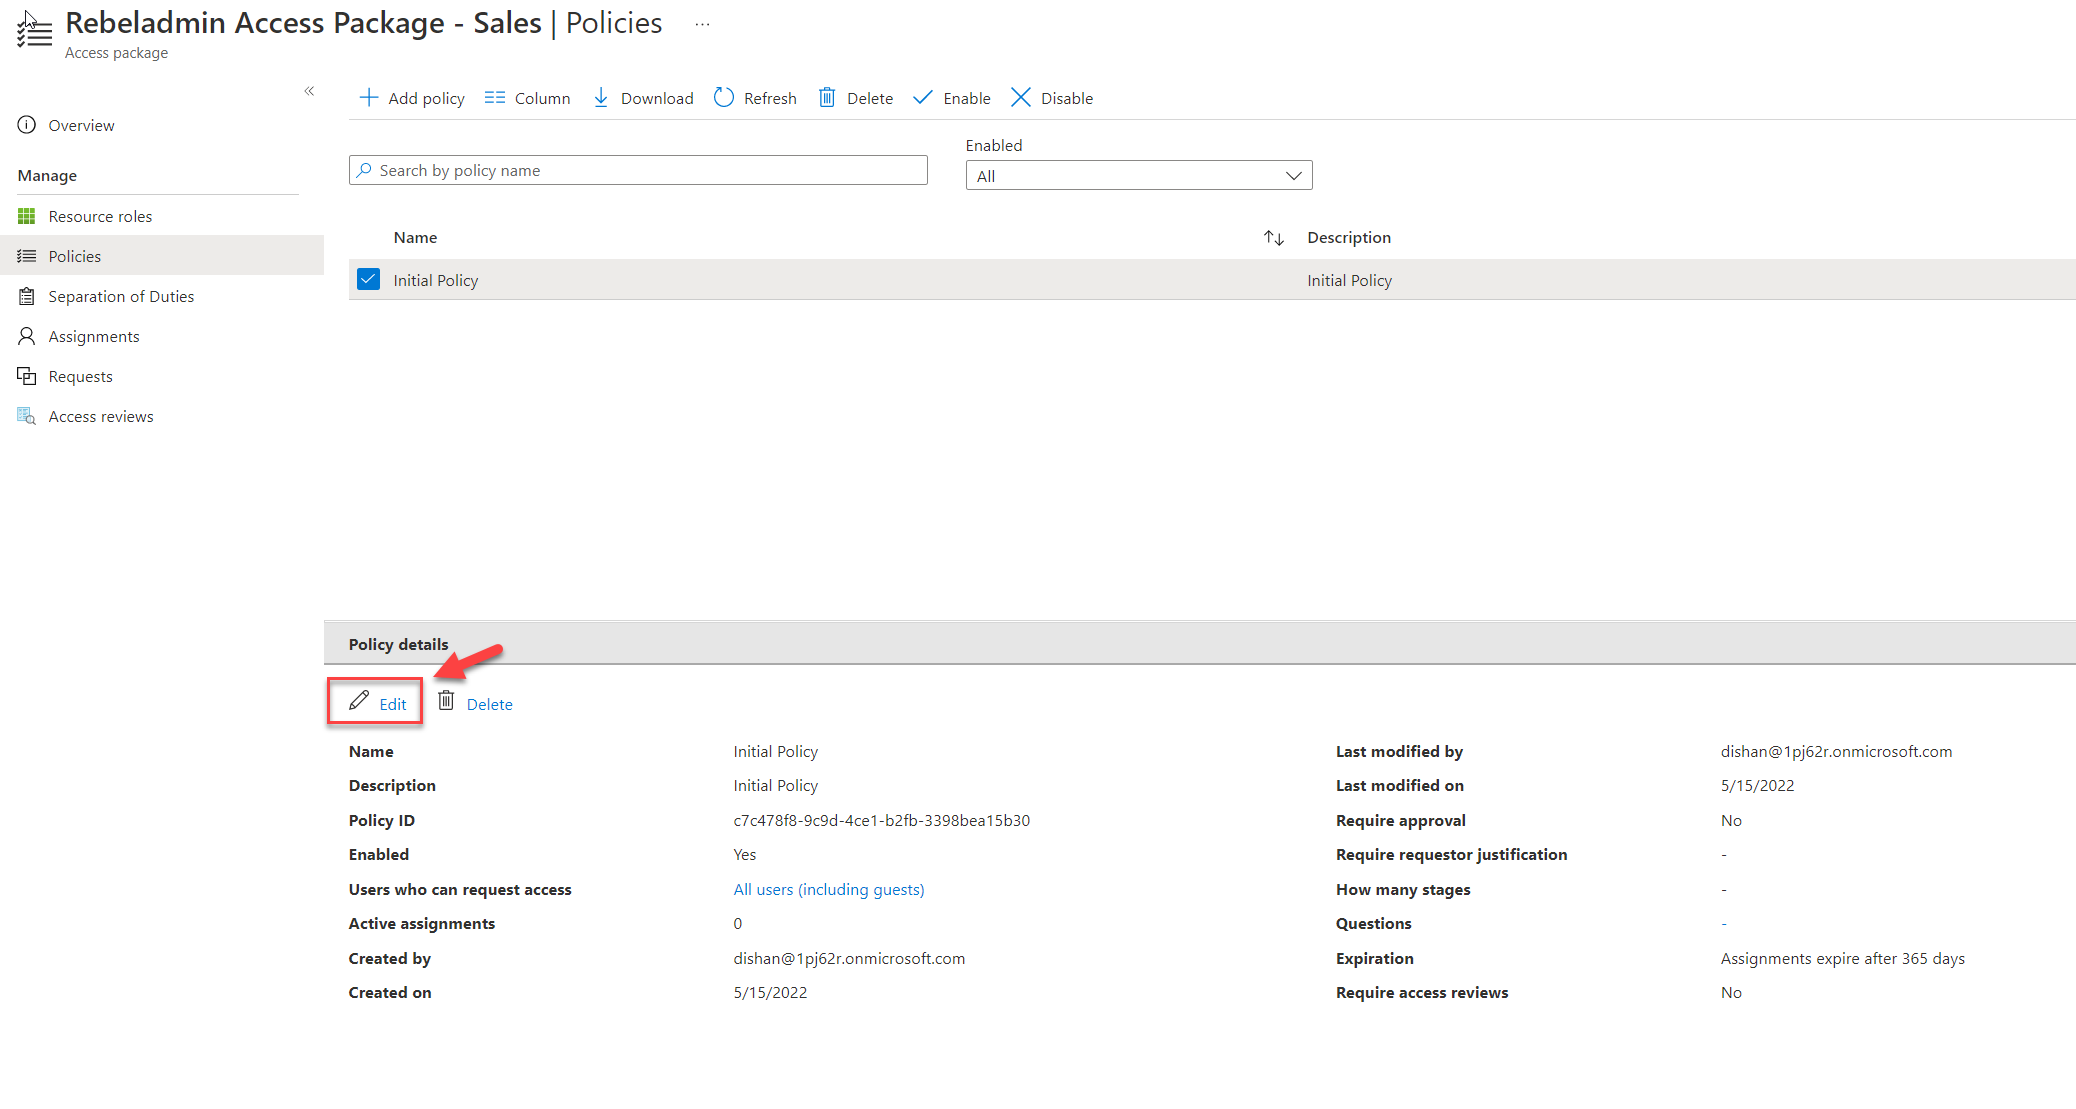
5) Then in policy details, click on Edit
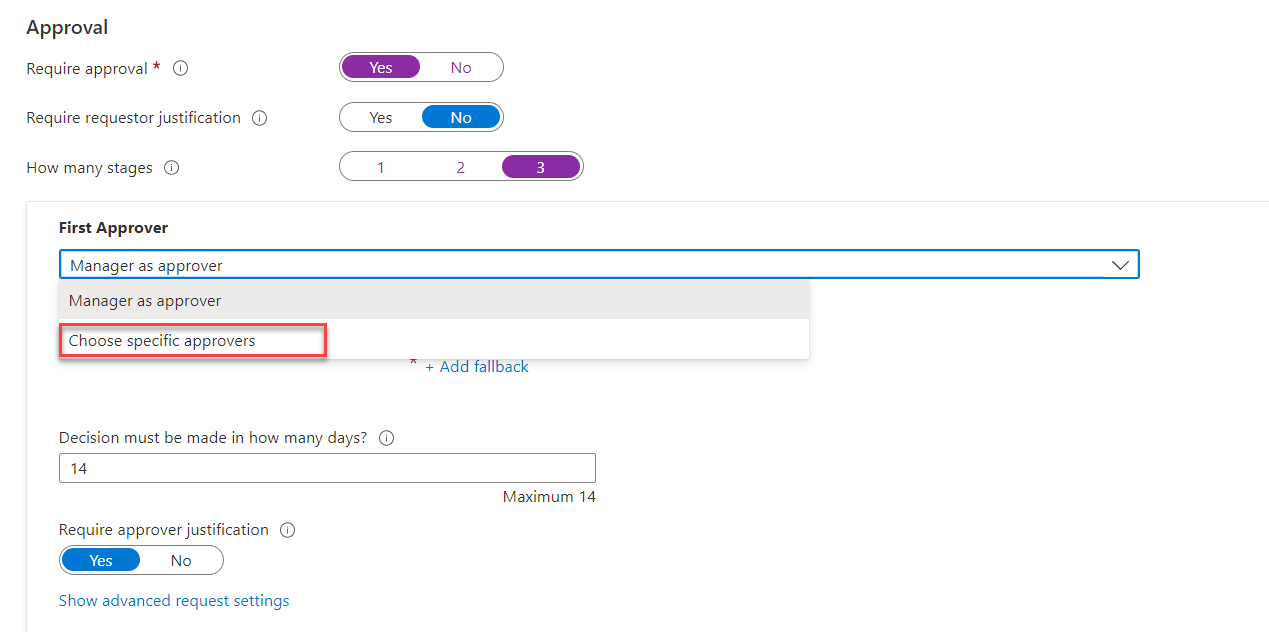
6) It will open the policy settings, click on Requests, and then set the Require approval toggle to Yes

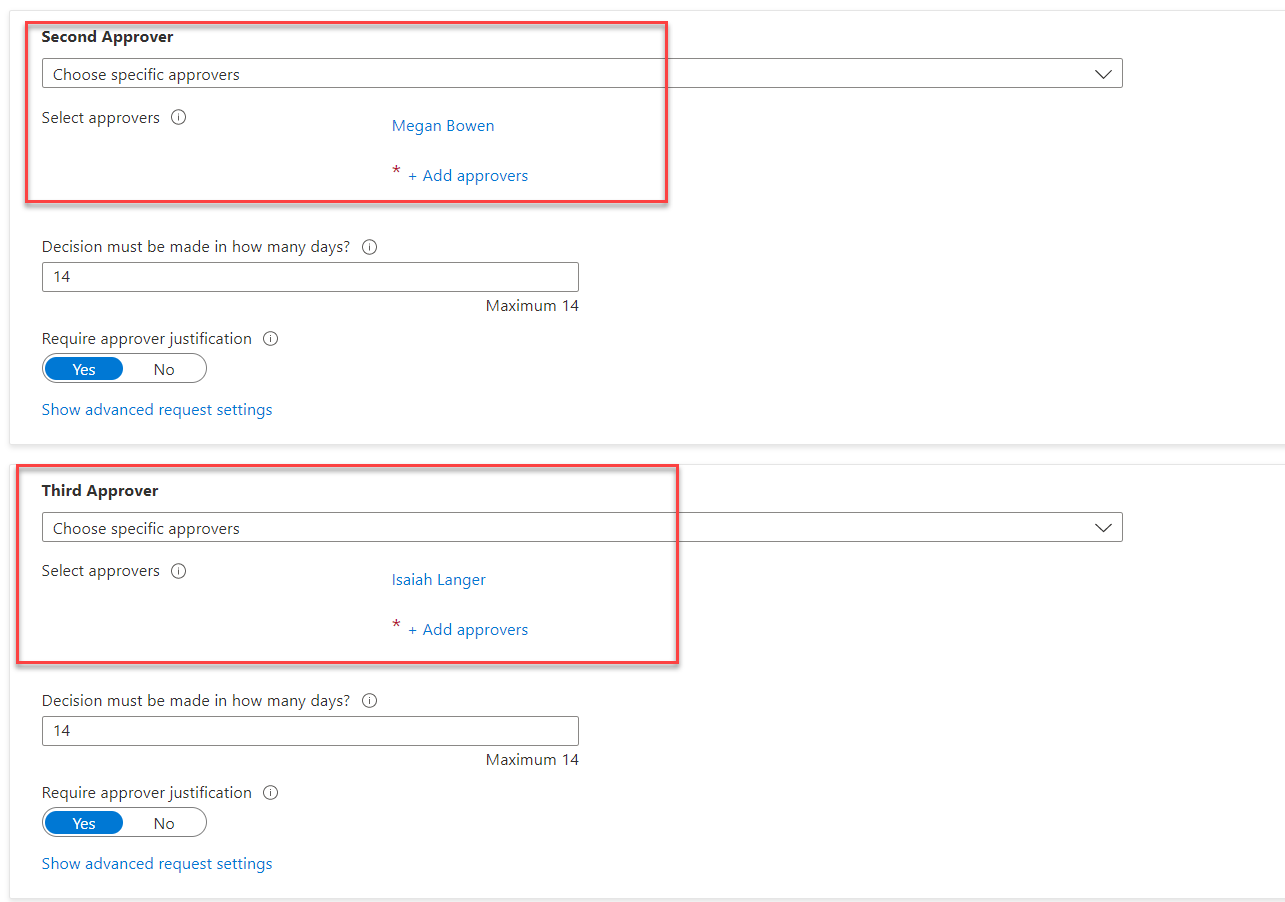
7) To enable three-stage approval process, Set the How many stages to the number three.
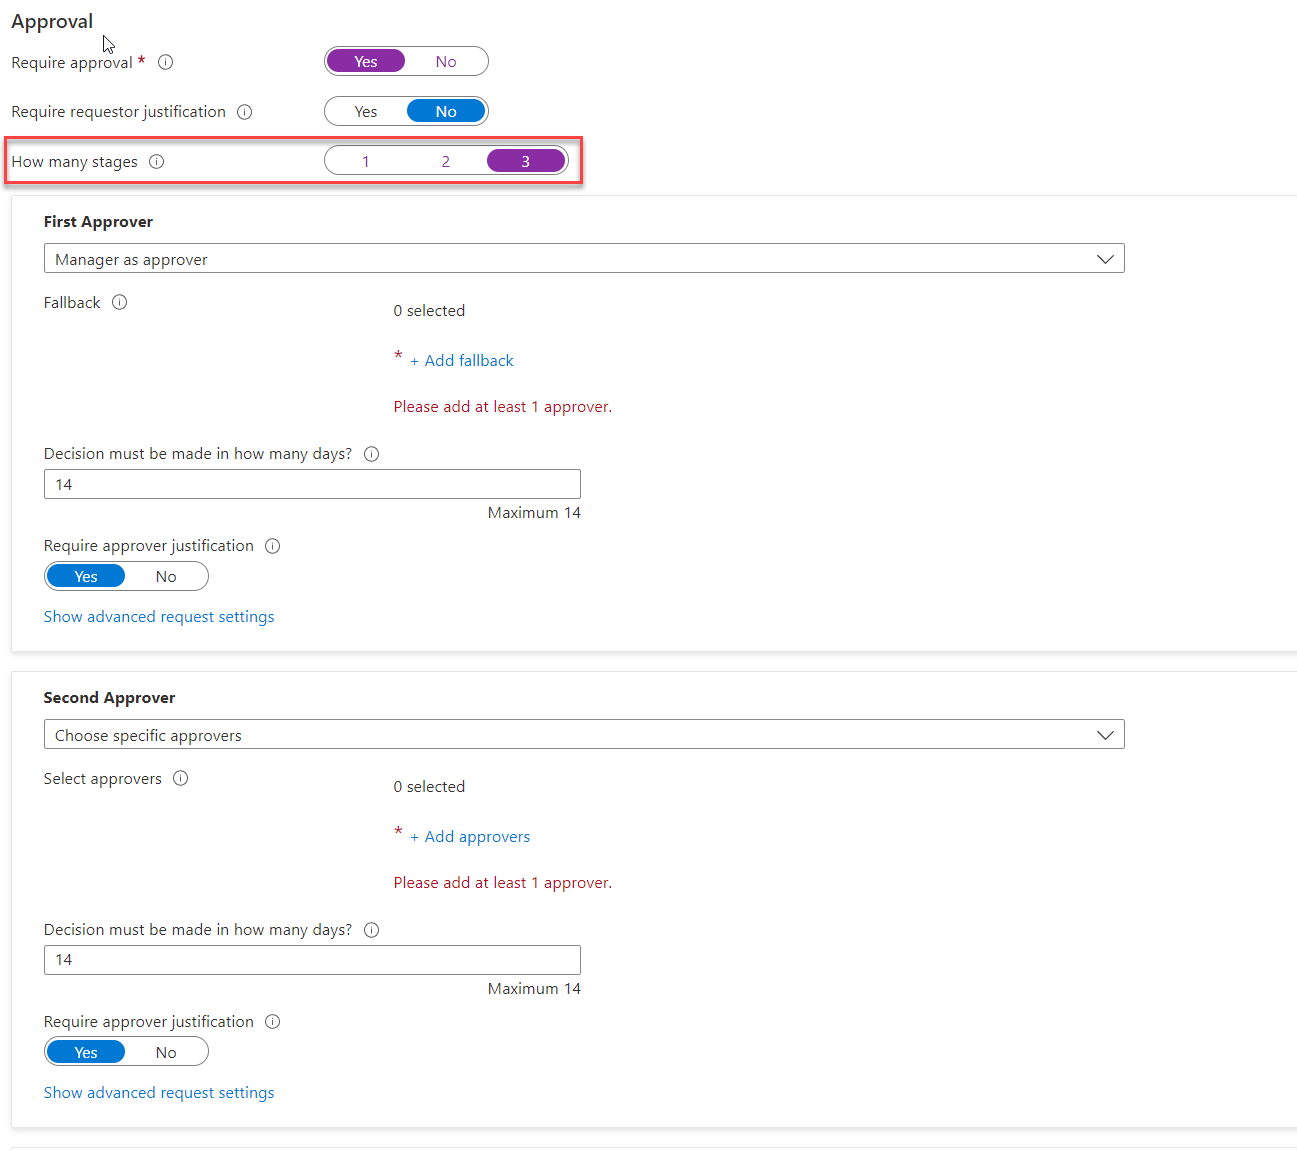
8) To set the First approver, go to First Approver section and from the drop-down select the relevant option. In this demo, I am going to use Choose specific approvers option. If the access policy is set to For users not in your directory option the list here will change. In there we can define external or internal sponsors.
9) After that click on + Add approvers to select the First approver.
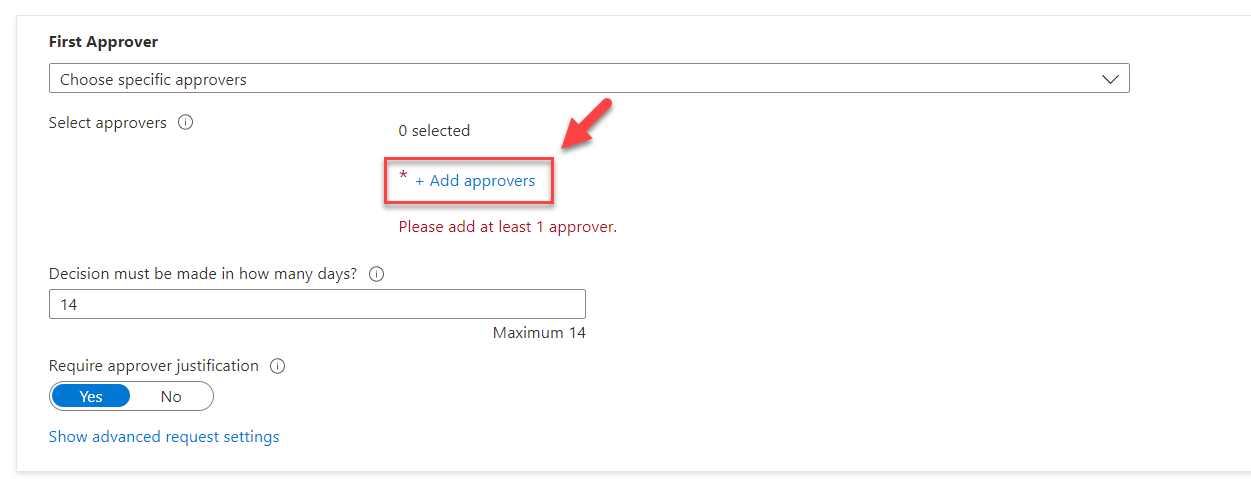
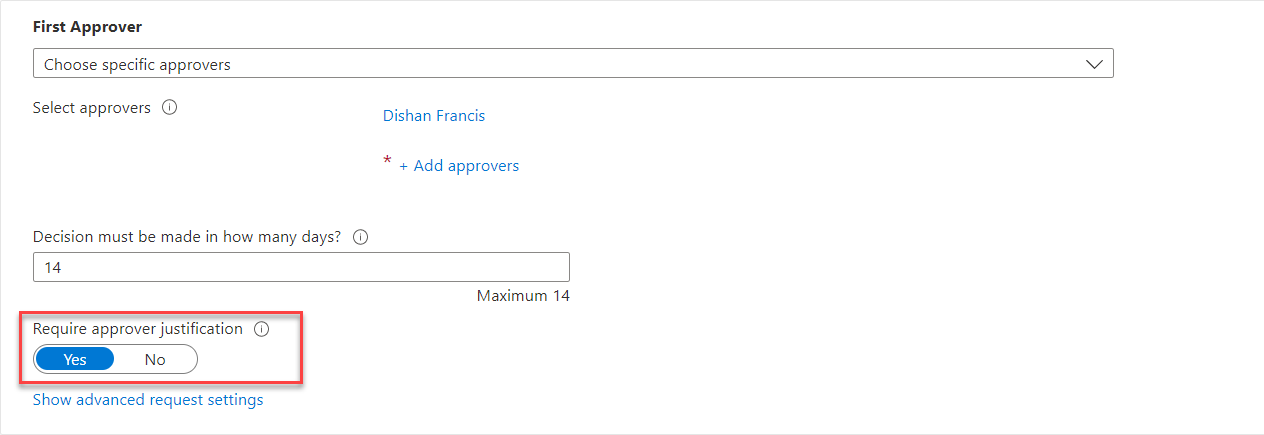
10) It will list down the users from the directory. Select the relevant approver from the list. In this demo, I also like to capture approver justification. To enable that set the Require approver justification toggle to Yes.
11) Repeat steps 8 to 10 to set the Second approver and Third approver.
12) After settings are in place click on Next and go to the Custom extension tab and then click on Update to apply policy changes.

This completes the policy configuration and the next step is to see new settings in action.
Testing
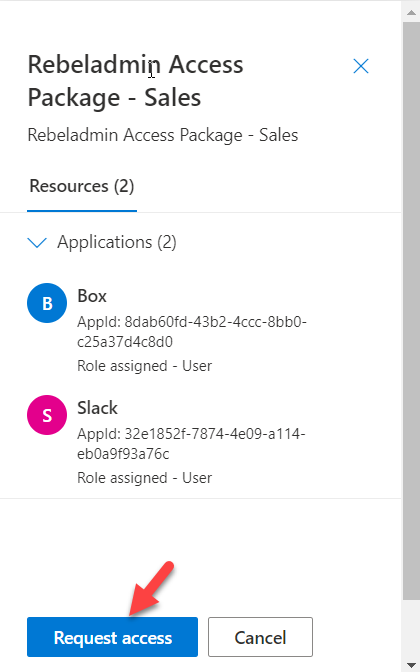
To verify the three-stage approval process, I log in to https://myaccess.microsoft.com/ as an end-user and there I can see the relevant access package. I went ahead and click on Request.

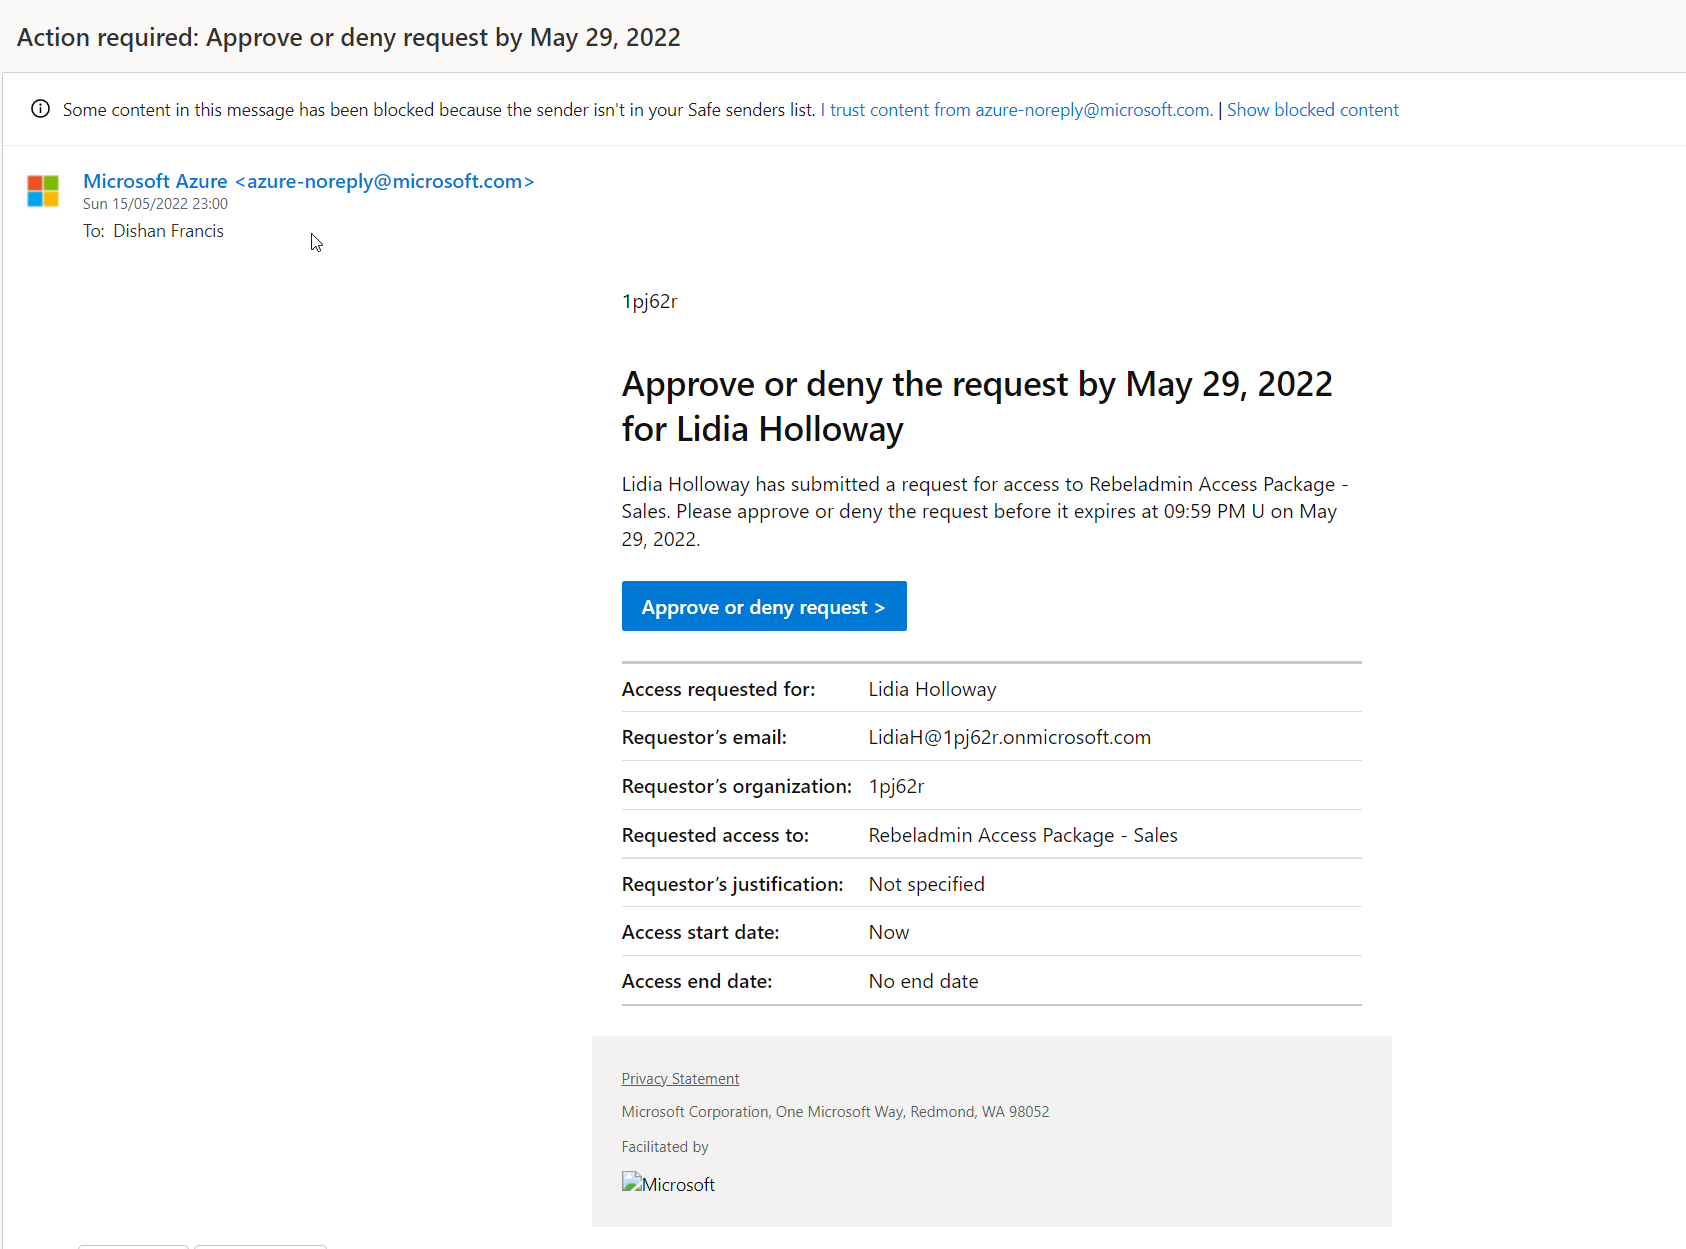
After the request is submitted, First approver received notification.
The First approver went ahead and approve the request via myaccess portal.
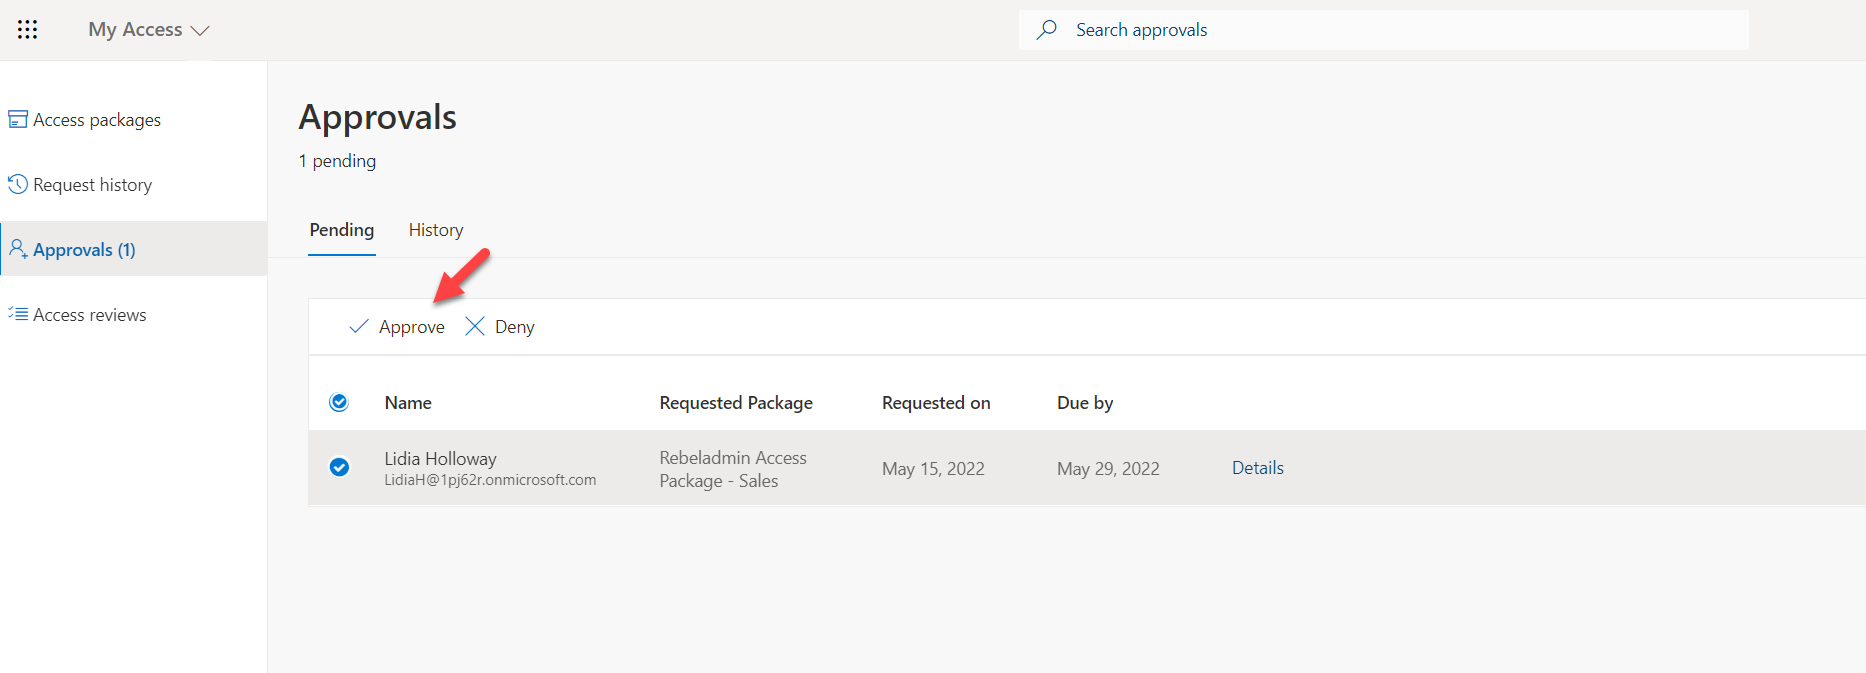
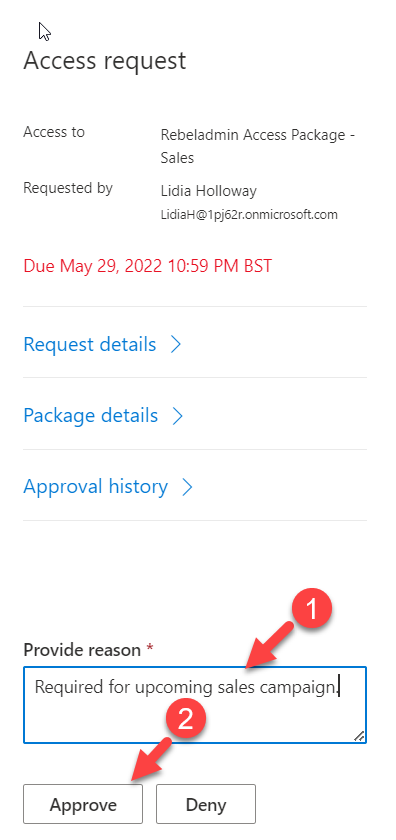
As expected, second and Third approvers also got the relevant notification. They also follow the same steps and approved the access request.
In the end, the user receives a notification about approved access package access.

Then the user logged in to myaccess portal and as expected now the access package status is set to active.
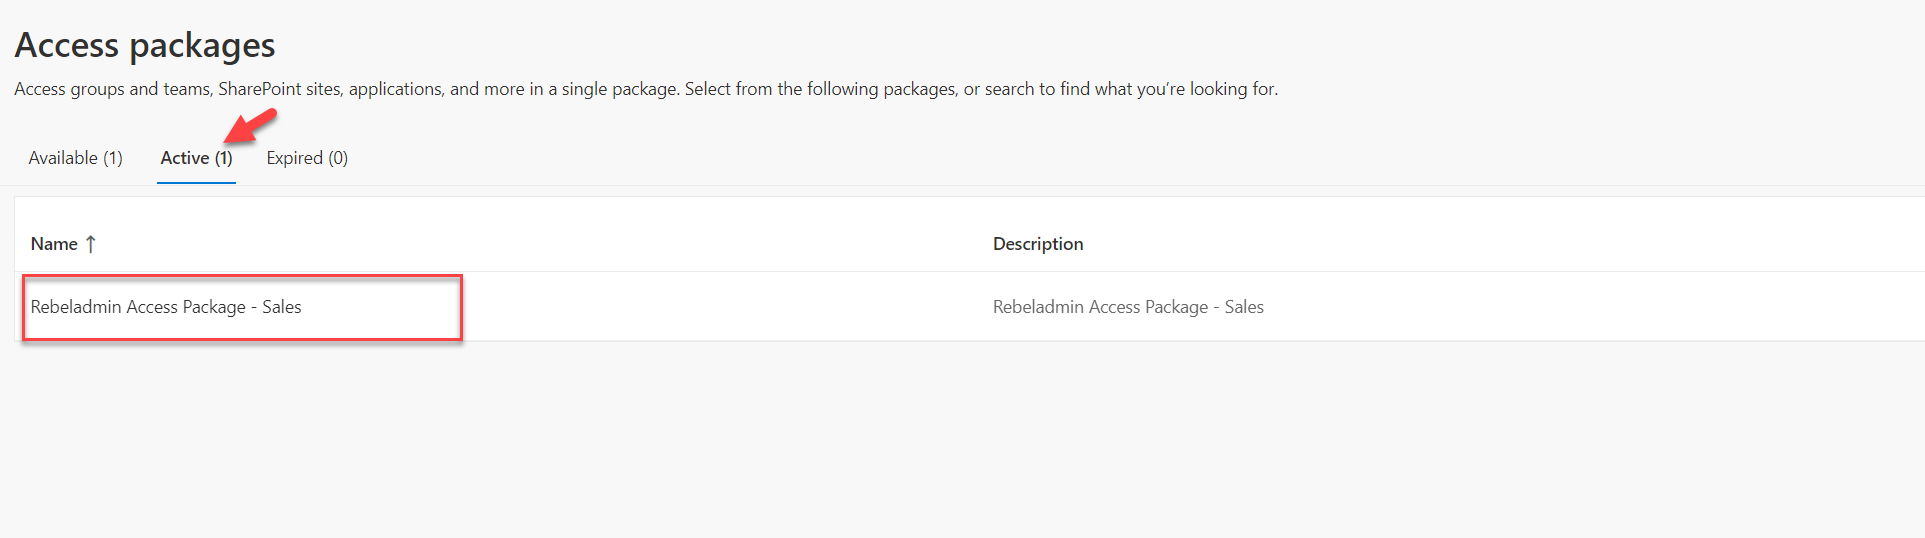
As we can see the three-stage approval process is working as expected. I hope now you have a better understanding of how we can three-stage approval process with access packages. This marks the end of this blog post. If you have any further questions about this feel free to contact me at rebeladm@live.com also follow me on twitter @rebeladm to get updates about new blog posts.

