In an Organization there will be so many different roles assigned for different tasks. As network engineer it’s important to decide how these tasks can integrate with company directory services as it will improve the productivity.
For an example let’s assume a new employ join in. if HR department can add the new user to the domain and add relevant permissions it save time and also work load of IT team. But obviously we can’t just make them with same permissions as domain administrator. “Delegate Control” option in AD helps to decide what sort of activities these types of users, groups can do with active directory functions.
I will explain this in details with following scenario.
Let’s consider about a role in organization called “Department Head”. Each department has department head who will manage their department activities. So they will also need some sort of permissions to do some basic IT activities. The permissions they will required is
• To add, edit, delete user accounts when required.
• To reset passwords for user accounts.
• Modify Group membership
To assign these permissions there is no built in group in AD, so we have to delegate those permissions manually. Also the role permissions should stay within the department and they should not be able to use it on other child domains or parent domains.
For the demonstration I will be using sales.sprint.local child domain. We will be creating separate OU and Group for Department head and delegate permissions to the group. That way we can add/remove users to the group when required.
To do this, need to log in to domain with administrative rights. Then from active directory users and computer snap in created OU called Department Head.
Then I have created a group called “Department Head Group” as Global Security Group.
For the demonstration I have created a user called “deph1” and I have assigned this user to the group.
Now we have the group with proper users in place. Now we need to delegate the permissions to the group.
To do it in active directory users and computers snap in, right click on the domain and select “Delegate Control”
Then it will display wizard, click next to start
In next window we need to add the “Department Head Group” to the list to assign the permissions. Click “add” to go and select the group and select next to continue.
In next window in delegate permission section select
• Create, Delete and Manage User accounts
• Reset user passwords and force password change at log on
• Read all user information
• Modify a membership of group
Then click next to continue.
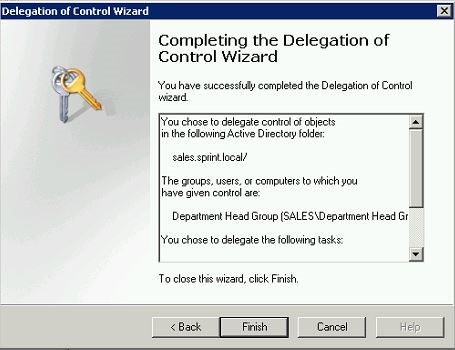
Then it gives the confirmation and click finish to continue.
Now we have the group. So next step to test it out. According to permissions he should not be able to log in to domain server. I will try to log in to sales.sprint.local server.
Now let’s see if the user really can use the permissions which are delegated for him. As we know user cannot log in to server itself with given permissions.
In demonstration user will be using windows 7 sp1 pc. Windows 7 do not comes with active directory snap in by default. There for we need to install “Remote Server Administration Tools for Windows 7 with Service Pack 1 (SP1)”. This tool can download from http://www.microsoft.com/en-us/download/details.aspx?id=7887 and the installation instructions also can find there. In demonstration I am not going to show how it can be installed.
The demo pc I have already installed these tools.
I am log in to the pc which is connected to sales.sprint.local as user deph1.
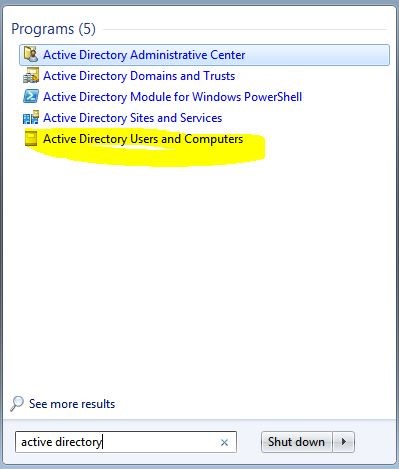
Once log in go to start > type “active directory” on search box and then click on “active directory users and computers”
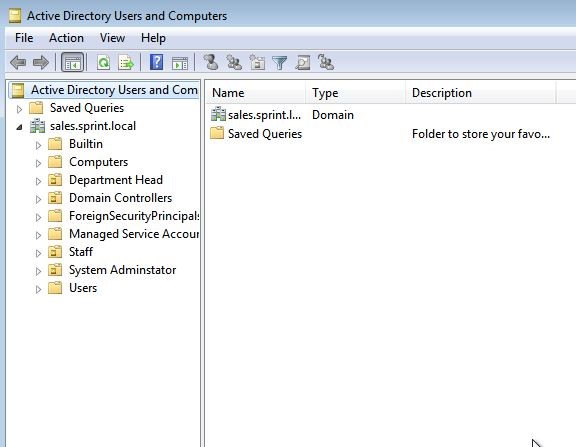
Here we can see the active directory users and computers snap in loaded.
Now we need to test if the user has the permission we assigned. Let’s test it with adding a new user to the active directory.
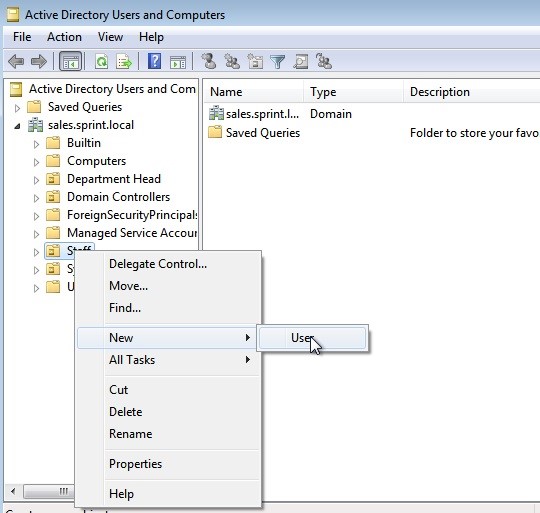
Right click on Staff OU > New > User. Here we only see the “User” option because we only assign permissions to add users only.
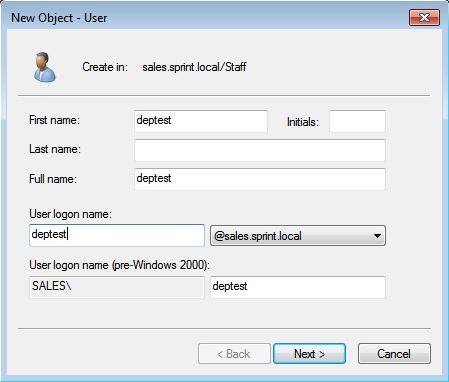
Then provide the necessary info for the user and click next to continue.
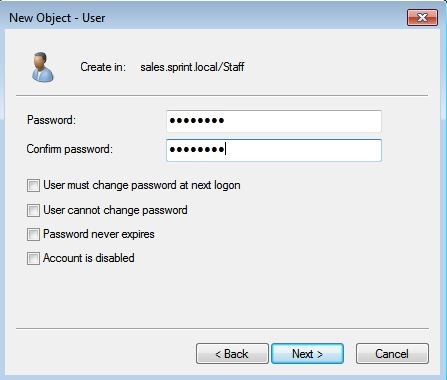
In next window provide the password and click next.
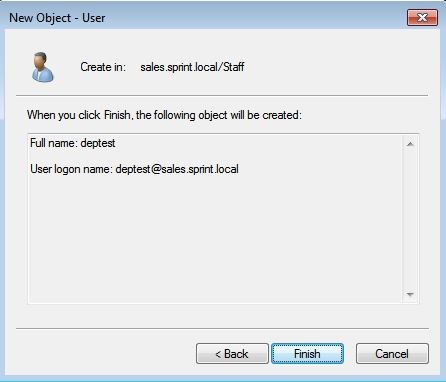
Then click Finish in confirmation windows to add the user.
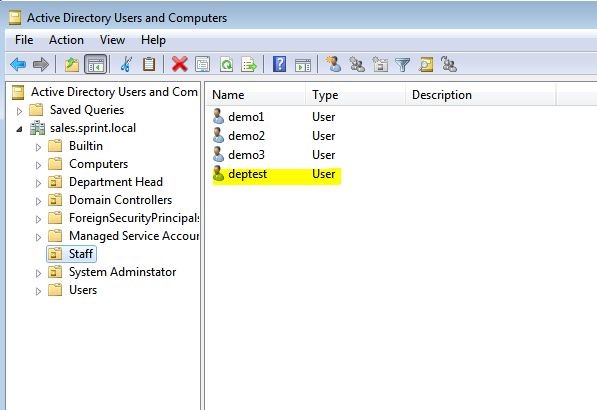
As we can see the permissions delegation is worked well and was able to add the user successfully.
As I have described using two practical examples we can assign the permissions for the group to control different resources on the active directory environment.





Thank you, am a student studying mcsa, can you give me the sites and books to follow in order to pass online examination.