This is the Part 2 of the AppLocker series. If you still not read the Part 1 you can find it in here.
In Part 1 i have explain what is "AppLocker" and use of it. Lets look in to furthure in to this nice feature.
As explain in part 1 in group policy applocker container there are four nodes called executable rules, windows installer rules,script rules and packaged app rules. in each of these containers we can allow or block applications based on 3 criteria.
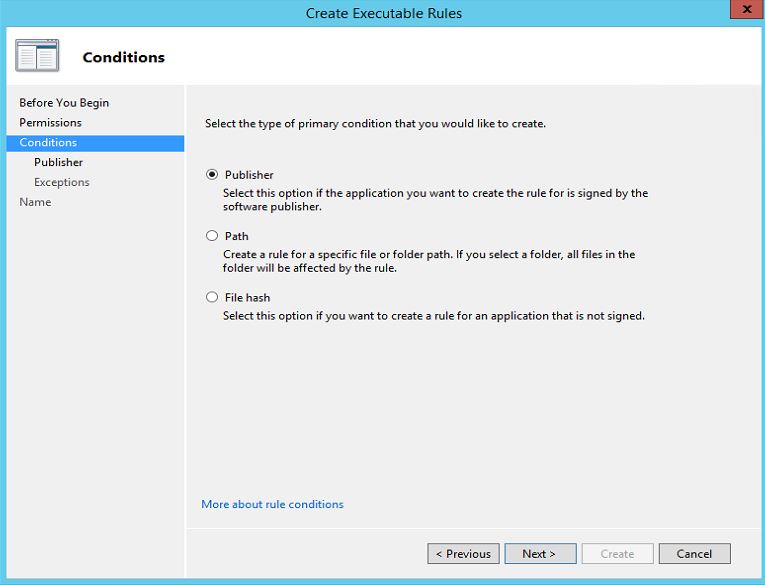
Publisher: Using this criteria we can block or allow applications based on its digital signature publish by the software publisher.
Path : Using this criteria we can block or allow applications based on the specific folder or file path. This type of rules kind of risky as if we given a folder path, any files in that particular folder affects from this rule.
File Hash: This criteria is apply to allow or block applications which is not digitally signed. it works based on digital fingerprint of the application and it will work even name or the location of the application change.
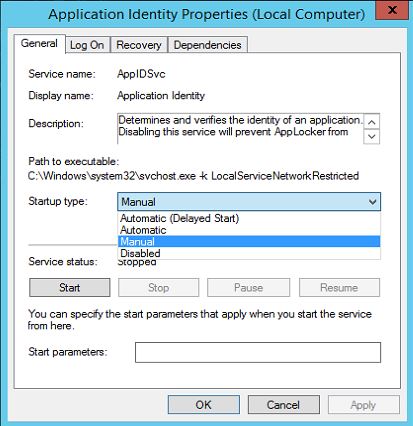
Before AppLocker rules get to work you need to make sure "Application Identity" service is running. by default it is not. so make sure you start the service and set its startup type to "Automatic"
Default Rules
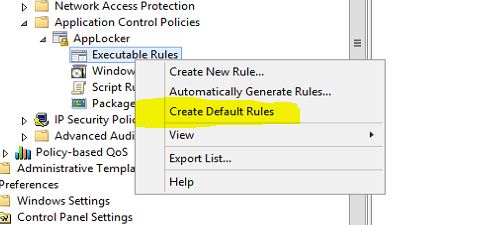
By default Applocket will block every package, file and script except the stuff which is allowed using rules. But as we know windows system it self need files, applications, scripts etc. to run by default. it is not practicle to create rules manually for each of these. Microsoft made this easier by introdusing "Default Rules". by creating default rules in each of four containers will create the required rules which system needs it self. These rules can simply create by using following steps,
1. Right click on each container.
2. Click on option "Create Default Rules" from the list
Automatically Generate Rules Wizard
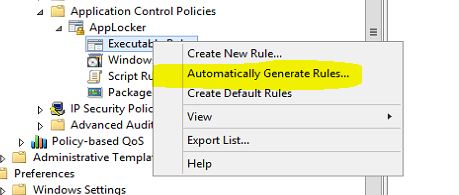
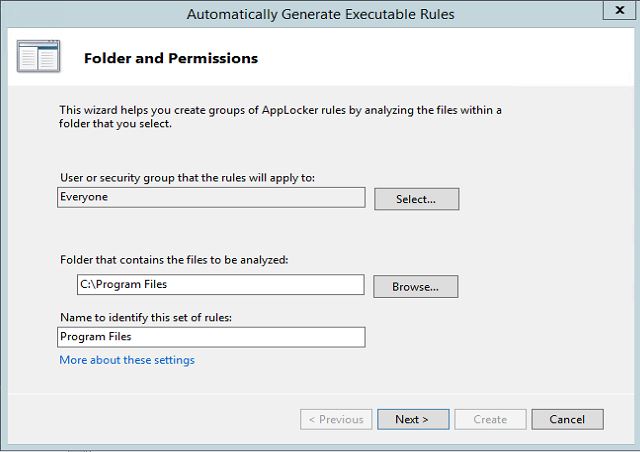
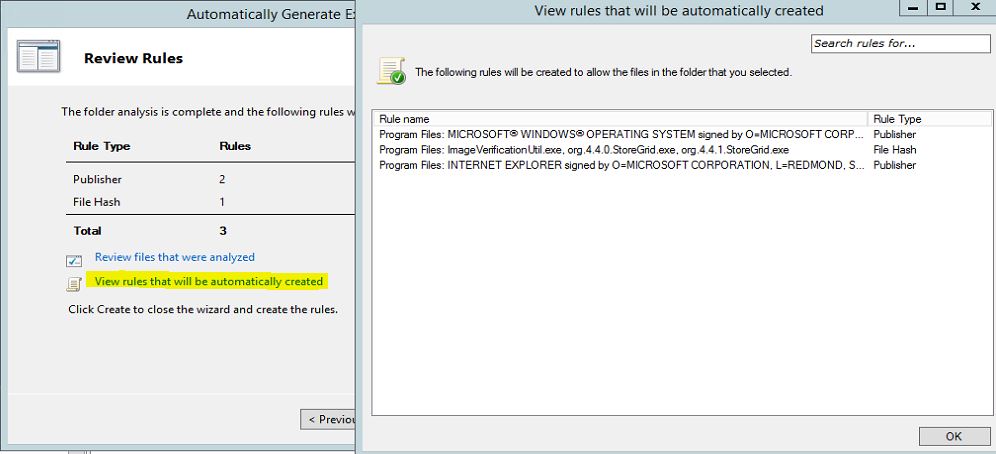
One of the grate option of applocker is its allow you to generate rules using wizard automatically. once you specify a folder path, permission groups it will automatically analyze the selection and generate the rules. then it will give you ability to review them and change them if required before create the rules.
This wizard can open using,
1. Right click on each container.
2. Click on option "Automatically Generate Rules.."
Create Rules Manually
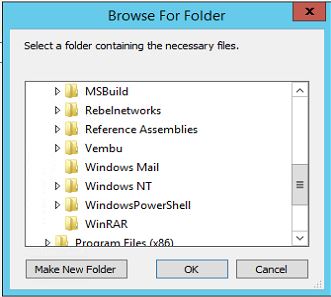
We can also create rules manually as per our requirement. I will explain the procedure with the example. In network i have WinRAR application installed in path "C:\Program Files\WinRAR". I need to block this application using APPLocker rule.
To do that i will be using the "Executable Rules" container rules.
To start the process
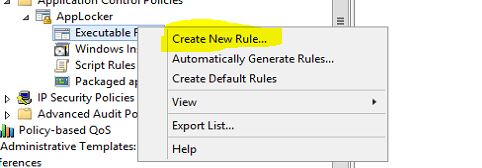
1. Right click on "Executable Rules" container
2. Select "Create New Rule…" Option
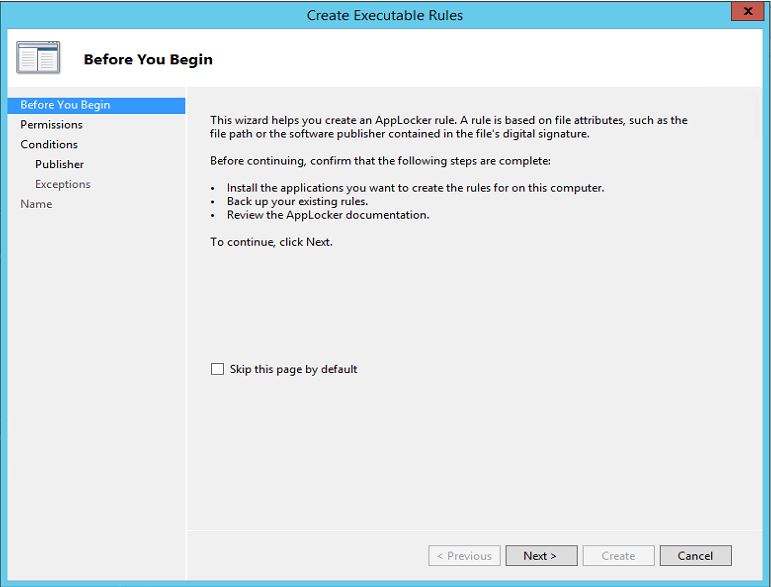
3. It will open the wizard, click next to continue
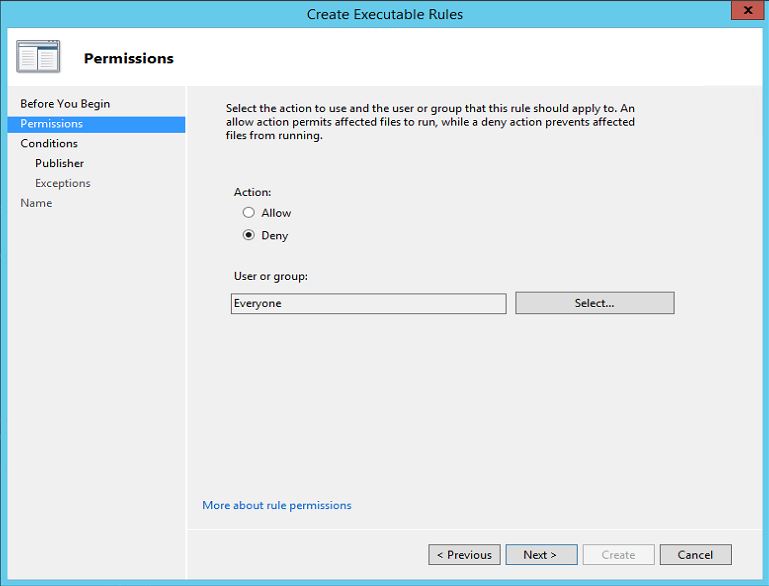
4. In next window i need to select the rule type and permissions. since i need to "deny" access the action will be "deny" and i will apply it to everyone in network
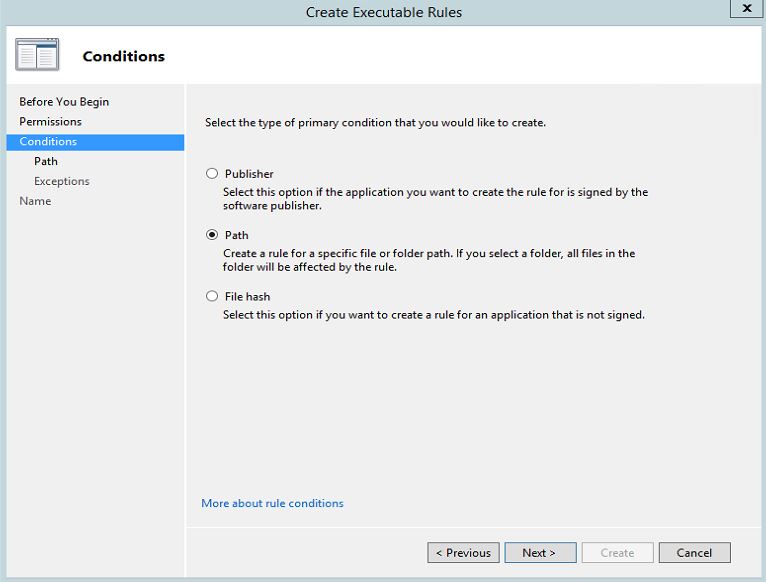
5. In next window i need to select the condition. here i will be using "Path" option.
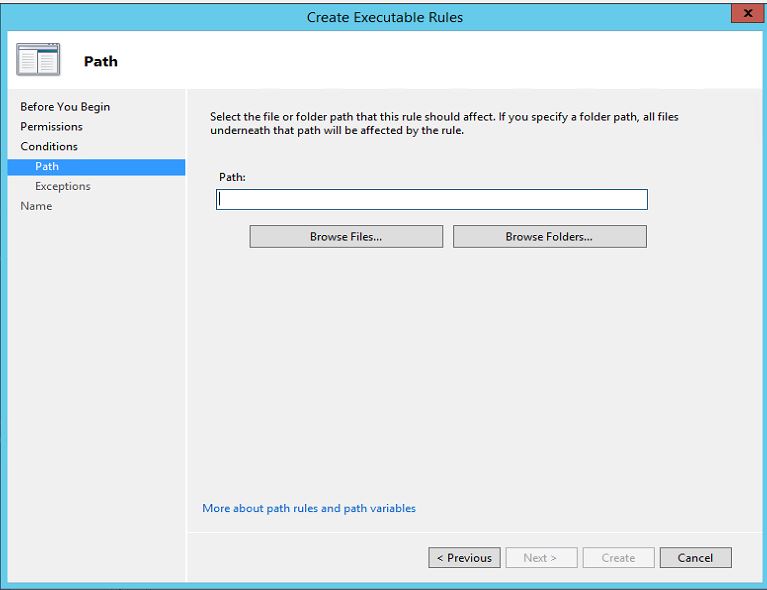
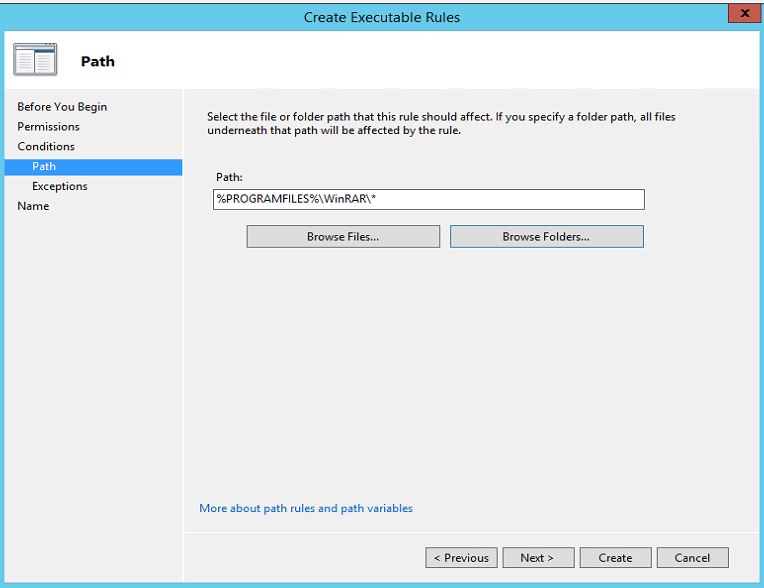
6. In next window it allows you to select the file or the folder. in here click on "Browse Folders" to select the path. once selection is done click on next to continue.
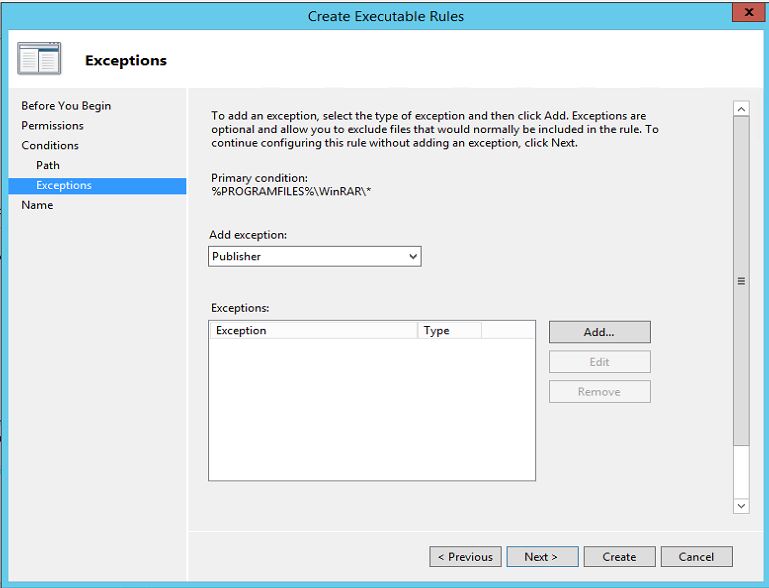
7. In next window it allows to add exception but here i will not do any modifications
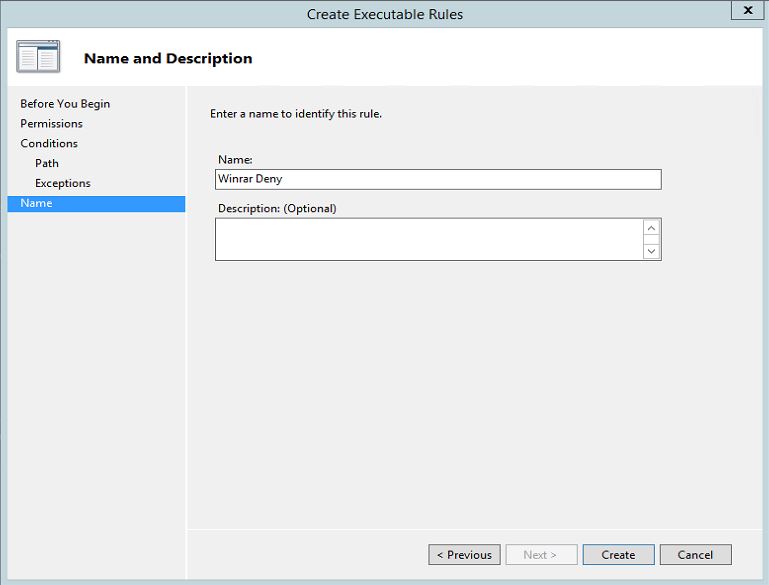
8. In next window it ask for name and we can define name to it. then once you click on create it will generate the rule.
9. Now i will try to execute the application in a pc in network which attached to the domain.
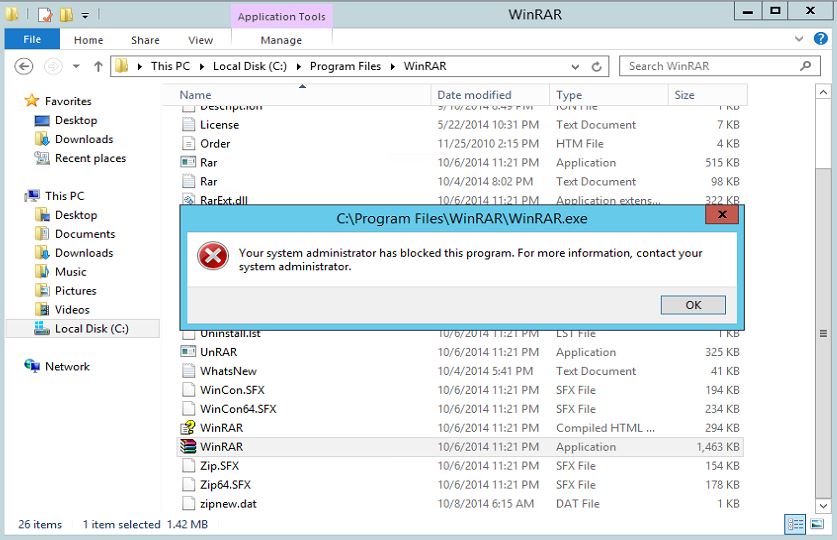
10. As soon as i double click on application shortcut it gives following error
As we can see its done the trick.
This is the end off the Applocker series.

