This is the part 3 of the article which explains about automation tools which we can use to automate procedure to import/export data into/from active directory. If you still not read the other 2 parts of the article, you can access them using
Part 1 – http://www.rebeladmin.com/2014/07/automate-user-creation-on-ad-part-1/
Part 2 – http://www.rebeladmin.com/2014/07/automate-user-creation-on-ad-part-2/
In last 2 posts i explain about the tool CSVDE and lets look in to another tool which we can use for the automation process. it is called "LDIFDE".
LDIFDE (LDAP Data Interchange Format)
This tool can use to import/export active directory objects as well as batch operations that modifies/remove the existing active objects. CSVDE tool only supported for the import/export process. The batch operations will only supports the values, data pass using LDIF file format (.ldf). This tool also will not allow to import/export user passwords. so the users which will created using .ldf file initially will be in disable mode and will need to reset the password and manually enable.
LDIF file format will consist of block of lines which describes the AD attributes, values. Multiple operations can be include in to one LDIF file and each operation will be separated by blank line.
It will be in format similar to
dn: distinguishedName
changetype: modify
replace: attribute
modify replace: attribute [this is the attribute to be changed]
attribute: value1
attribute: value2
attribute: valueN [where N is the next value] – [hyphen, required to terminate input file]
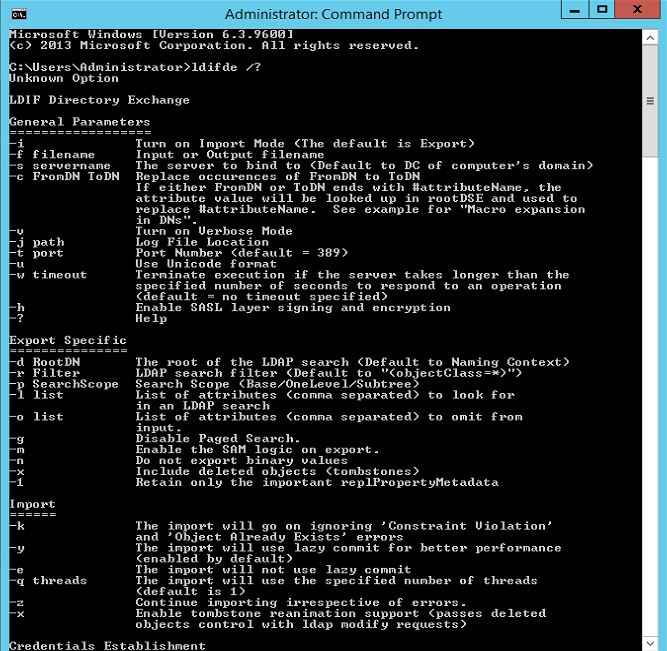
to use this tool, user need to log in to a DC server as a administrator. The help file of the tool can be open using command ldifde /?
This tool also allows to parameters to pass along with the command. lets look in to some of major parameters.
-i – This specifies the Import mode. the default mode is export as same as CSVDE
-f – This specifies the file path to .ldf file which will use for the batch operations.
-s – This specifies the DC server name to bind and perform queries
-c – This specifies the fromDN and ToDN. This is useful when import objects from another domain to a new domain.
-v – This will turn on the verbose mode
-j – This specifies the log file location
-d – This defines the root of the LDAP search. the default is the root of the domain.
-r – This is very handy parameter and using this can filter the LDAP search
-p – This describes the depth of the LDAP search.
-l – This will defines the comma-separated list of attributes which need to include in export
-o – This will specifies the list of attributes to omit from the export
-k – This will ignore the errors about the objects which is already exist and continue the batch processing.
This is the end of part 3 of the article and in next article lets see how LDIFDE tool can use as automation tool with examples.


