
Last Updated on June 7, 2021 by Dishan M. Francis
Windows Server 2008 R2 extended support ended on 1/14/2020. This raised interest in migrating various Windows Server Roles from Windows Server 2008 R2 to latest. I thought it will be useful to do step-by-step guide to migration AD CS role from Windows Server 2008 R2 to Windows Server 2019. We also can use same steps to migrate AD CS role from Windows Server 2012/2012R2/2016.
Demo Setup
The following figure shows the demo environment that I will be using for this particular task.
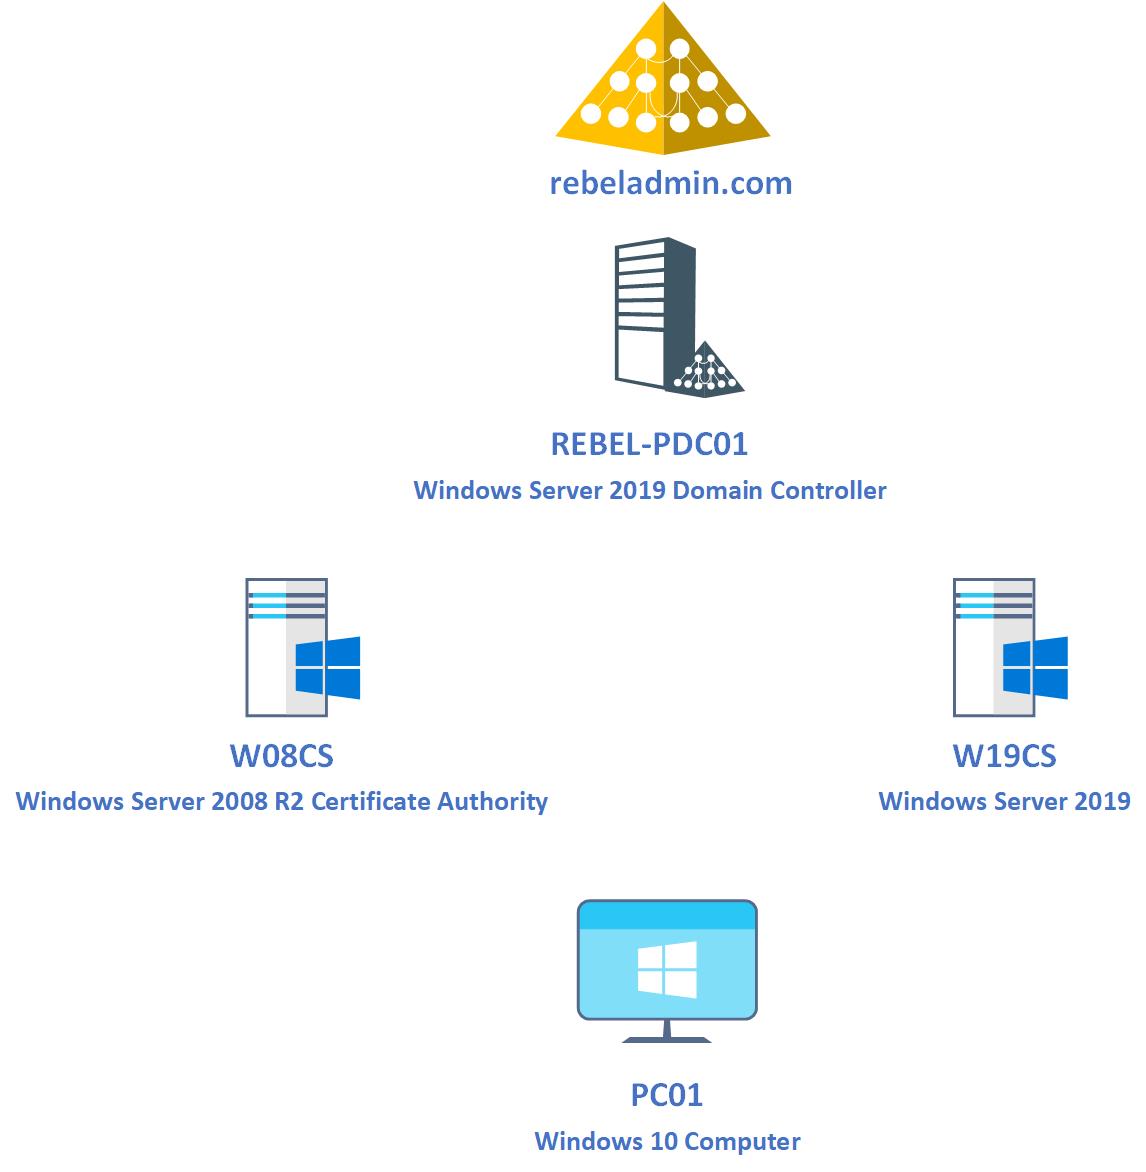
As illustrated in above, In the demo environment I have 4 servers/pc. The role of each servers/pc as following,
| Host Name | Operating System | Role |
| REBEL-PDC01 | Windows Server 2019 | Primary Domain Controller in rebeladmin.com Active Directory Domain |
| W08CS | Windows Server 2008 R2 | Existing Certificate Authority |
| W19CS | Windows Server 2019 | After AD CS configuration is migrated, this server will become the Certificate Authority in rebeladmin.com domain |
| PC01 | Windows 10 | Test PC |
In here the plan will be to migrate AD CS configuration from existing Windows Server 2008 R2 based certificate authority to newly built server with Windows Server 2019. For the demo purpose the current certificate authority is deployed using single-tier model which means a single server will work as root CA as well as issuing CA. The AD CS migration process mainly contain following steps,
1) Backup configuration of existing Certificate Authority
2) Remove AD CS role from Windows 2008 R2 server
3) Install AD CS role in new Windows 2019 server
4) Restore configuration from previous Certificate Authority
5) Testing
Let’s go ahead and start the process by exporting current CA configuration from W08CS server.
Backup configuration of existing Certificate Authority (Windows Server 2008 R2)
There are two ways to export CA database and private key from Windows Server 2008 R2 CA.
1) By using certutil command utility
2) By using Certificate Authority mmc
From Windows Server 2012, we also can use Backup-CARoleService PowerShell cmdlet to back up the existing CA configuration.
In this demo, I am going to use the certutil command utility to backup up CA. To do that,
1) Log in to the Windows 2008 R2 CA Server as Domain Administrator
2) Launch PowerShell as Administrator
3) Run certutil -backup C:\CABackup

The preceding command will backup following items to C:\CABackup folder,
• Certificate database
• Certificate database log files
• CA certificate and private key

4) We also need to export the CA configuration settings saved under HKEY_LOCAL_MACHINE\SYSTEM\CurrentControlSet\Services\CertSvc\Configuration registry key. To export the key run following PowerShell command.
reg.exe export HKEY_LOCAL_MACHINE\SYSTEM\CurrentControlSet\Services\CertSvc\Configuration C:\CABackup\careg.reg
The preceding command will backup the registry key to C:\CABackup folder and save it as careg.reg.
Remove AD CS role from Windows 2008 R2 server
Now we have the relevant backup in place, before we import it to new server, we need to remove AD CS role from existing CA server. To do that,
1. Log in to existing CA as Domain Admin
2. Launch PowerShell console as an Administrator
3. Run Remove-WindowsFeature -Name AD-Certificate command. This will remove the AD CS role from the server. After role is removed restart the server to complete the process.
Note : You may have to run Import-Module Servermanager first before you use WindowsFeature PowerShell commands.
4. Copy C:\CABackup folder to new Windows 2019 Server.
After copying the backup folder, we also can shutdown and remove the old CA server from domain.
Install AD CS role in new Windows 2019 server
Next step of the configuration is to install AD CS role in new Windows 2019 Server (W19CS). To do that,
1. Log in to W19CS Server as Domain Administrator
2. Launch PowerShell 7.1 console as Administrator (I have PowerShell 7.1 configured already but we can run this with Windows PowerShell)
3. Run Add-WindowsFeature ADCS-Cert-Authority -IncludeManagementTools command to install AD CS role.
This will install AD CS role on the server. But we need to restore the configuration before using it.
Restore configuration from previous Certificate Authority
Now we have the AD CS role installed in new Windows 2019 Server. We can restore the AD CS backup by using one of the following methods,
• By using Restore-CARoleService PowerShell cmdlet
• By using Certutil cmd utility
• By using Certificate Authority mmc.
In this demo I am going to restore the backup by using Restore-CARoleService PowerShell cmdlet. But before that first we need to configure the AD CS role with existing certificate. To do that,
1. Log in to W19CS Server as Domain Administrator
2. Launch PowerShell 7.1 console as Administrator (I have PowerShell 7.1 configured already)
3. Run Install-AdcsCertificationAuthority -CAType EnterpriseRootCa -CertFile “C:\CABackup\REBELADMIN CA.p12” -CertFilePassword (read-host “Cert Password” -assecurestring)
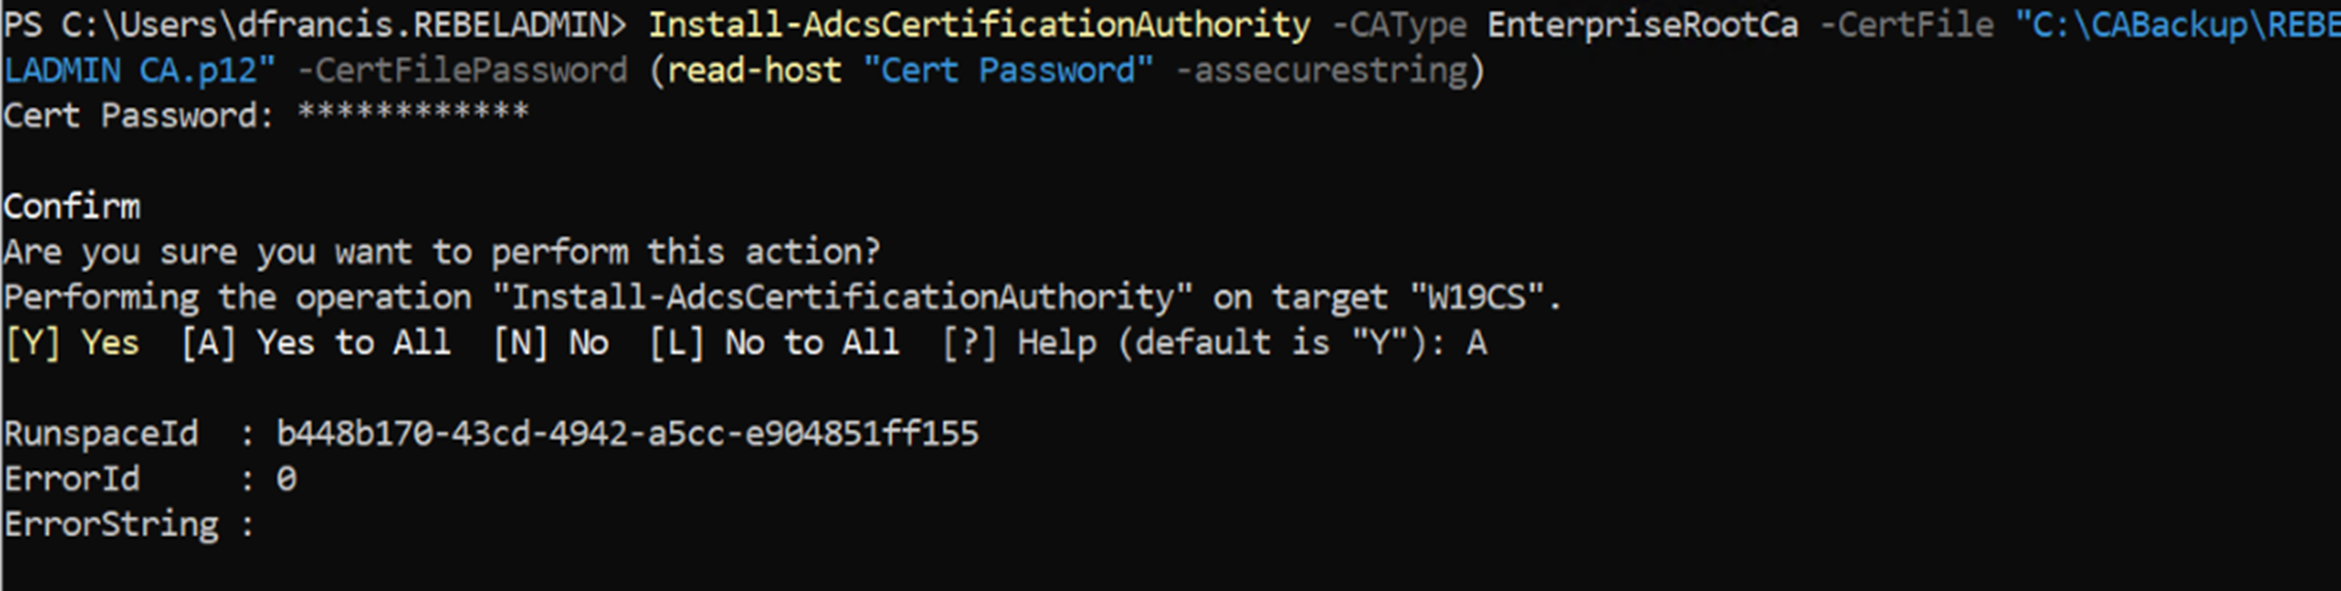
The preceding command configure the AD CS role with existing CA certificate which is saved as C:\CABackup\REBELADMIN CA.p12 from previous CA backup.
4. As next step, we can restore the CA configuration by using Restore-CARoleService PowerShell cmdlet. Before we use it, first we need to stop the AD CS using Stop-Service CertSvc
5. After that, we can restore CA database by using, Restore-CARoleService -Path C:\CABackup -DatabaseOnly -force
The above command will restore only the CA database. We do not need to restore key as we already did that.
6. Once above step is completed, we can start AD CS service using Start-Service CertSvc
7. Next step of the configuration is to restore the registry settings related to AD CS service. To do that double click on registry file which is saved as C:\CABackup\careg.reg
8. Once key is imported restart the server.
This completes the CA migration process. Next step will be to do some testing to verify the configuration.
Testing
In demo environment we have Windows 10 Computer (PC01). This computer already has a certificate issued by previous Windows Server 2008 R2 Certificate Authority. I went ahead and log in to PC01 and open the certificate mmc. In there I can see the existing certificate and it is shows as valid certificate.
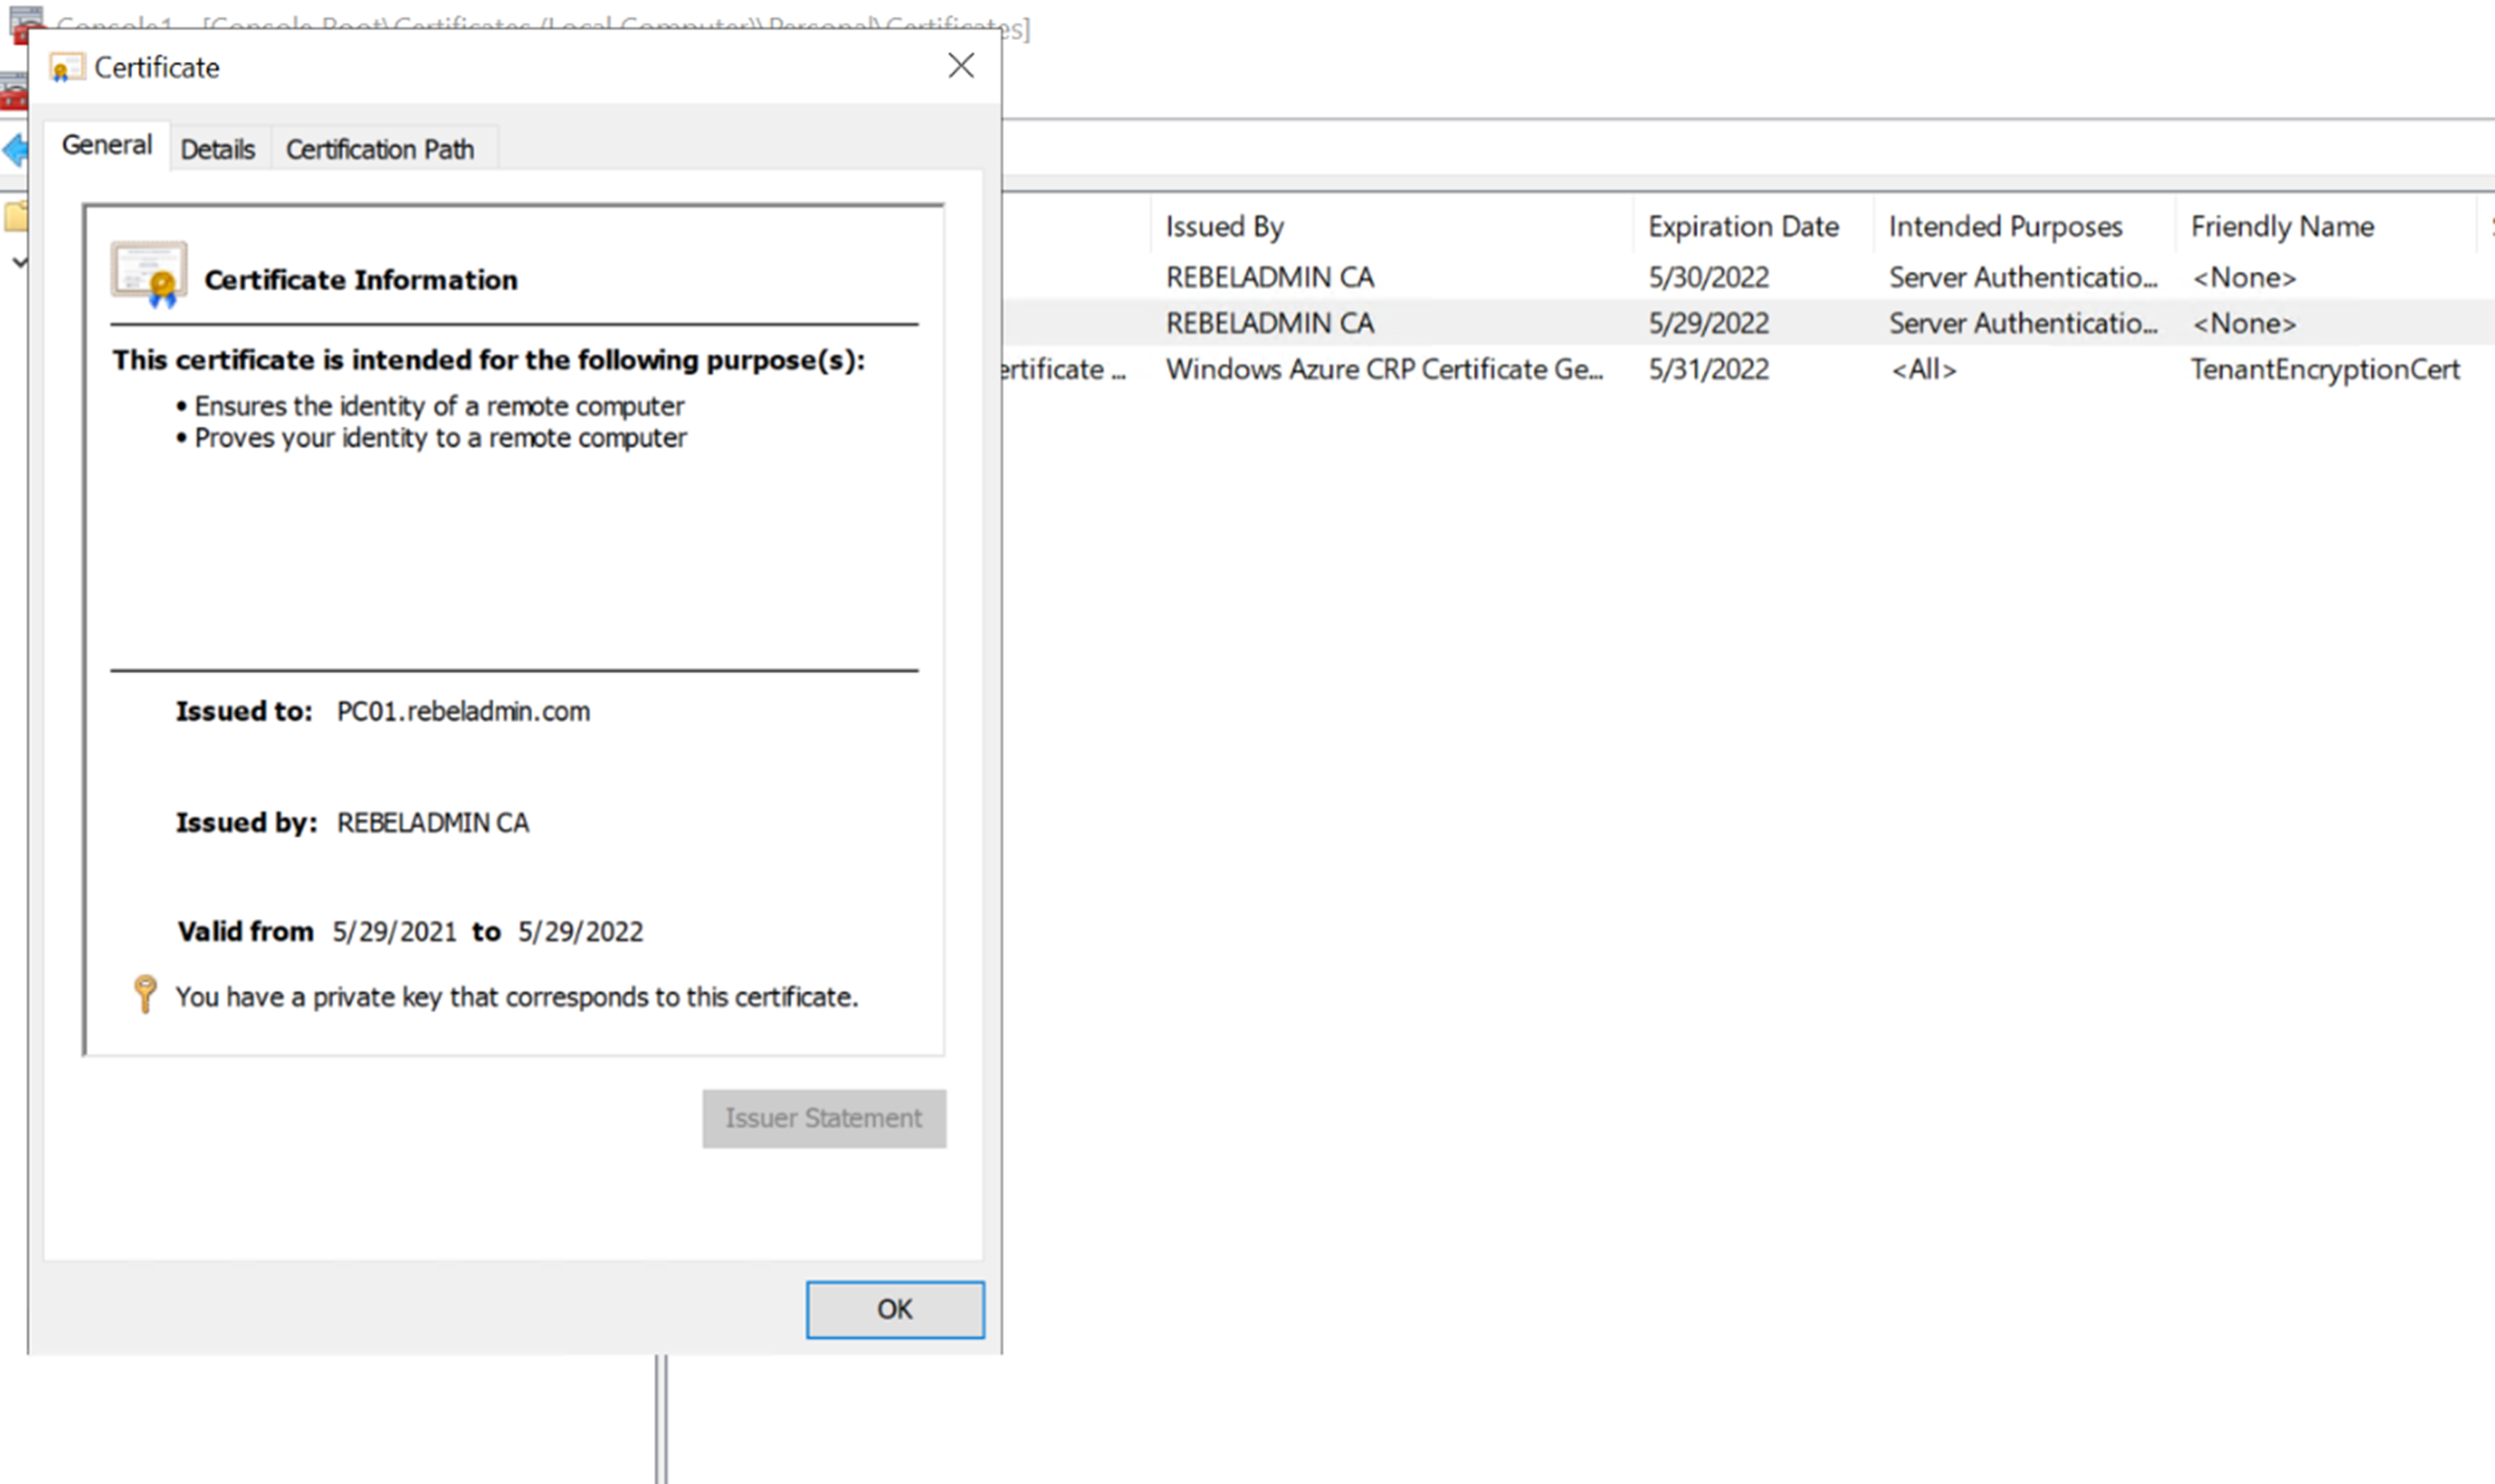
I also checked the certificates under Certificate Authority | Issued Certificates and I can see the same certificate there. It means the previous CA configuration has been migrated to new CA.
In Windows Server 2008 R2 Certificate Authority, I had a custom certificate template created for computers. From PC01, I went ahead and request for new computer certificate. As expected, I can still see the certificate template I created before.
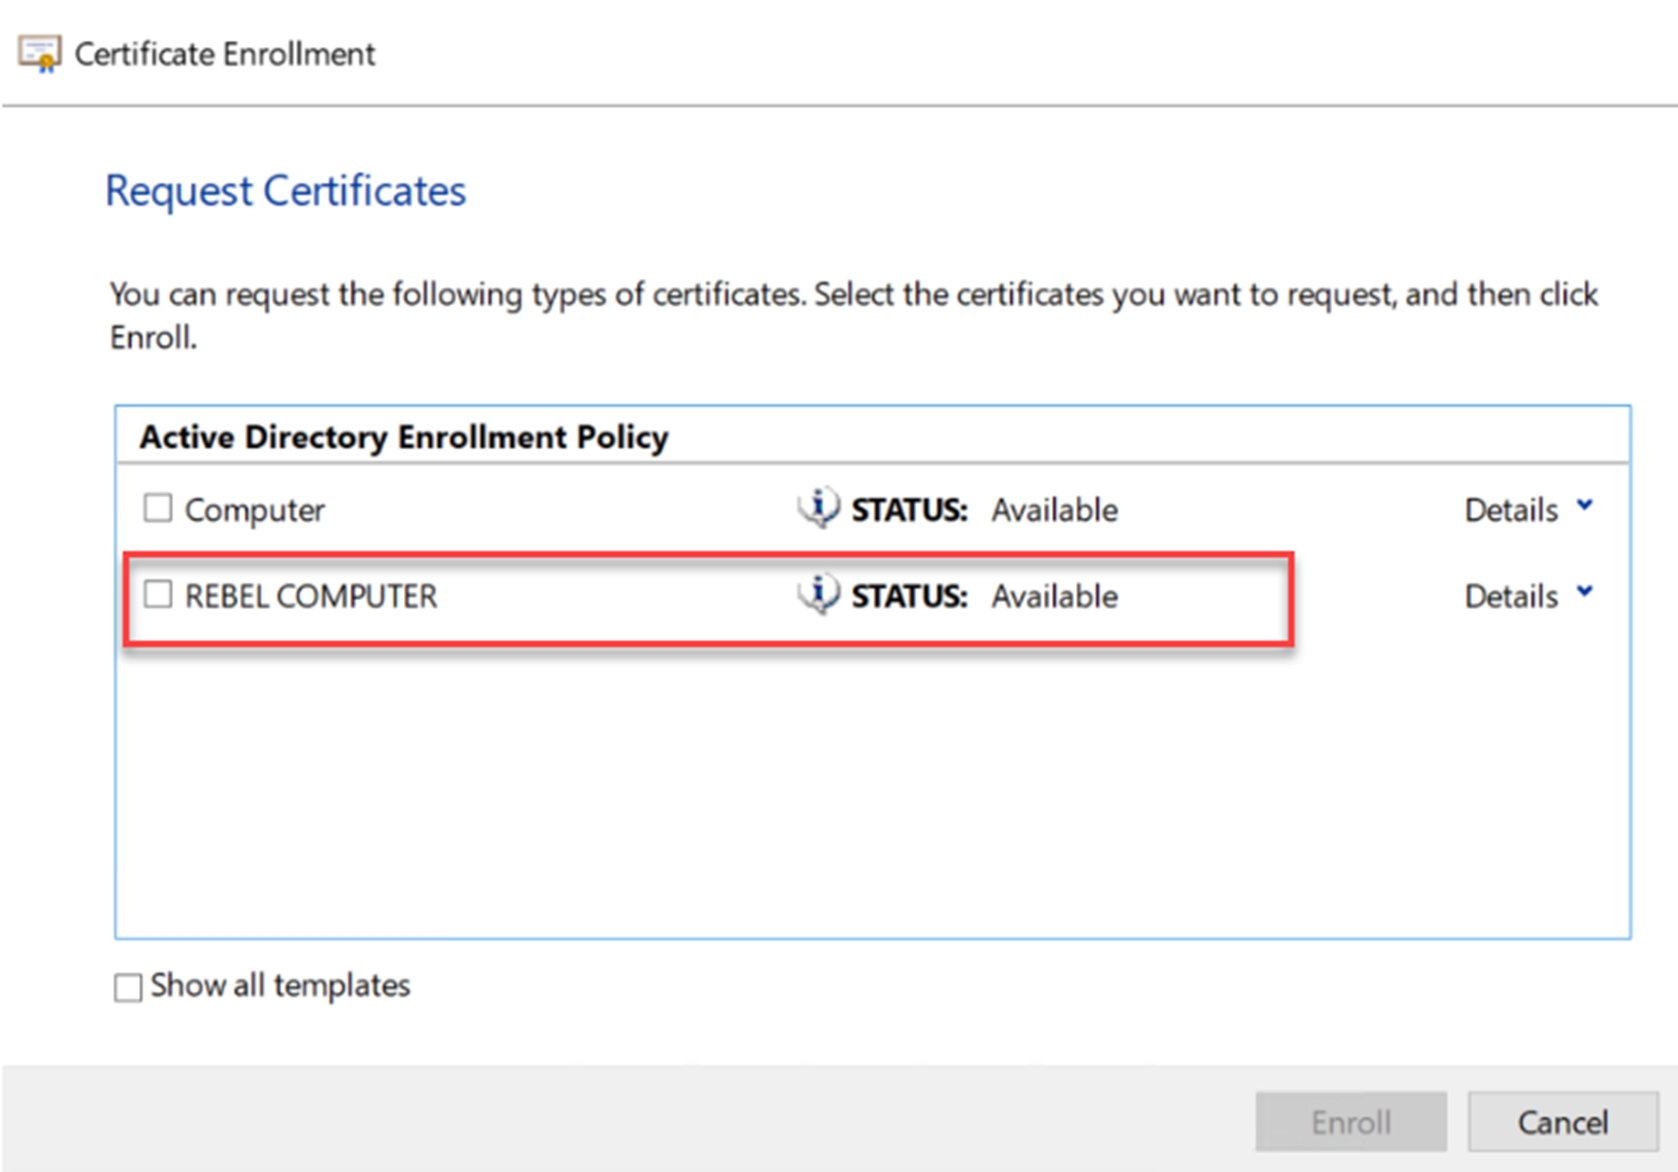
I went ahead and request a certificate with the custom certificate template and I was able to get new certificate. This means the old certificate templates also been migrated.
After I complete the enrol process, I went to Certificate Authority | Issued certificate mmc in W19CS server. In there I can see the newly issued certificate.
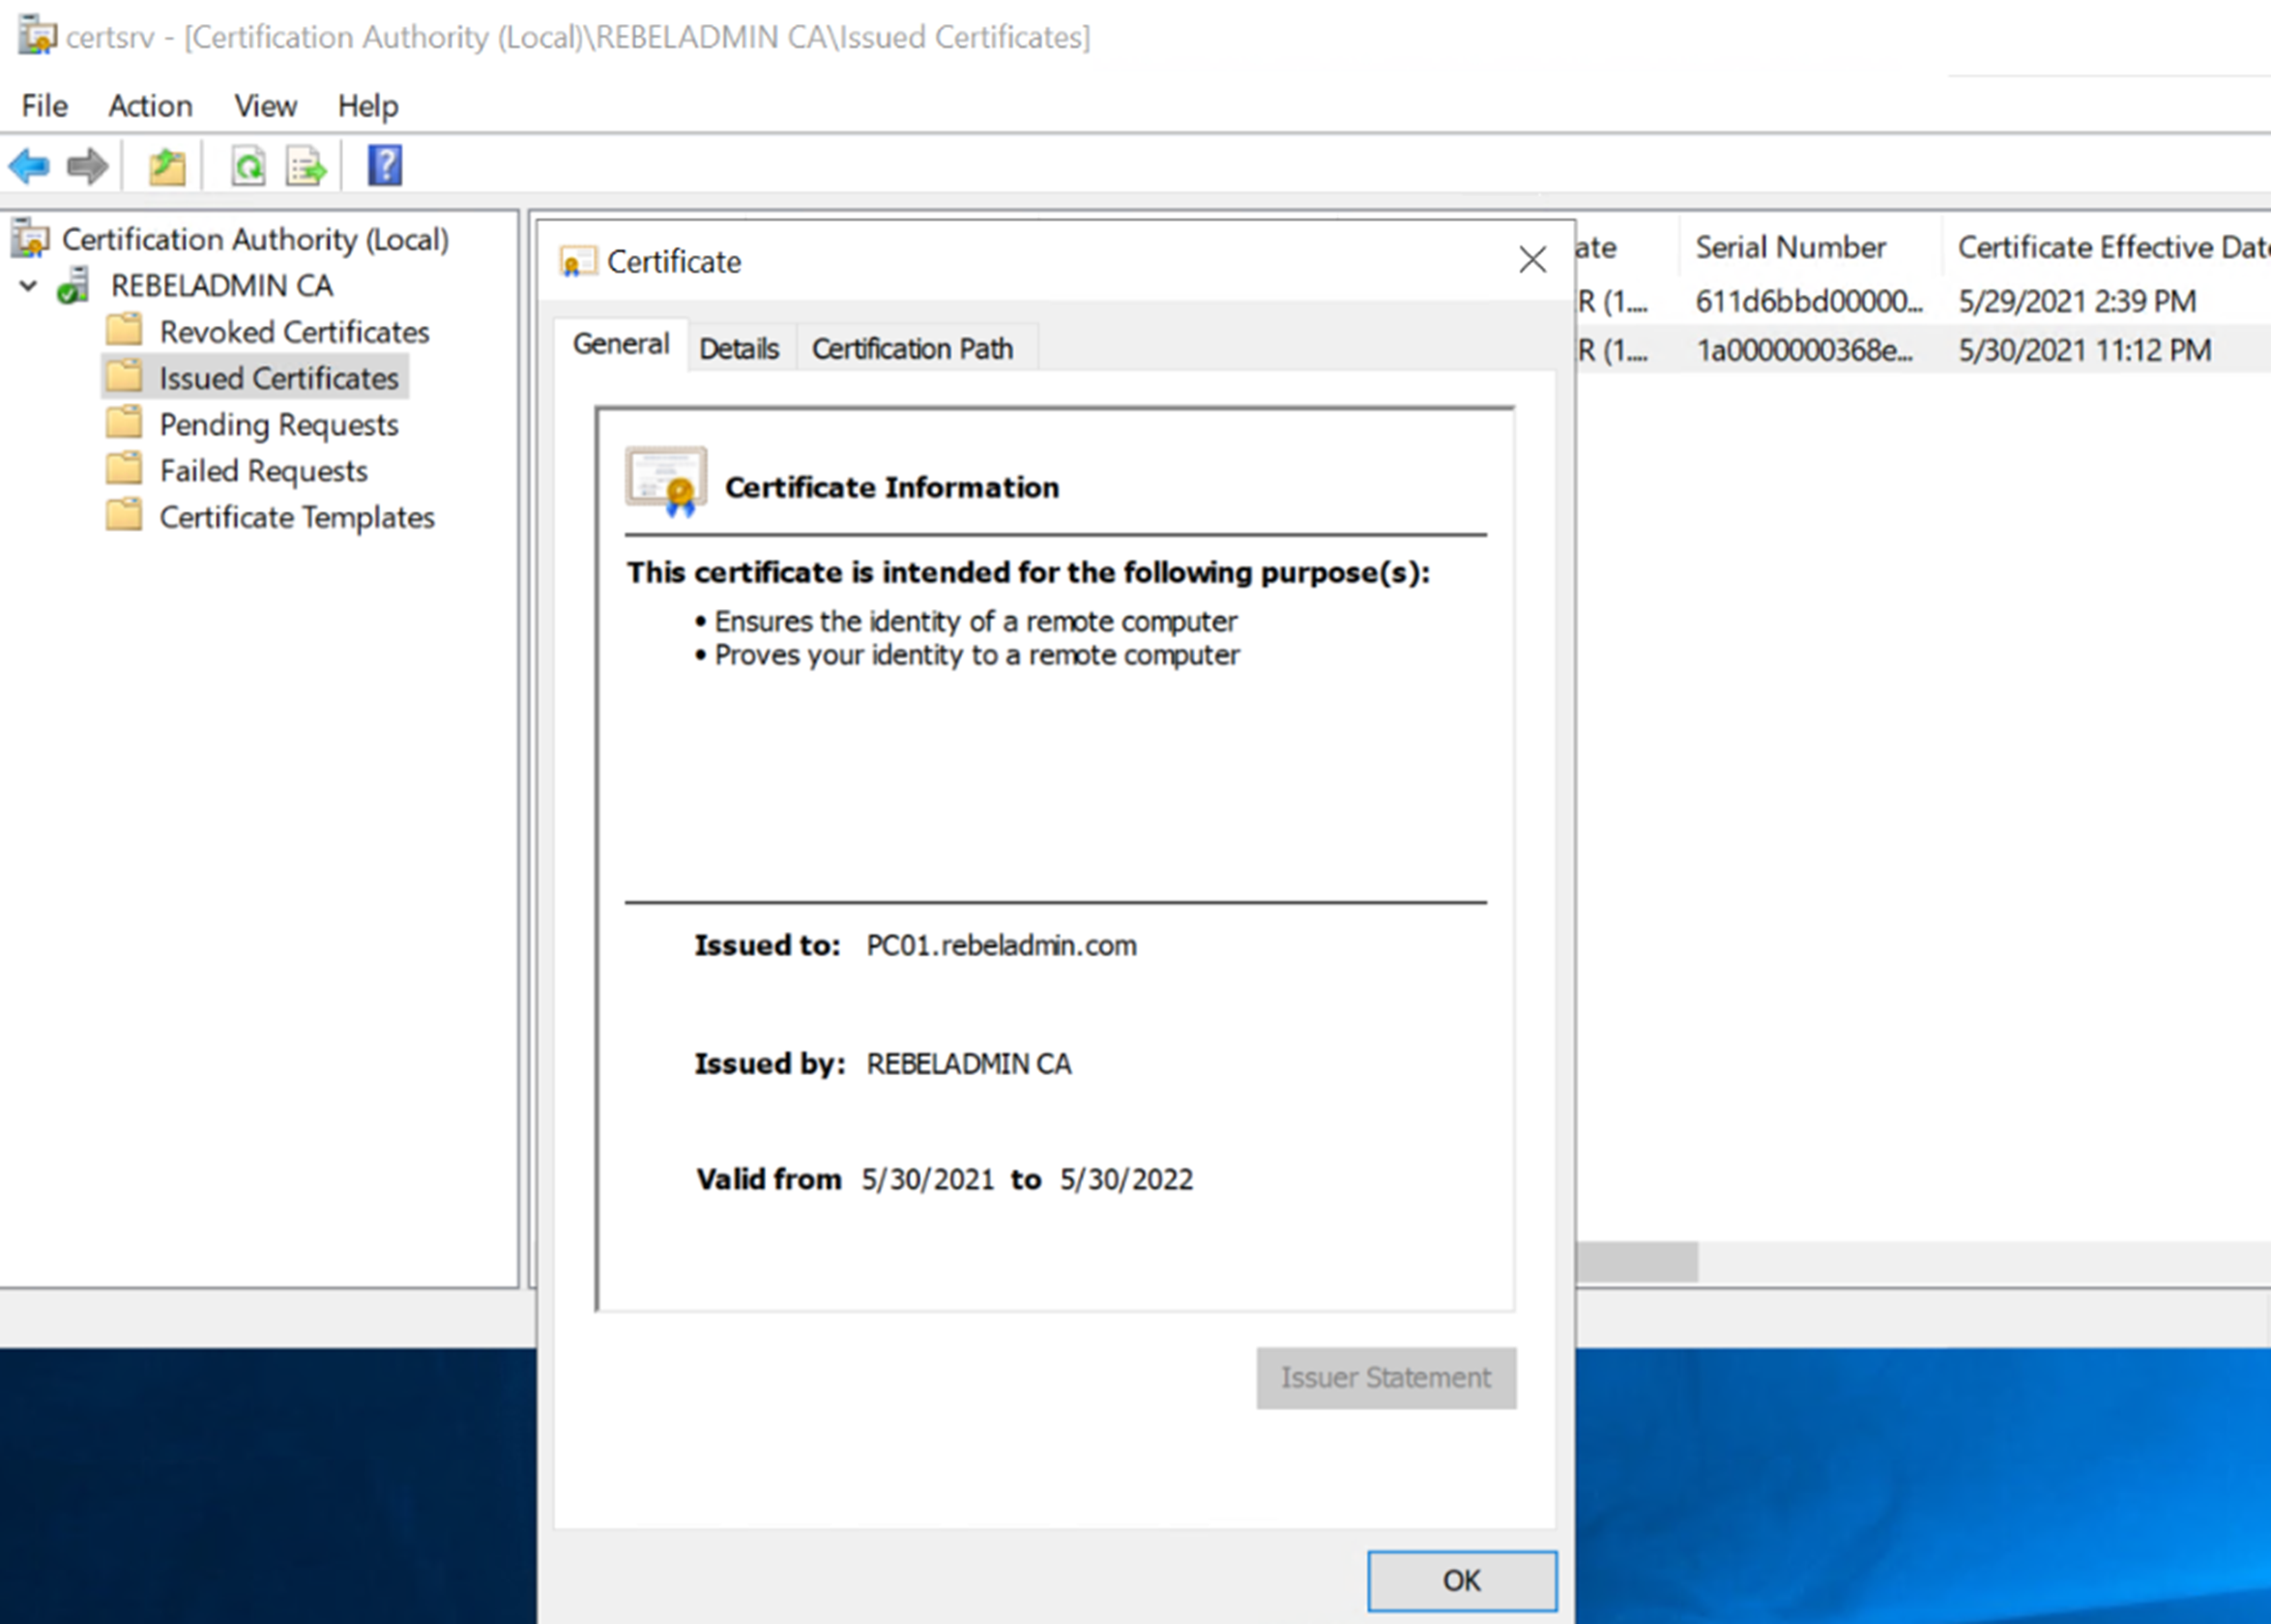
As we can see here the new certificate authority is working as expected and it already got the previous CA configuration. This marks the end of this blog post. If you have any further questions feel free to contact me on rebeladm@live.com also follow me on Twitter @rebeladm to get updates about new blog posts.


Hi Sir,
Your Articles are very good. You are really “REBEL”.. few old articles links expired.
Bonjour
pendant la migration de ADCS es ce que les applications constitue a marché normalement