AzCopy is a command-line utility that can use to transfer data in or out from s storage account (blobs or files). This can be used in Windows, Linux or macOS systems. The same utility also can use to migrate data from one storage account to another.
In this demo, I am going to demonstrate how to use AzCopy to,
• Upload data to the storage account
• Download data from the storage account
• Migrate data from one storage account to another
Create Storage Account
Before using AzCopy, first, let's go ahead and create a storage account. I am going to use Azure PowerShell for this task. So, please make sure you have the Azure PowerShell module installed. More info about it can find under https://docs.microsoft.com/en-us/powershell/azure/install-az-ps?view=azps-2.6.0
1. Launch PowerShell console and connect to Azure using Connect-AzAccount
2. Create a new resource group using,
New-AzResourceGroup -Name REBELRG -Location "East US"
3. Then create a new storage account using,
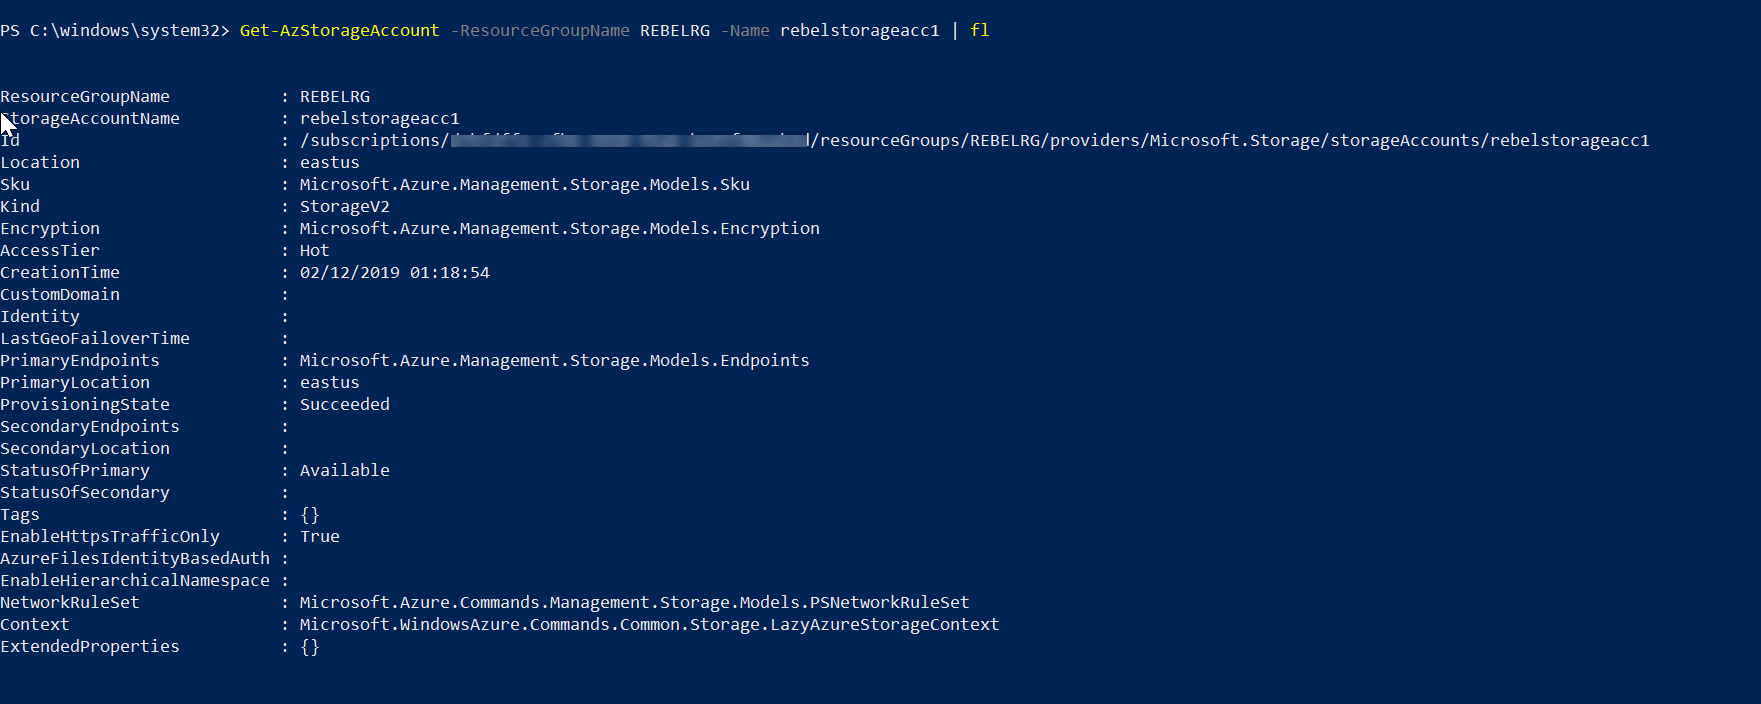
New-AzStorageAccount -ResourceGroupName REBELRG -Name rebelstorageacc1 -Location "East US" -SkuName Standard_LRS -Kind StorageV2
In the above, rebelstorageacc1 is the storage account name. It is using Locally redundant storage (LRS) as the replication option. It is also created as general purpose v2 storage account.
4. As the next step let's go ahead and create Azure file share.
$storageacc = Get-AzStorageAccount -ResourceGroupName REBELRG -Name rebelstorageacc1
New-AzStorageShare -Context $storageacc.Context -Name rebelshare1
In the above, rebelshare1 is the new file share name and it is created under rebelstorageacc1 storage account.
Create a shared access signature (SAS) token for Storage Account
SAS token allows providing temporally access to containers, blobs in a storage account. More information about SAS token can be found via https://docs.microsoft.com/en-us/azure/storage/common/storage-sas-overview
Let's go ahead and create SAS token for this new storage account. Once done, we can use it to access the storage account using AzCopy.
1. Log in to Azure portal (https://azure.portal.com) as Global Administrator
2. Go to Storage accounts | rebelstorageacc1
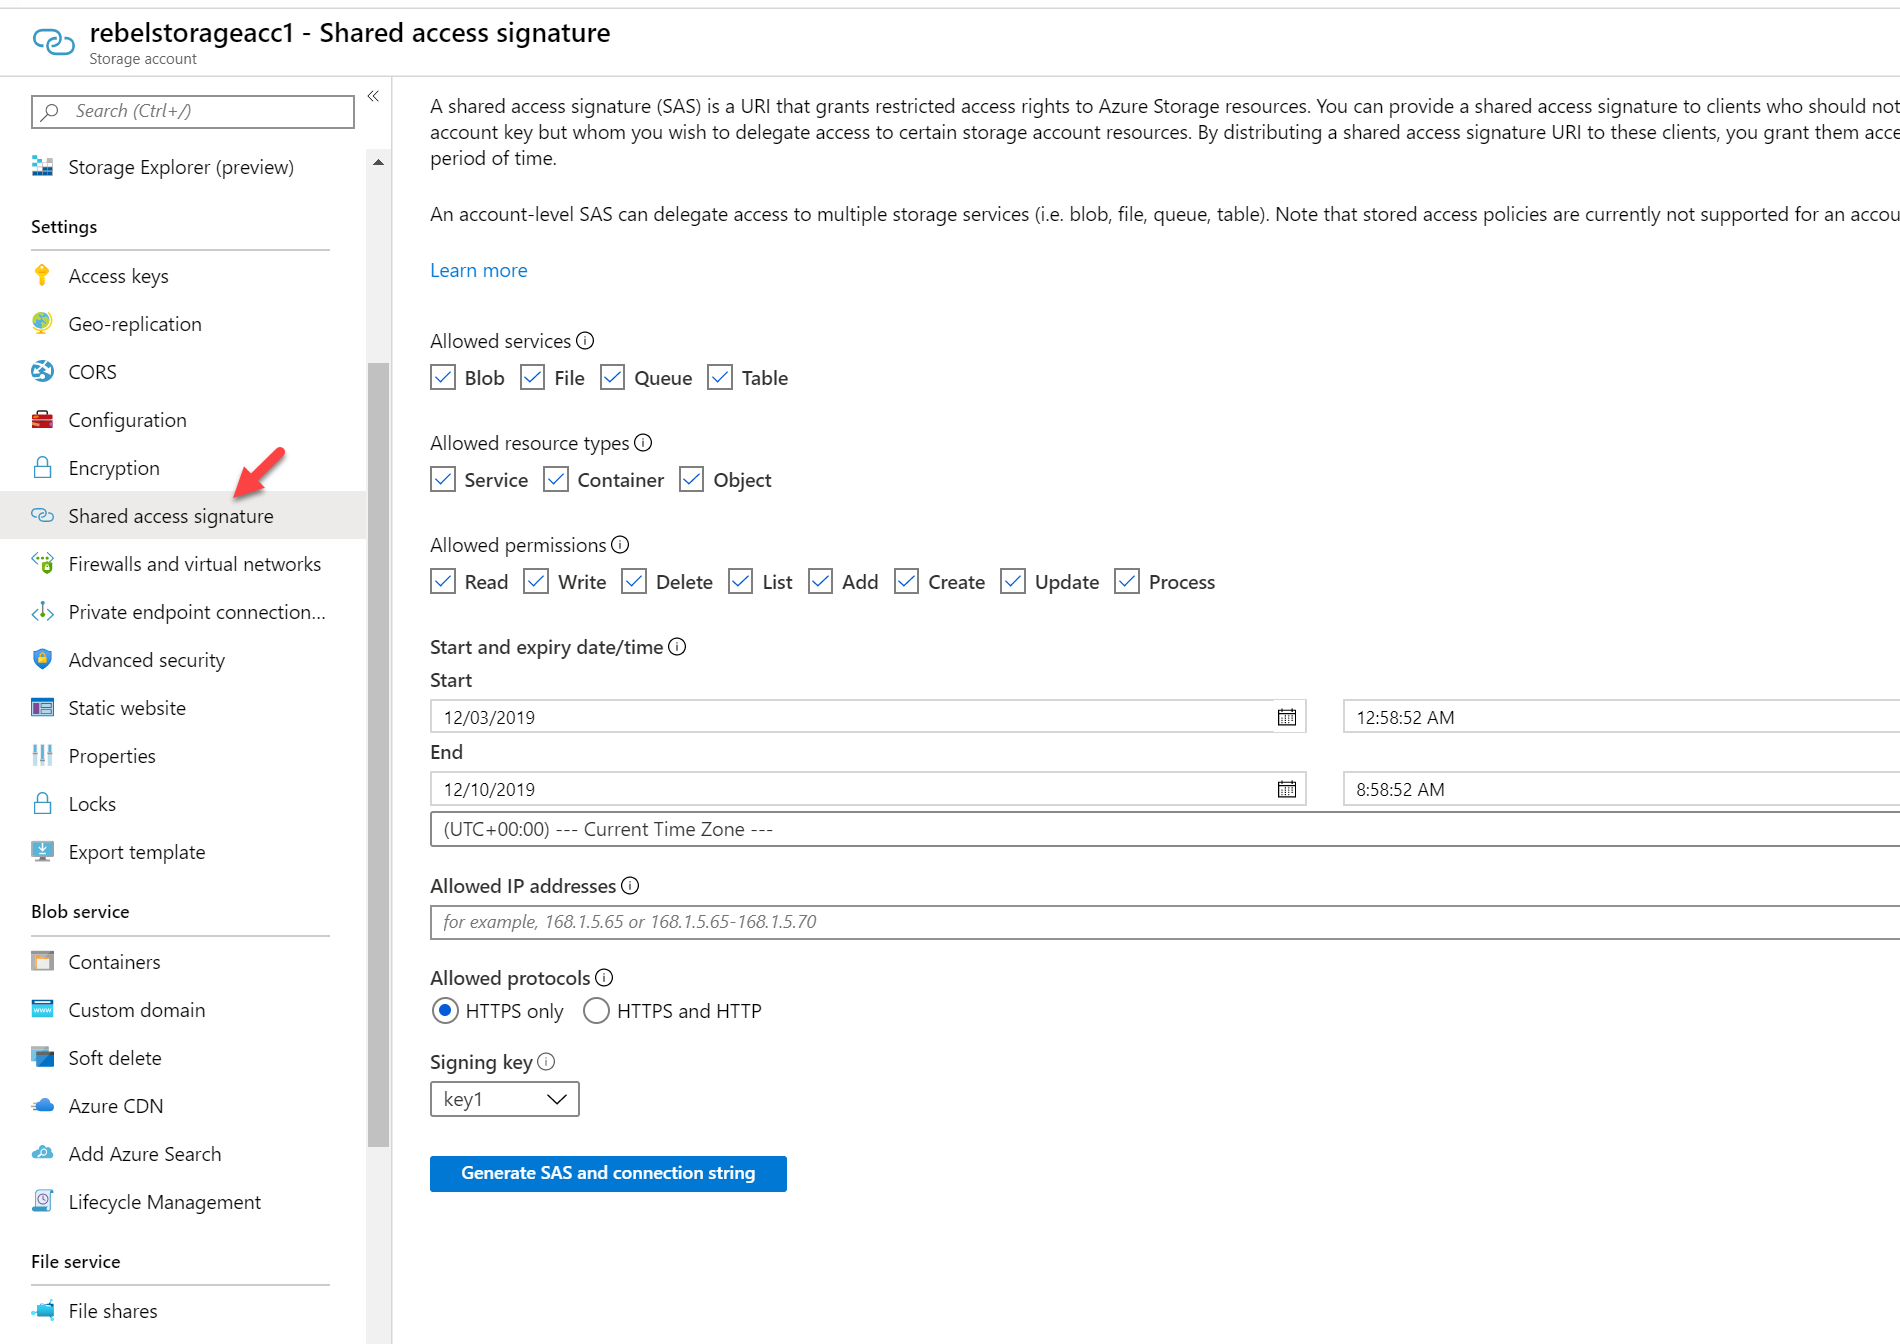
3. Then click on Shared access signature option.
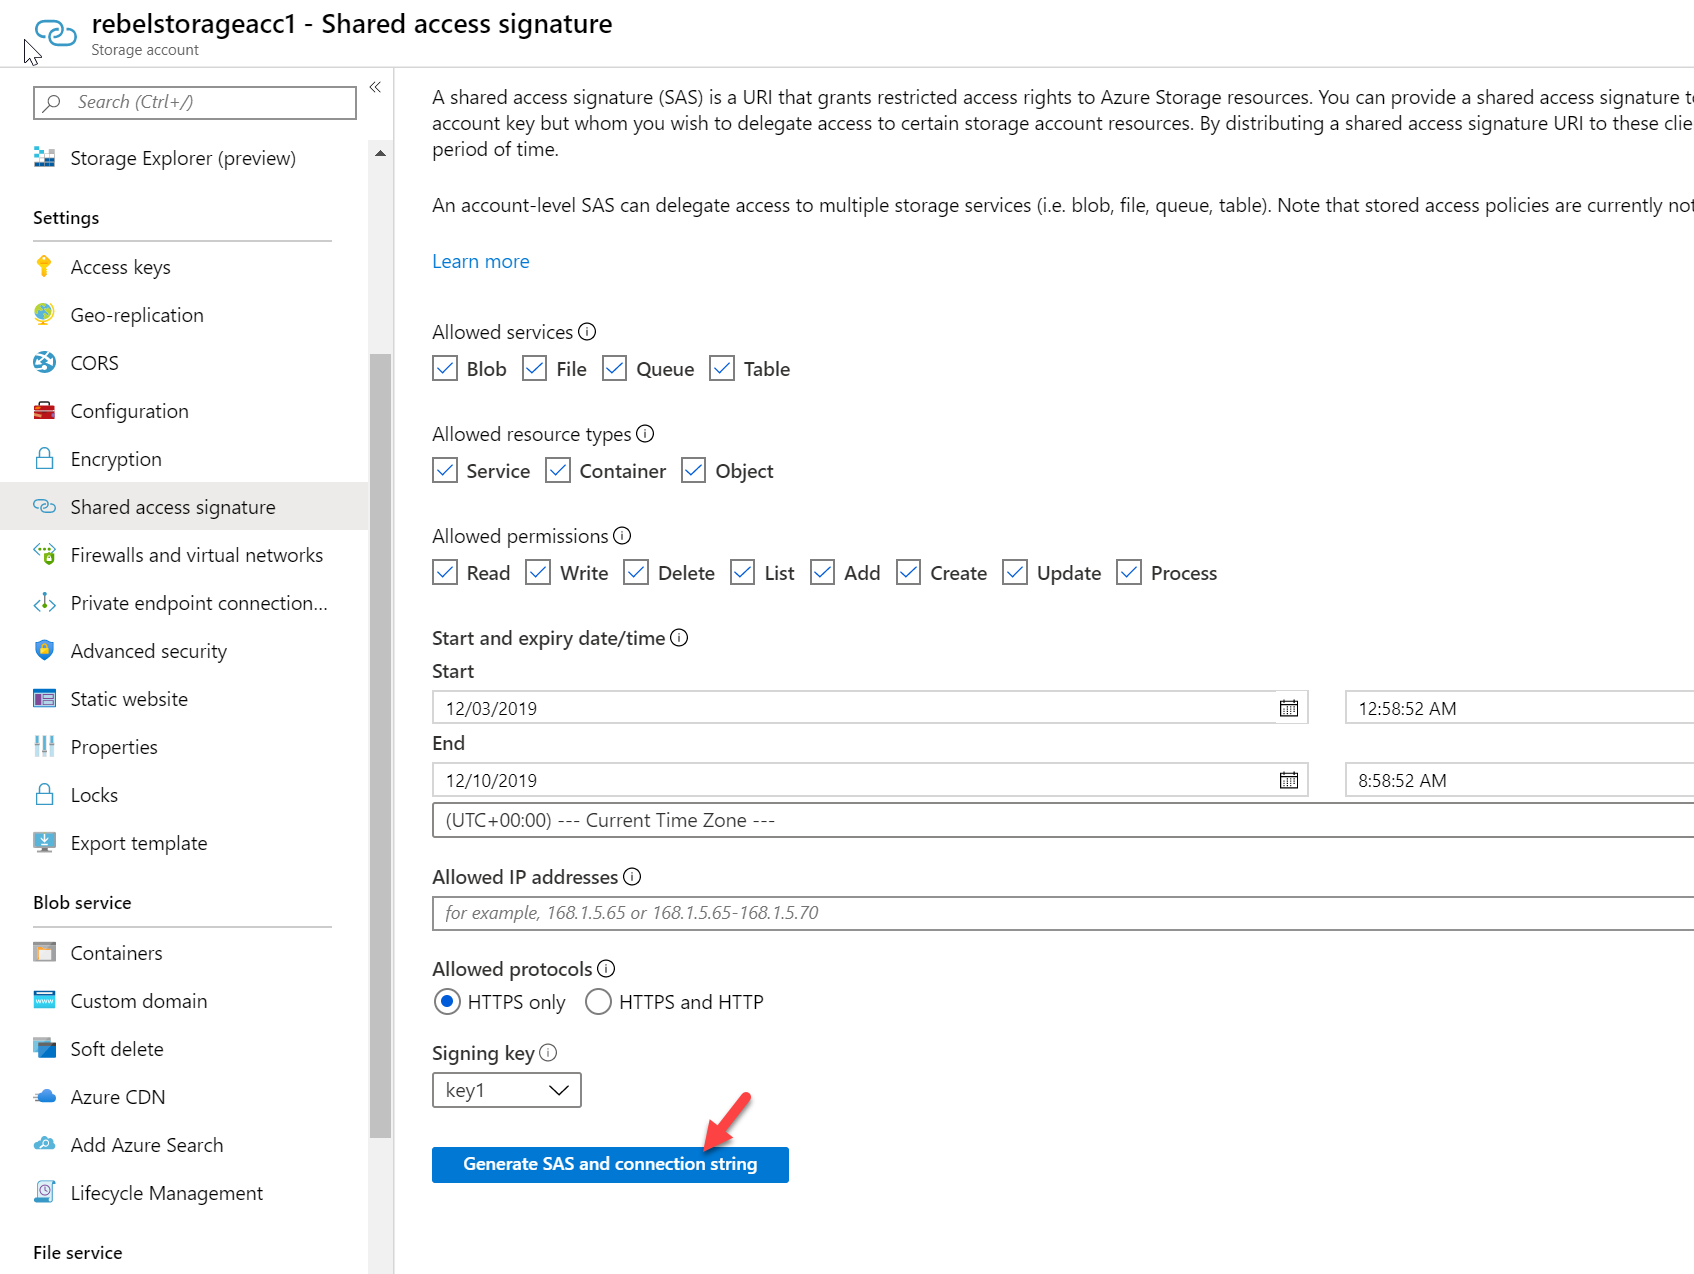
4. In the new window, adjust the permissions and expiry date for the SAS token. In this demo, I am using default selections. Once settings are in place, click on Generate SAS and the connection string button.
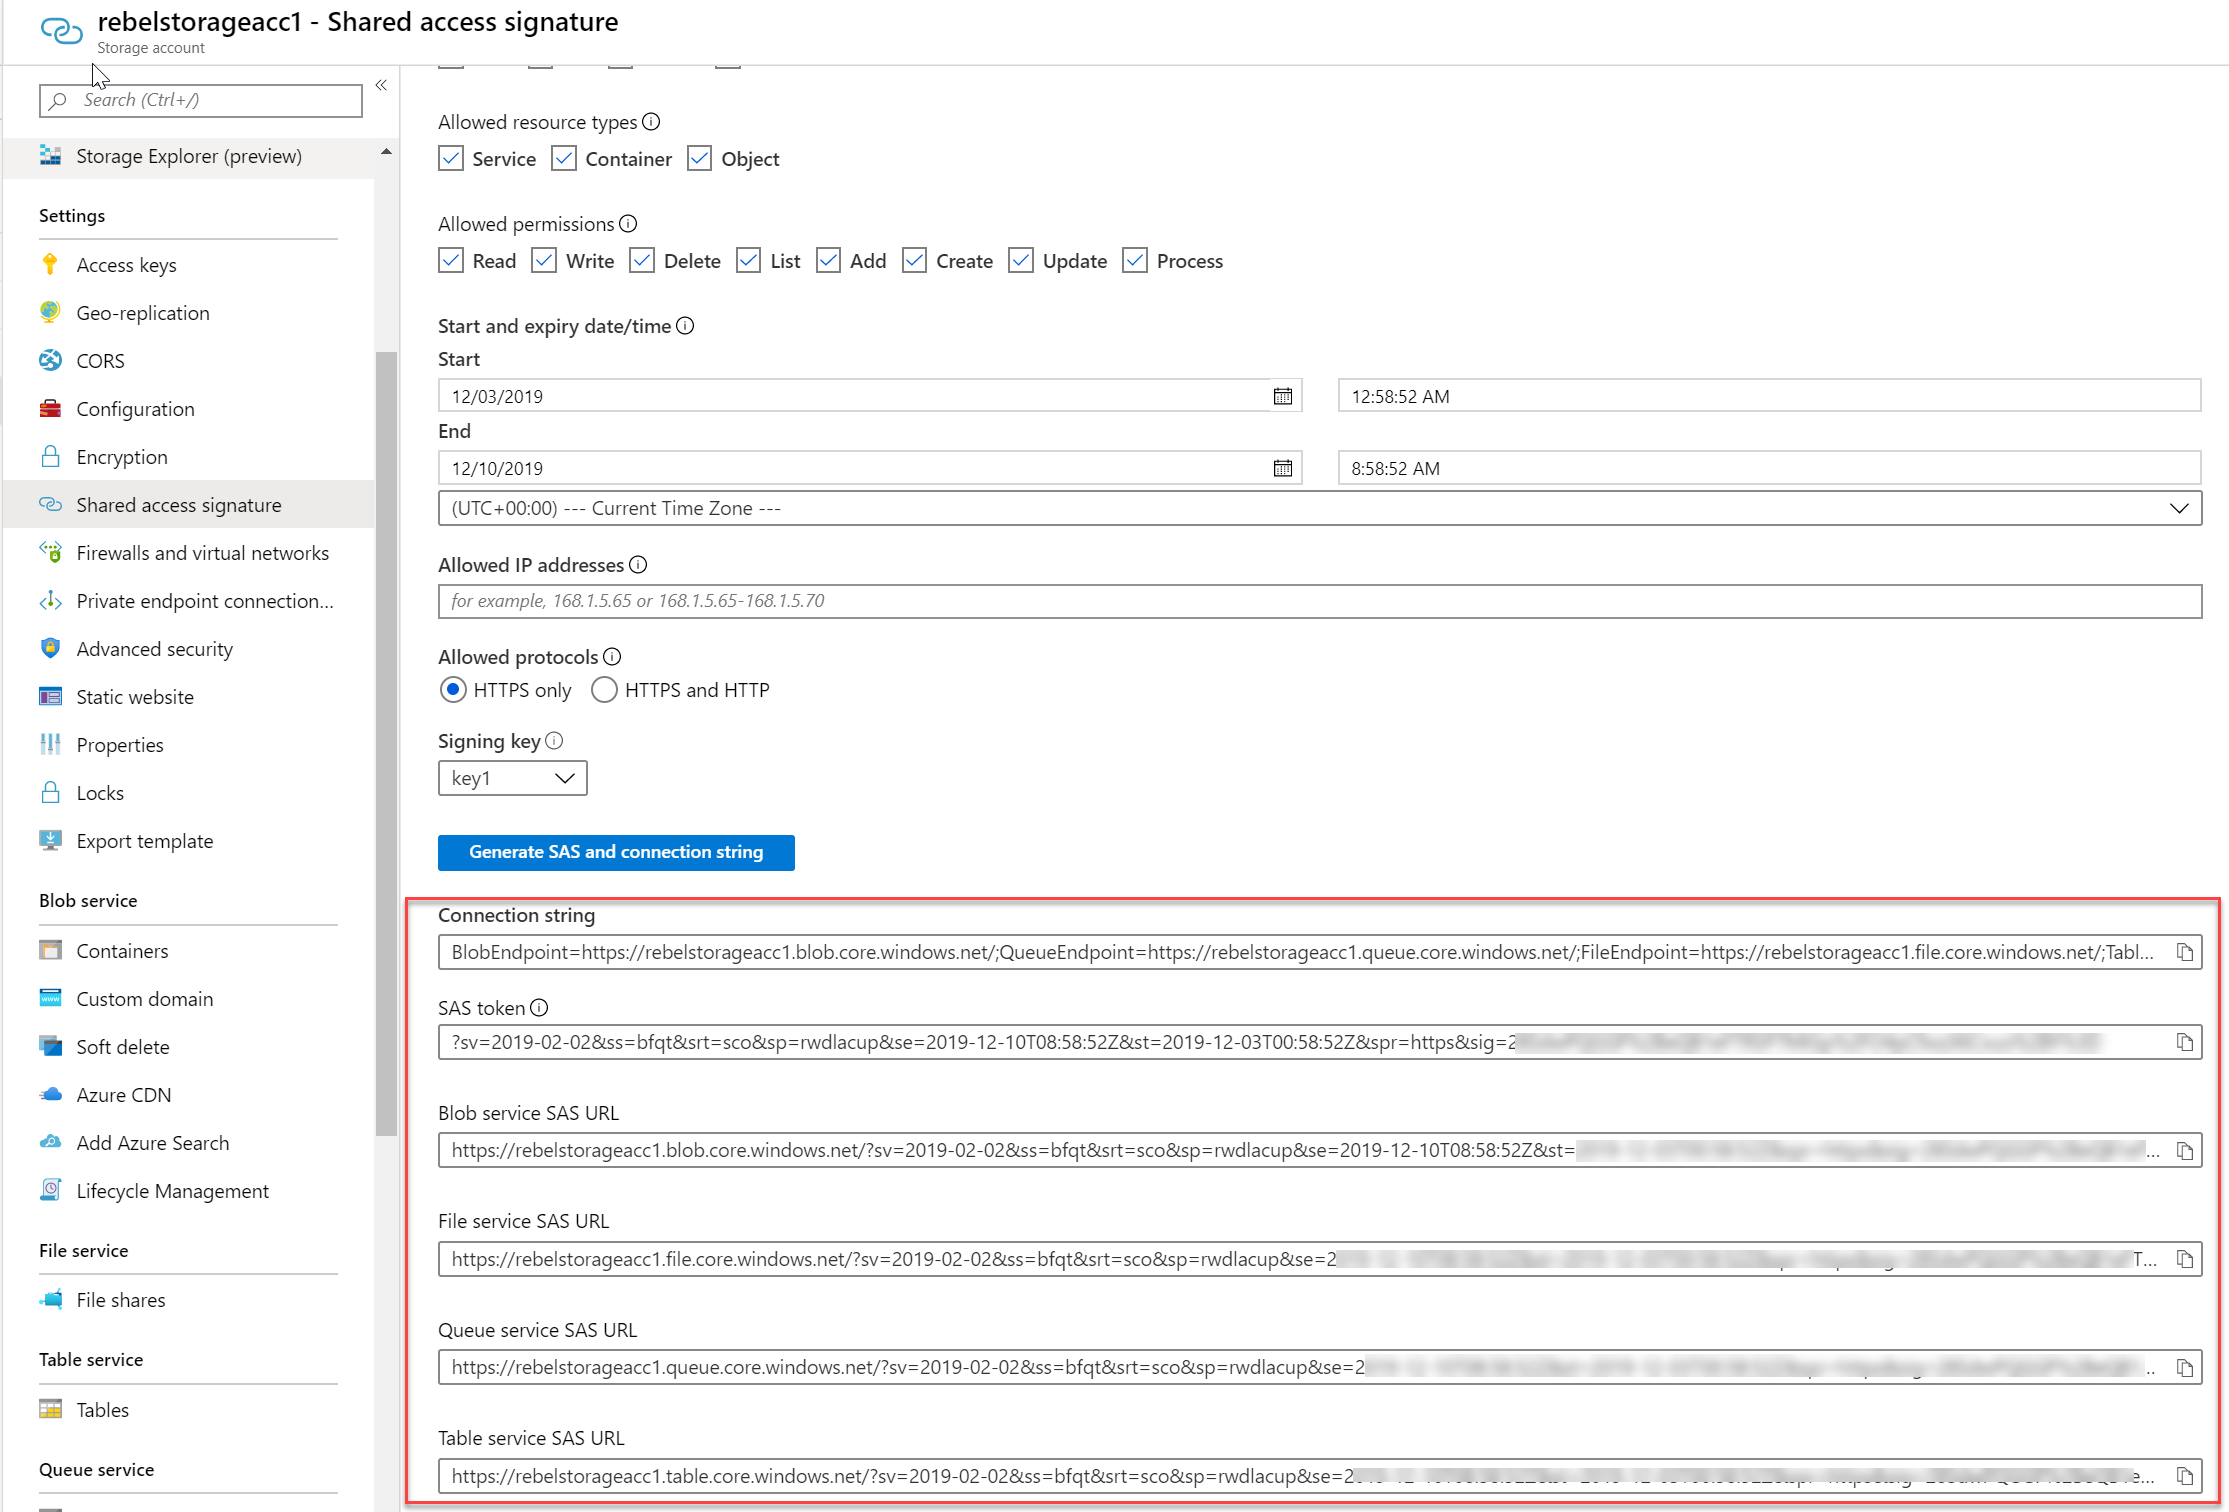
5. It will generate SAS token and service URLs. We will be using these later.
Install AzCopy Utility
To install AzCopy, first, download the AzCopy executable using https://aka.ms/downloadazcopy-v10-windows. Then extract the file.
Once the file is extracted, Open Windows command line as administrator and change the path to the new folder.
Upload a File
Now we have everything ready. Let's see how we can upload a file to the new file share we created.
In my demo environment, I got a file called mybook.pdf in C:\ drive. Let's see how we can upload it.
To do that I am going to use,
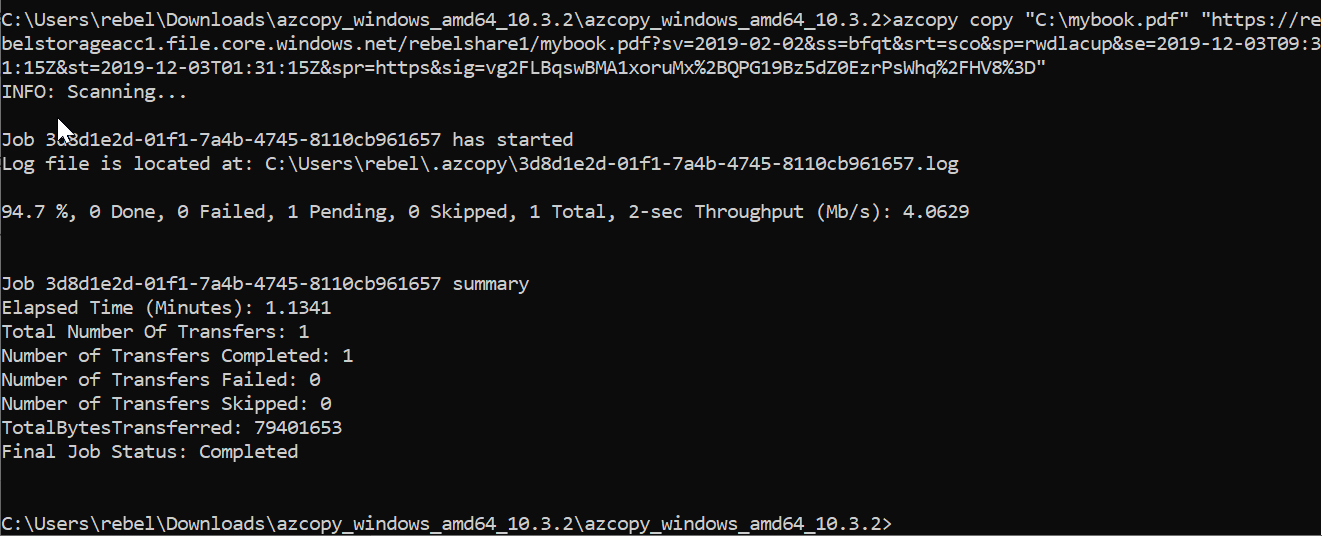
azcopy copy "C:\mybook.pdf" https://rebelstorageacc1.file.core.windows.net/rebelshare1/mybook.pdf?sv=2019-02-02&ss=bfqt&srt=sco&sp=rwdlacup&se=2019-12-03T09:31:15Z&st=2019-12-03T01:31:15Z&spr=https&sig=vg2FLBqswBMA1xoruMx%2BQPG19Bz5dZ0EzrPsWhq%2FHV8%3D
In above command, https://rebelstorageacc1.file.core.windows.net/rebelshare1/ is my file share. ?sv=2019-02-02&ss=bfqt&srt=sco&sp=rwdlacup&se=2019-12-03T09:31:15Z&st=2019-12-03T01:31:15Z&spr=https&sig=vg2FLBqswBMA1xoruMx%2BQPG19Bz5dZ0EzrPsWhq%2FHV8%3D is the SAS token.
As we can see it is successfully uploaded the file.
We also can upload complete directories using,
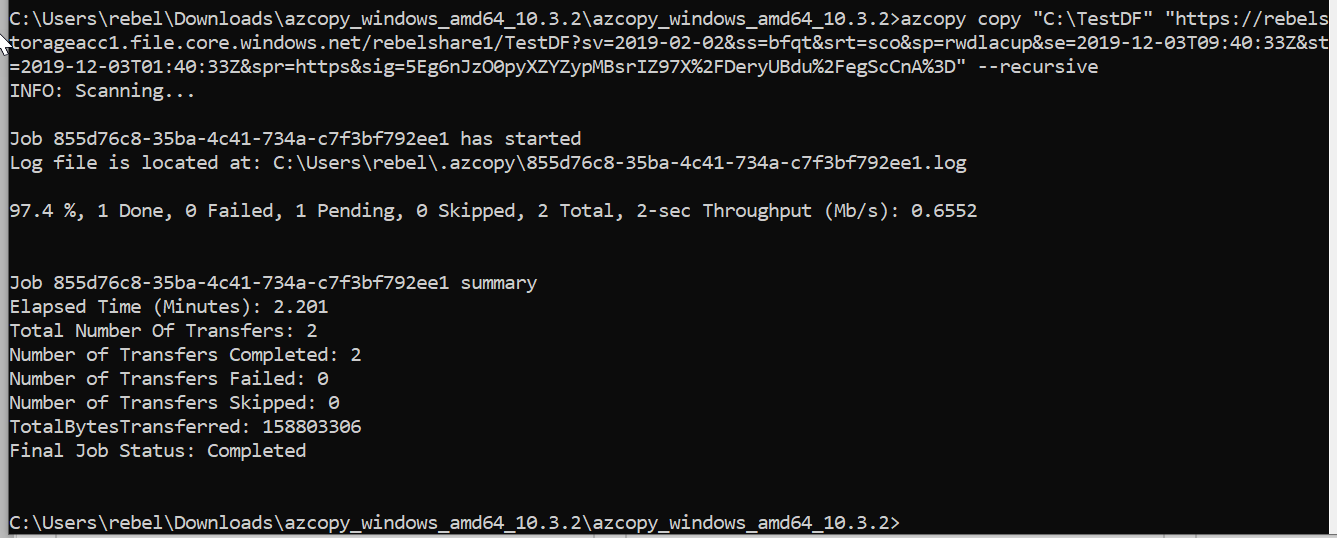
azcopy copy "C:\TestDF" "https://rebelstorageacc1.file.core.windows.net/rebelshare1/TestDF?sv=2019-02-02&ss=bfqt&srt=sco&sp=rwdlacup&se=2019-12-03T09:40:33Z&st=2019-12-03T01:40:33Z&spr=https&sig=5Eg6nJzO0pyXZYZypMBsrIZ97X%2FDeryUBdu%2FegScCnA%3D" –recursive
In above, AzCopy will upload TestDF folder and its content.
Download a file
We also can download files, directories, content of directories using AzCopy.
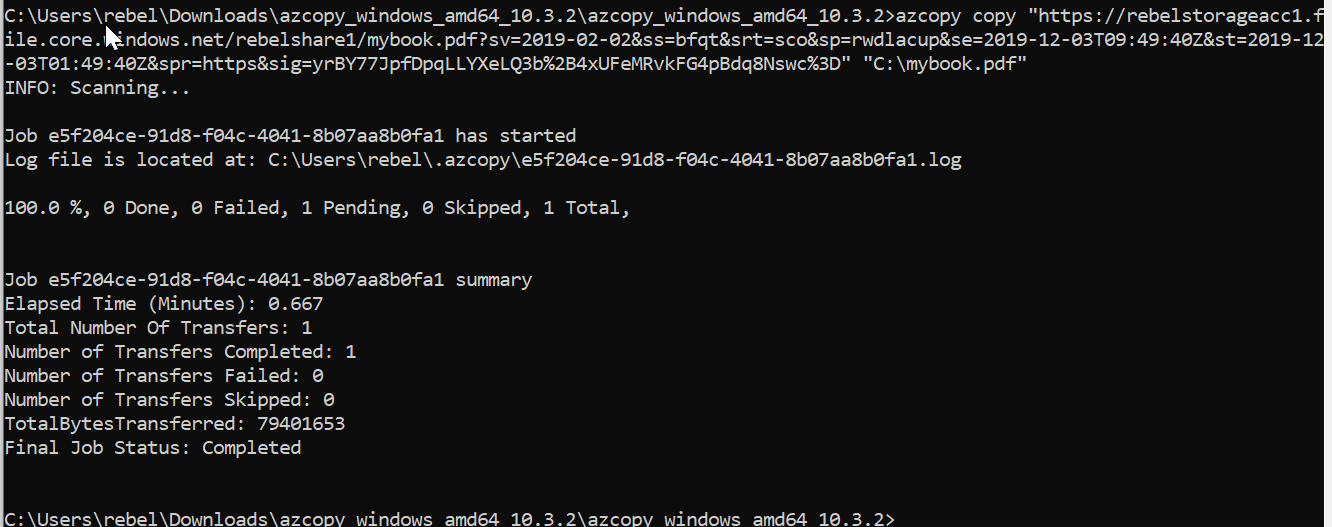
azcopy copy "https://rebelstorageacc1.file.core.windows.net/rebelshare1/mybook.pdf?sv=2019-02-02&ss=bfqt&srt=sco&sp=rwdlacup&se=2019-12-03T09:49:40Z&st=2019-12-03T01:49:40Z&spr=https&sig=yrBY77JpfDpqLLYXeLQ3b%2B4xUFeMRvkFG4pBdq8Nswc%3D" "C:\mybook.pdf"
In above example I am downloading a PDF file called mybook.pdf from rebelshare1. Local path of the file is C:\mybook.pdf. The SAS token for the action is ?sv=2019-02-02&ss=bfqt&srt=sco&sp=rwdlacup&se=2019-12-03T09:49:40Z&st=2019-12-03T01:49:40Z&spr=https&sig=yrBY77JpfDpqLLYXeLQ3b%2B4xUFeMRvkFG4pBdq8Nswc%3D
We also can download Directoy and its content using,
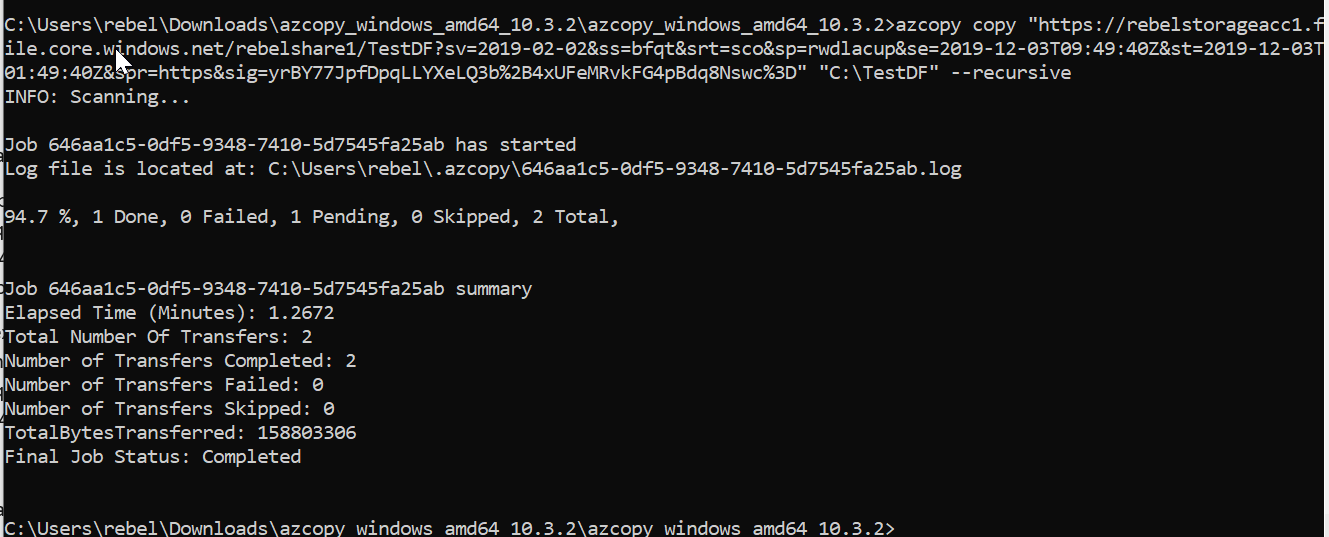
azcopy copy "https://rebelstorageacc1.file.core.windows.net/rebelshare1/TestDF?sv=2019-02-02&ss=bfqt&srt=sco&sp=rwdlacup&se=2019-12-03T09:49:40Z&st=2019-12-03T01:49:40Z&spr=https&sig=yrBY77JpfDpqLLYXeLQ3b%2B4xUFeMRvkFG4pBdq8Nswc%3D" "C:\TestDF" –recursive
In above, I am downloading TestDF folder in share with its content in to C:\TestDF
Move data between storage accounts
We also can use AzCopy to move data between storage accounts. For demo purpose, I went ahead and create another storage account and a file share. Let's see how we can move a file from one storage account to another.
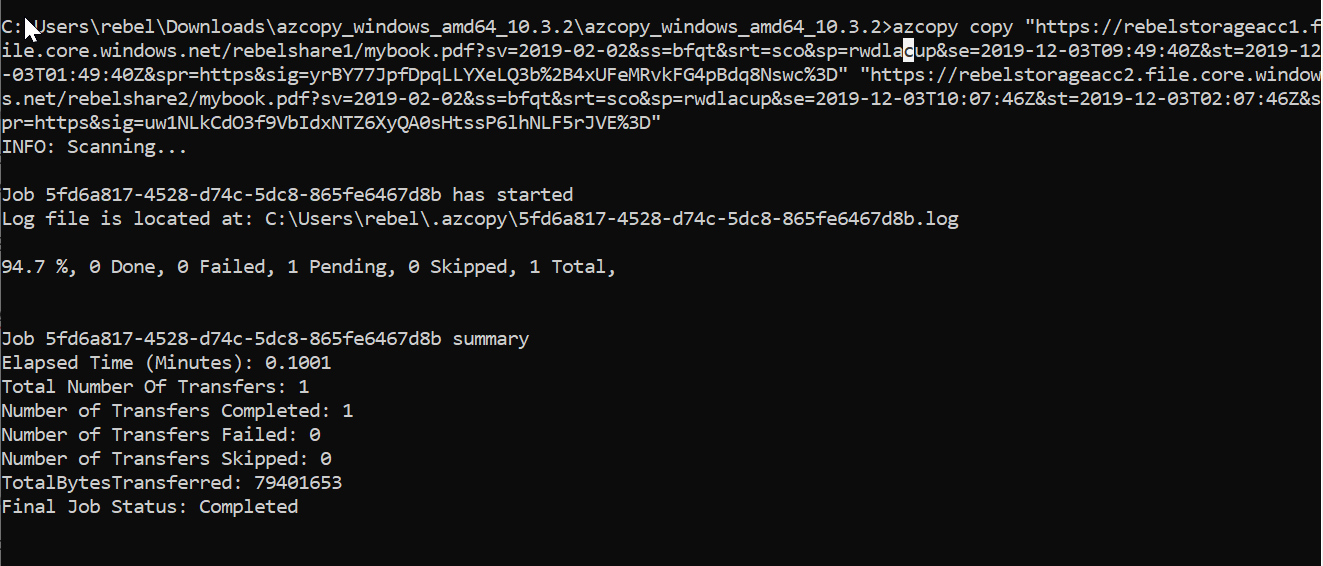
azcopy copy "https://rebelstorageacc1.file.core.windows.net/rebelshare1/mybook.pdf?sv=2019-02-02&ss=bfqt&srt=sco&sp=rwdlacup&se=2019-12-03T09:49:40Z&st=2019-12-03T01:49:40Z&spr=https&sig=yrBY77JpfDpqLLYXeLQ3b%2B4xUFeMRvkFG4pBdq8Nswc%3D" "https://rebelstorageacc2.file.core.windows.net/rebelshare2/mybook.pdf?sv=2019-02-02&ss=bfqt&srt=sco&sp=rwdlacup&se=2019-12-03T10:07:46Z&st=2019-12-03T02:07:46Z&spr=https&sig=uw1NLkCdO3f9VbIdxNTZ6XyQA0sHtssP6lhNLF5rJVE%3D"
In above, the source file is https://rebelstorageacc1.file.core.windows.net/rebelshare1/mybook.pdf and it will be copied to https://rebelstorageacc2.file.core.windows.net/rebelshare2/
In here I highlighted the source SAS token
azcopy copy "https://rebelstorageacc1.file.core.windows.net/rebelshare1/mybook.pdf?sv=2019-02-02&ss=bfqt&srt=sco&sp=rwdlacup&se=2019-12-03T09:49:40Z&st=2019-12-03T01:49:40Z&spr=https&sig=yrBY77JpfDpqLLYXeLQ3b%2B4xUFeMRvkFG4pBdq8Nswc%3D" "https://rebelstorageacc2.file.core.windows.net/rebelshare2/mybook.pdf?sv=2019-02-02&ss=bfqt&srt=sco&sp=rwdlacup&se=2019-12-03T10:07:46Z&st=2019-12-03T02:07:46Z&spr=https&sig=uw1NLkCdO3f9VbIdxNTZ6XyQA0sHtssP6lhNLF5rJVE%3D"
and below I highlighted the target SAS token
azcopy copy "https://rebelstorageacc1.file.core.windows.net/rebelshare1/mybook.pdf?sv=2019-02-02&ss=bfqt&srt=sco&sp=rwdlacup&se=2019-12-03T09:49:40Z&st=2019-12-03T01:49:40Z&spr=https&sig=yrBY77JpfDpqLLYXeLQ3b%2B4xUFeMRvkFG4pBdq8Nswc%3D" "https://rebelstorageacc2.file.core.windows.net/rebelshare2/mybook.pdf?sv=2019-02-02&ss=bfqt&srt=sco&sp=rwdlacup&se=2019-12-03T10:07:46Z&st=2019-12-03T02:07:46Z&spr=https&sig=uw1NLkCdO3f9VbIdxNTZ6XyQA0sHtssP6lhNLF5rJVE%3D"
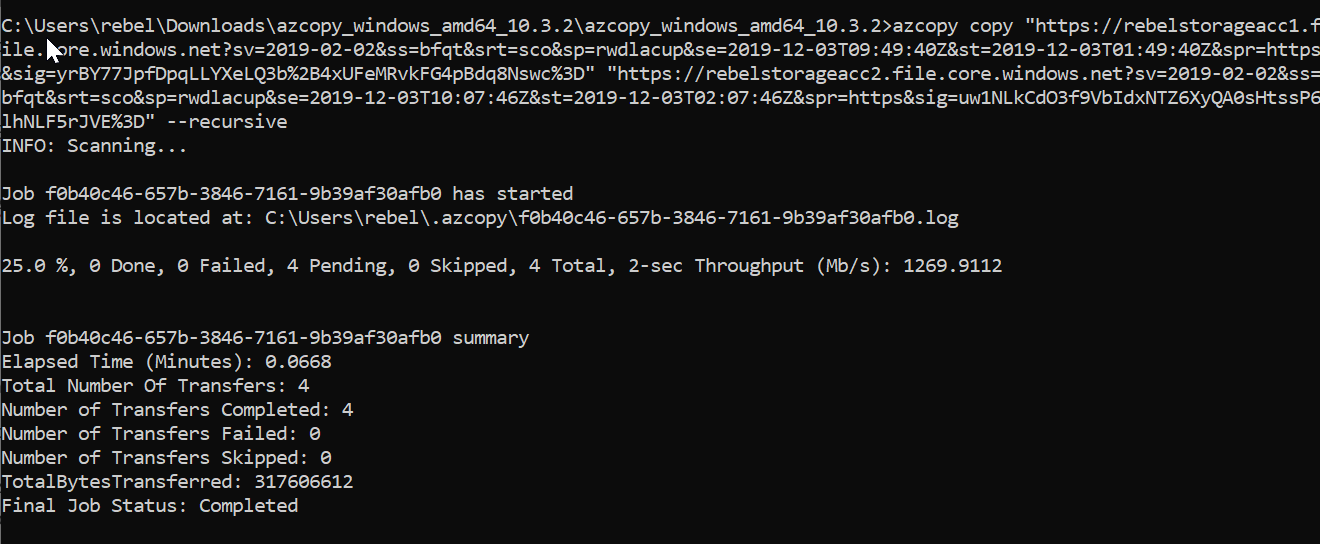
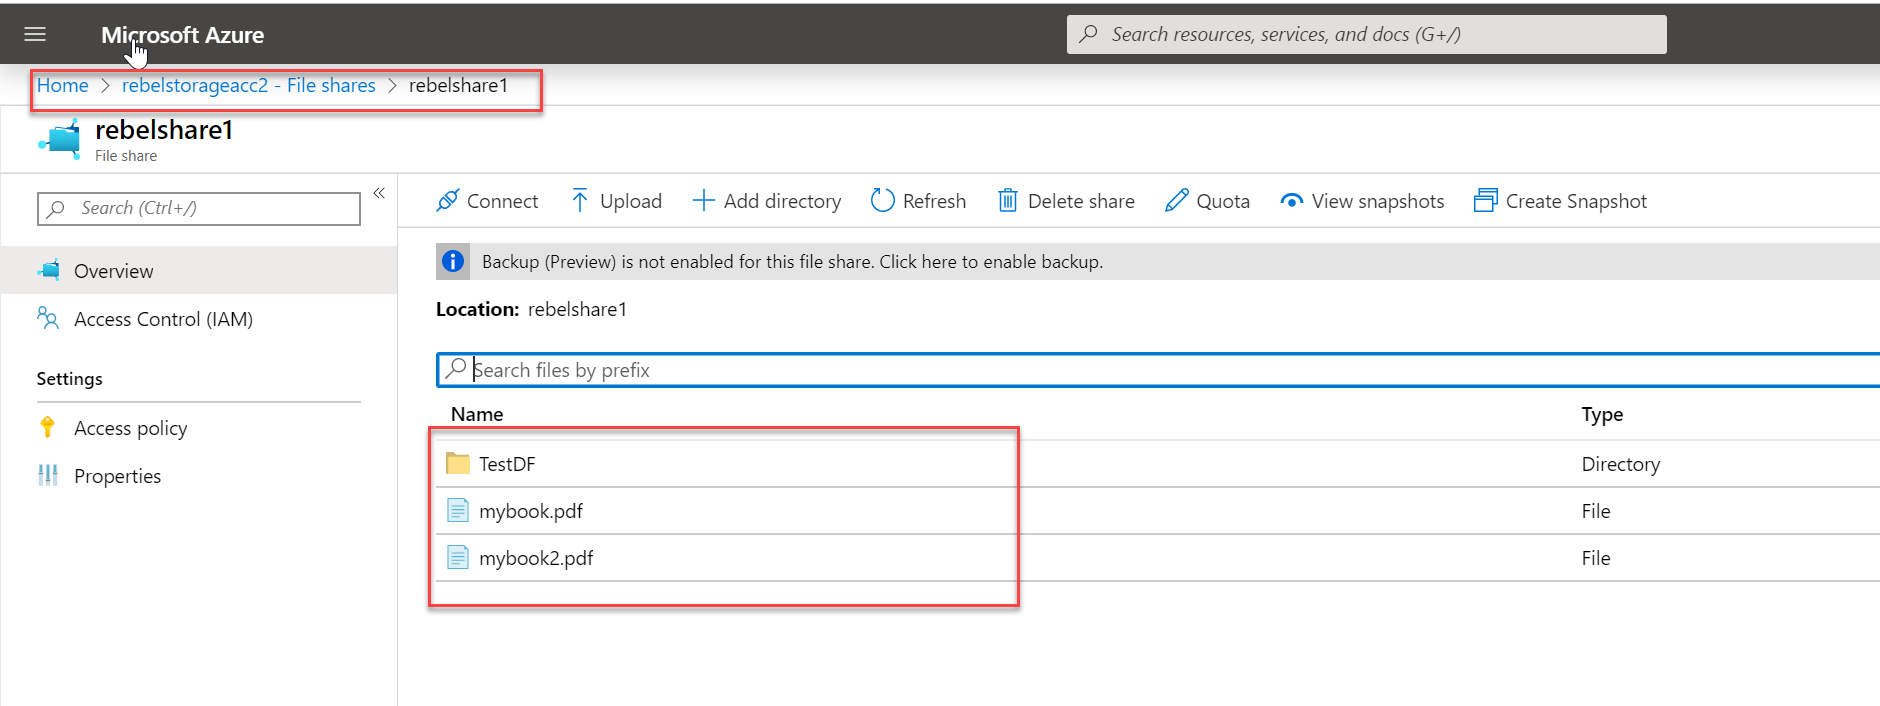
We also can use the same method to copy the entire file share to another storage account.
azcopy copy "https://rebelstorageacc1.file.core.windows.net?sv=2019-02-02&ss=bfqt&srt=sco&sp=rwdlacup&se=2019-12-03T09:49:40Z&st=2019-12-03T01:49:40Z&spr=https&sig=yrBY77JpfDpqLLYXeLQ3b%2B4xUFeMRvkFG4pBdq8Nswc%3D" "https://rebelstorageacc2.file.core.windows.net?sv=2019-02-02&ss=bfqt&srt=sco&sp=rwdlacup&se=2019-12-03T10:07:46Z&st=2019-12-03T02:07:46Z&spr=https&sig=uw1NLkCdO3f9VbIdxNTZ6XyQA0sHtssP6lhNLF5rJVE%3D" –recursive
in above I am copying all file shares from https://rebelstorageacc1.file.core.windows.net to https://rebelstorageacc2.file.core.windows.net
As we can see it is easy to download, upload, migrate data using AzCopy command utility. This marks the end of this blog post. If you have any further questions about this feel free to contact me on rebeladm@live.com also follow me on twitter @rebeladm to get updates about new blog posts.






Thanks for this Article. this helped me a lot thank you so much
Thank you so much for this nice tutorial, it provided me an excellent starting point.