
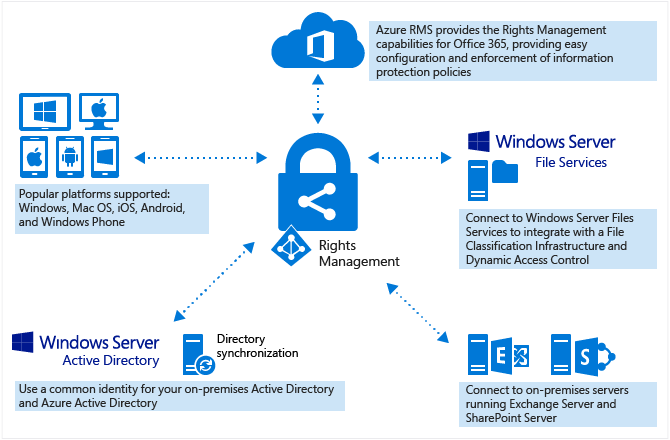
What is Azure RMS ? Microsoft Right management service help organizations to protect organization’s sensitive data getting unauthorized access. This service been used on-premises active directory infrastructures in years and it’s also available in azure.
If you not familiar with RMS let me explain it in simpler way. Let’s say user A got a document which contain some sensitive data about company stock prices. User A sending it to User B. This we know should be a conversation between user A and B. and how we can verify these data not been to pass to another user? What if someone gets a printed copy of this document? What if the user B edit this and add some false information? Using RMS you can prevent those. RMS can use to encrypt, managed identities and apply authorization policies in to your files and emails. The files you can define to open only by the person who you wished to open it, set it to read-only and also prevent user from printing it.
Using Azure RMS you can integrate the above features with your cloud applications, office 365 to protect the confidential data.
In order to enable the Azure RMS you need the following prerequisites.
1) Valid Azure Subscription – You need to have valid azure subscription to start with. If you not have paid version you still can start with a trial.
2) Azure AD – You must have Azure AD configured to have RMS. I have written articles about how to get Azure AD services enable and you can simply search the blog if you need help with it. Also you can integrate it with your on-premises Ad infrastructure.
3) RMS Supported Devices – you need to have devices runs with RMS supported OS to use this features. The list is available at https://docs.microsoft.com/en-us/rights-management/get-started/requirements-client-devices
4) RMS Supported Applications – to use RMS features its need to be used with RMS supported applications. The list is available here https://docs.microsoft.com/en-us/rights-management/get-started/requirements-client-devices
Enable Azure RMS
Once you are ready with above first step is to enable the Azure RMS Service.
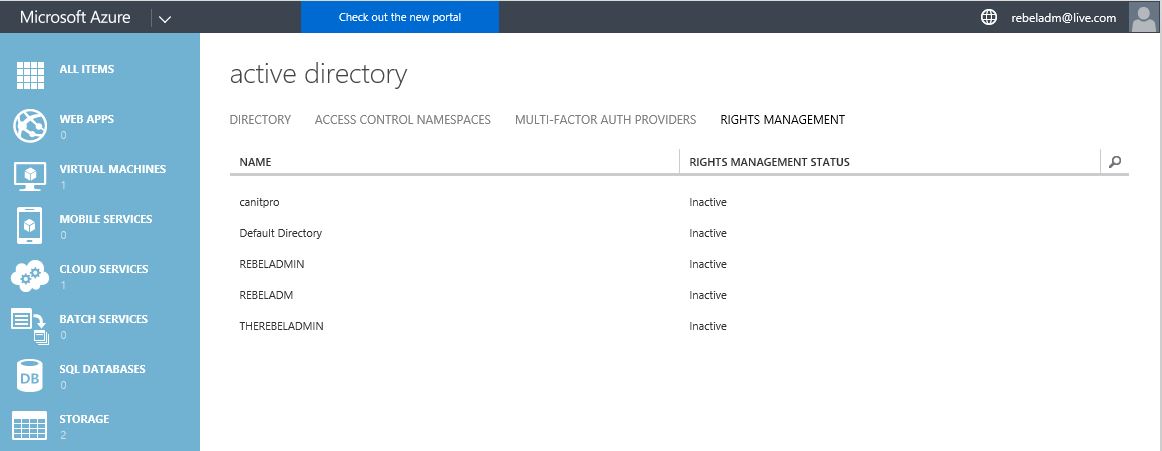
1) Log in to the Azure Portal with a privileged account
2) Go to Brows and then type rms, then it will list the RMS service then click on it.

3) It will load the classic portal. In here you can see all the azure Ad instance running and its RMS service status. In my demo I do not have any instance enable with RMS.
4) To enable the RMS service, select the AD instance and the click on “Activate” button in the bottom of the page.
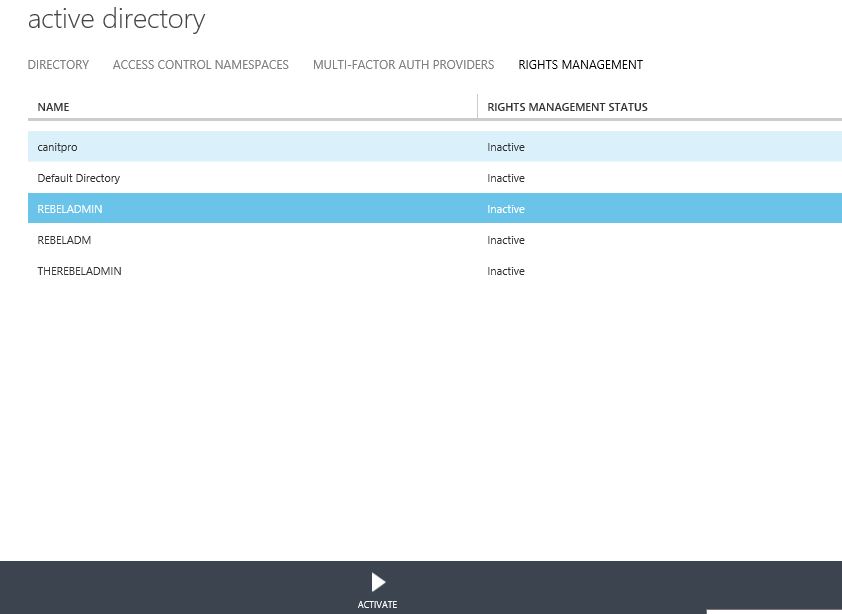
Once it’s activated we have RMS enabled. In next part of the article let’s see how to use its features.
If you have any questions feel free to get back to me on rebeladm@live.com

