When it comes to network security, we use firewalls for perimeter defense. It helps to define security boundaries for infrastructure. There are many conversations about validity of perimeter defense against modern security threats as its more about identities now. However, firewall is still the most commonly used tool to control in & out communications in a network.
In Azure so far, we were using Azure Network Security Groups or host firewall to filter network traffic. But now Azure Firewall allow to filter traffic pass through Azure Virtual Networks. It works as fully stateful firewall. It is still in preview mode but it is not too early to test its capabilities.
Features
• Built-in High Availability – Firewall manages ingress and egress traffic of the network. So high-availability of edge firewall of your network is really important. Azure firewall is a cloud-based service and comes with built-in high availability. Users do not have to pay or do additional configurations for HA.
• Domain Based Filtering – Traditional Firewall rules are based on IP addresses. We have to define the networks to allow or deny access. Azure firewall can block or allow access based on FQDN. It is also supported to use wild cards.
• Work as fully stateful firewall – Azure firewall allow to create inbound & outbound rules using networks, FQDN, protocols & ports. So, it can monitor nature of active connections and allow or deny relevant packets through firewall.
• Outbound Source Network Address Translation (SNAT) – All outgoing traffic from virtual networks are translated in to Azure Firewall Public IP Address. It allows to identify and control traffic leaving from your network to other destinations.
• Azure Monitor Integrations – All Firewall events are logged in to Azure monitor. If required we can send it to log analytics for further analysis.
• No need to worry about upgrades – If it is hardware firewall, it has its own capacity limitation. It can be based on port utilization, ram or packet processing power. Since azure firewall is cloud-based service, none of those limitations applies to it. it can scale up whenever it needed.
Licenses
Current license model for this service is based on size of traffic (of ingress & egress) travel through virtual network.
Known Issues
As it is still on preview mode, it doesn’t come with any SLA. Therefore, do not use it in your production environment. Also, it has some know issues. You can read about those using https://docs.microsoft.com/en-gb/azure/firewall/overview .
Demo
In this demo I am going to setup azure firewall and test it using few rules.
Enable Public Preview
Azure firewall preview is not enabled by default. To enable it,
1) Log in to Azure portal https://portal.azure.com as Global Administrator
2) Launch Cloud Shell
3) Then run Register-AzureRmProviderFeature -FeatureName AllowRegionalGatewayManagerForSecureGateway -ProviderNamespace Microsoft.Network
4) After that run Register-AzureRmProviderFeature -FeatureName AllowAzureFirewall -ProviderNamespace Microsoft.Network
5) This can take up to 30 minutes to complete. You can review status of feature by using,
Get-AzureRmProviderFeature -FeatureName AllowRegionalGatewayManagerForSecureGateway -ProviderNamespace Microsoft.Network
Get-AzureRmProviderFeature -FeatureName AllowAzureFirewall -ProviderNamespace Microsoft.Network
6) After it is successfully register, run Register-AzureRmResourceProvider -ProviderNamespace Microsoft.Network
Create Resource Group
As next step, I am going to create new resource group. I am going to use this resource group to group resources which we are going to use in this demo.
1) To create RG run New-AzureRmResourceGroup -Name REBELFWRG -Location "East US". In here REBELFWRG is RG group name and East US is the location.
Create Virtual Network
Now we need to create new virtual network. This virtual network will be protected by Azure firewall.
We can create virtual network using,
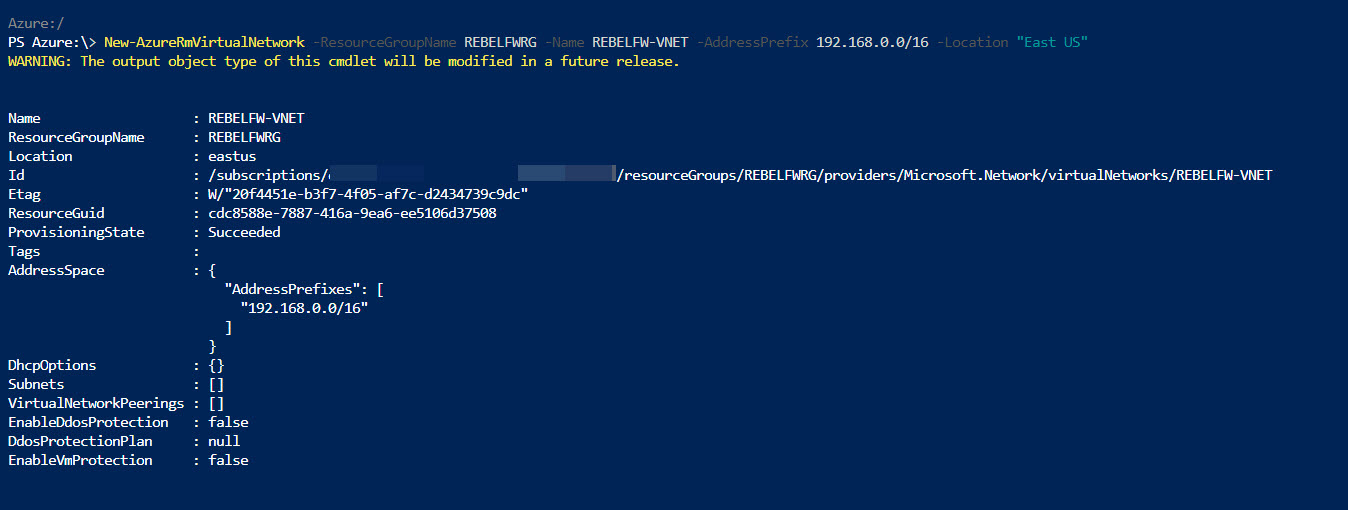
New-AzureRmVirtualNetwork -ResourceGroupName REBELFWRG -Name REBELFW-VNET -AddressPrefix 192.168.0.0/16 -Location "East US"
In above, REBELFW-VNET is the virtual network name. it uses 192.168.0.0/16 IP address range.
Create Subnets
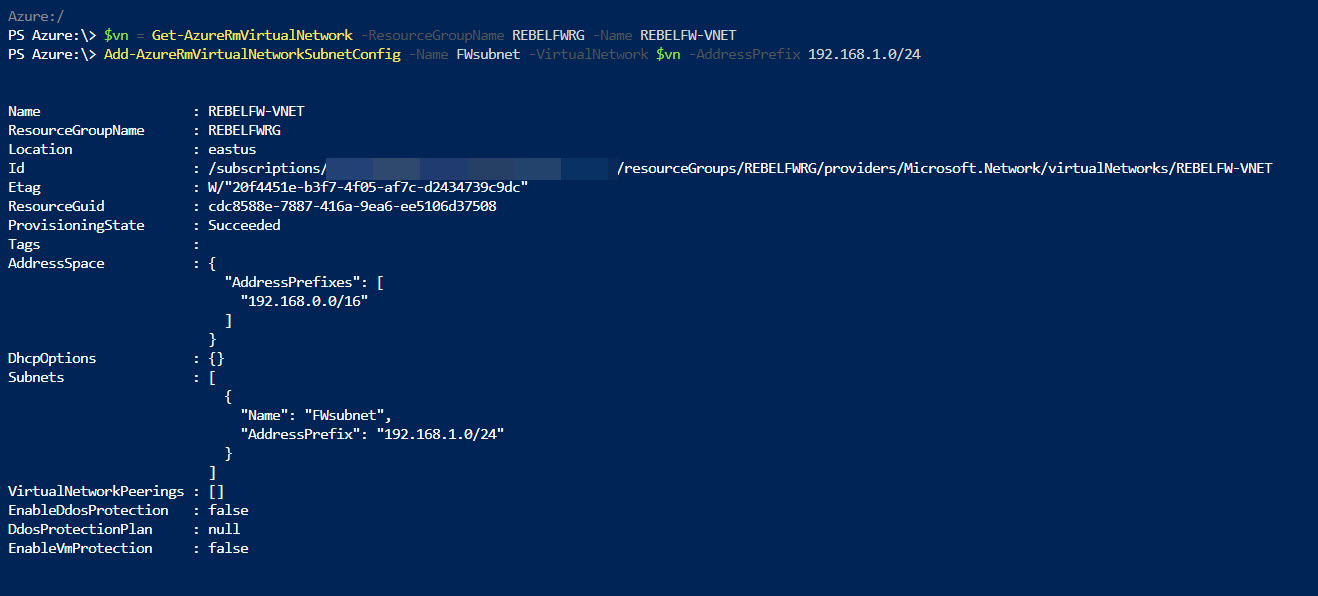
Under the virtual network I am going to create three subnets. One for firewall and one for management network and one for Server subnet.
$vn = Get-AzureRmVirtualNetwork -ResourceGroupName REBELFWRG -Name REBELFW-VNET
Add-AzureRmVirtualNetworkSubnetConfig -Name AzureFirewallSubnet -VirtualNetwork $vn -AddressPrefix 192.168.5.0/24
Add-AzureRmVirtualNetworkSubnetConfig -Name MGMsubnet -VirtualNetwork $vn -AddressPrefix 192.168.6.0/24
Add-AzureRmVirtualNetworkSubnetConfig -Name Srvsubnet -VirtualNetwork $vn -AddressPrefix 192.168.2.0/24
Set-AzureRmVirtualNetwork -VirtualNetwork $vn
[su_note]You must use name AzureFirewallSubnet name as firewall subnet as azure firewall would not recognize other names. [/su_note]
Create Virtual Machine
We need a virtual machine to do testing. I am going to GUI from this task to make it equal for audience.
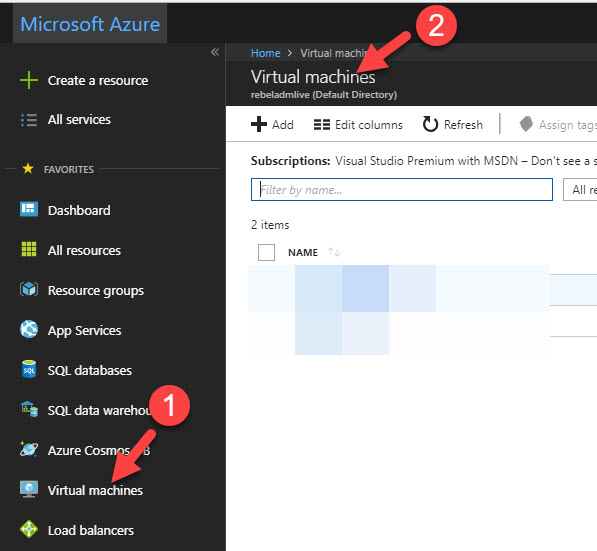
1) Go to Azure Virtual Machines | Add
2) Select Windows server 2016 built for the server
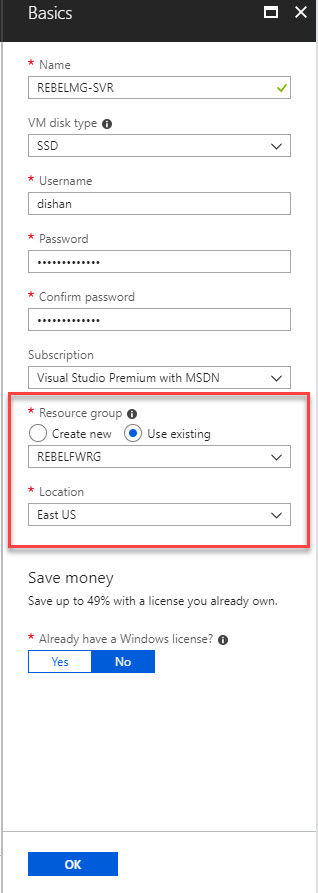
3) Under Basic Settings select RG we created before and select the correct location. Then click on Ok
4) Select D2s_v3 as size and click select. ( You can select any template you need )
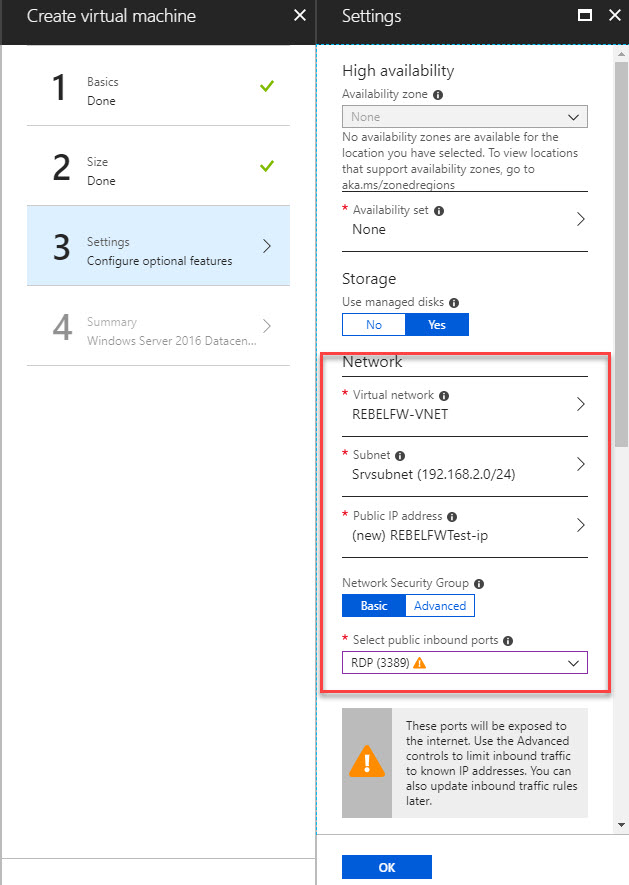
5) For settings, select the MGMsubnet as VM subnet. Also add a public IP and allow 3389 for inbound so we can RDP to it. Once all applied click on OK.
6) At the end, review configuration and click OK to create VM.
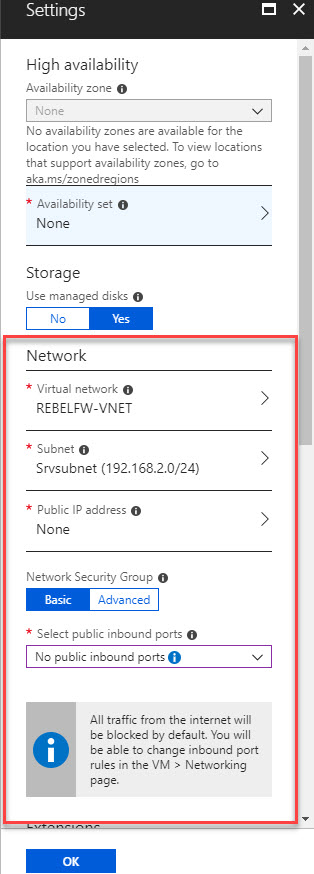
7) Once it is done create similar VM and this time select Srvsubnet but that doesn’t need public IP or inbound port.
Create Firewall
Now everything is ready to create firewall. To do that,
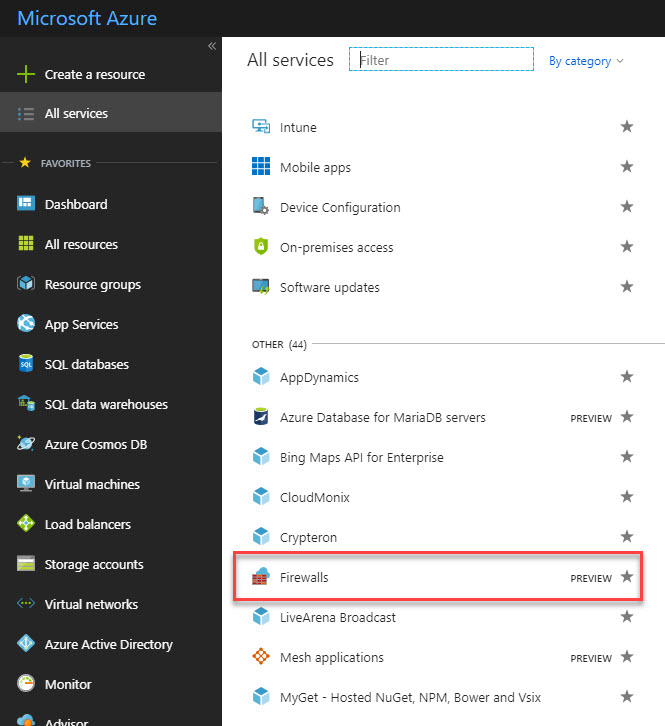
1) Go to Azure Portal | All Services | Firewalls
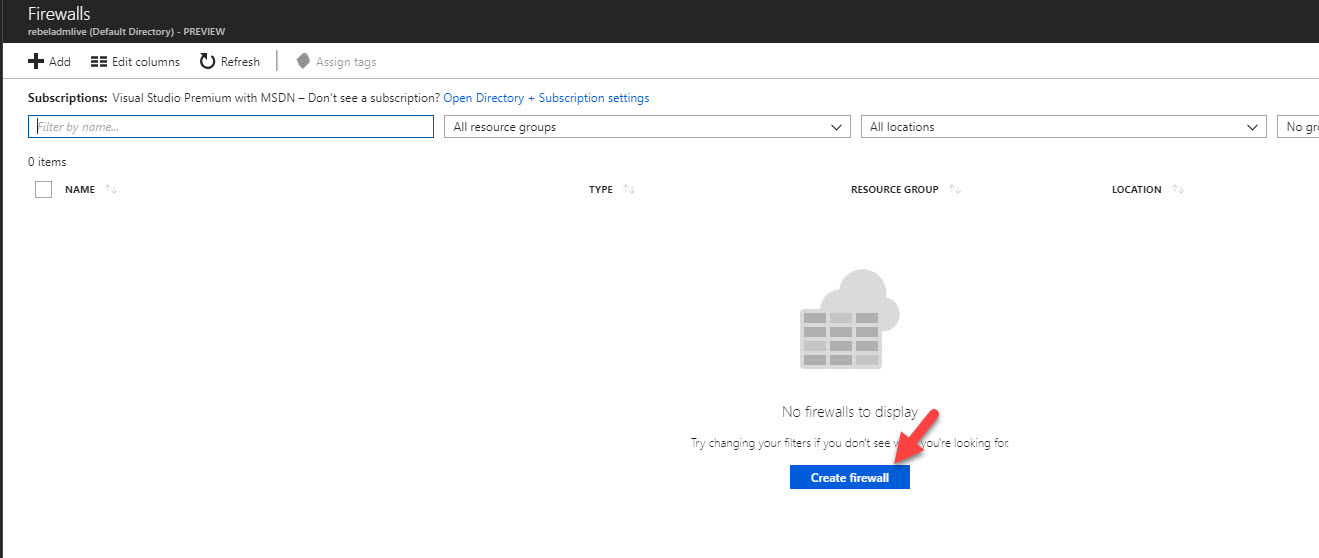
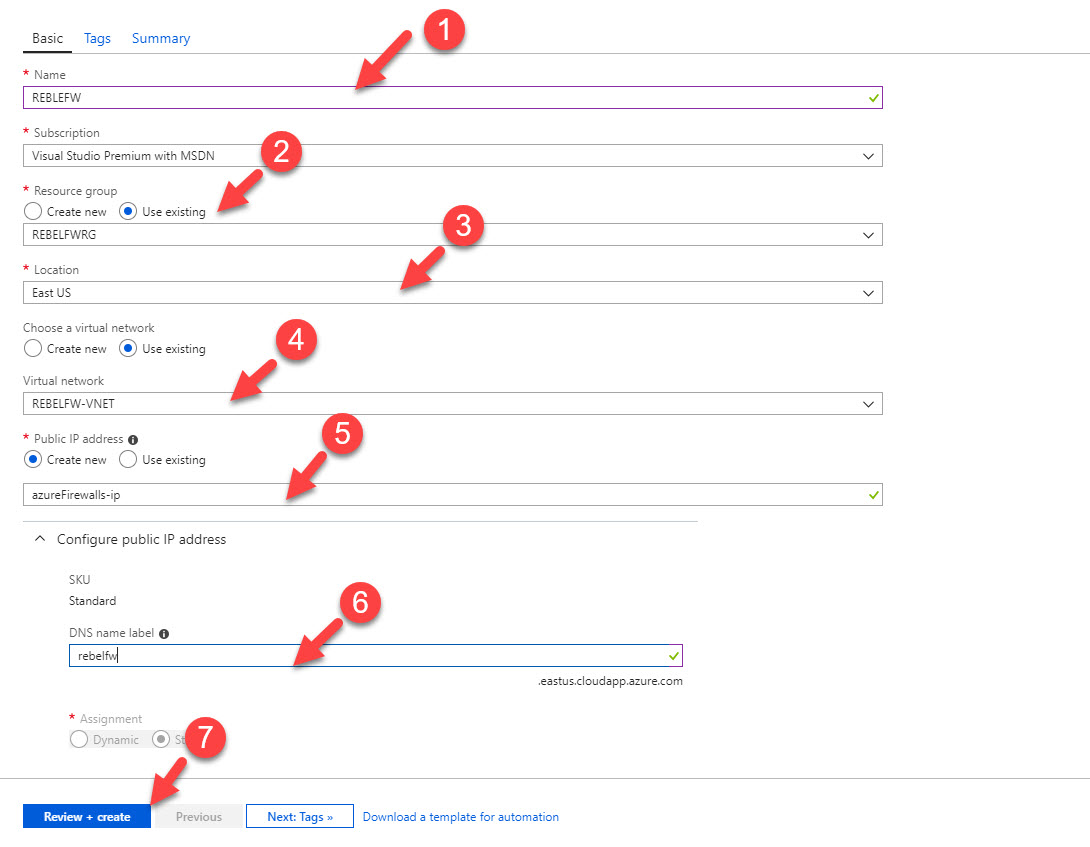
2) Click on Create Firewall
3) Now fill the form as following. Make sure you select relevant RG, VN. Also, we are going to use static IP for firewall.
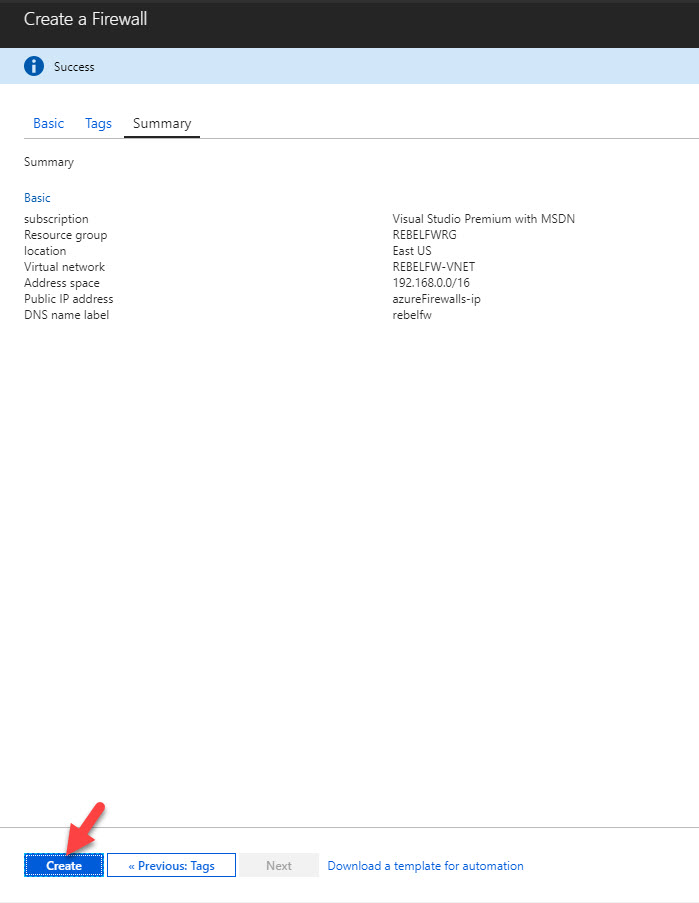
4) In next window, review the config and click on Create
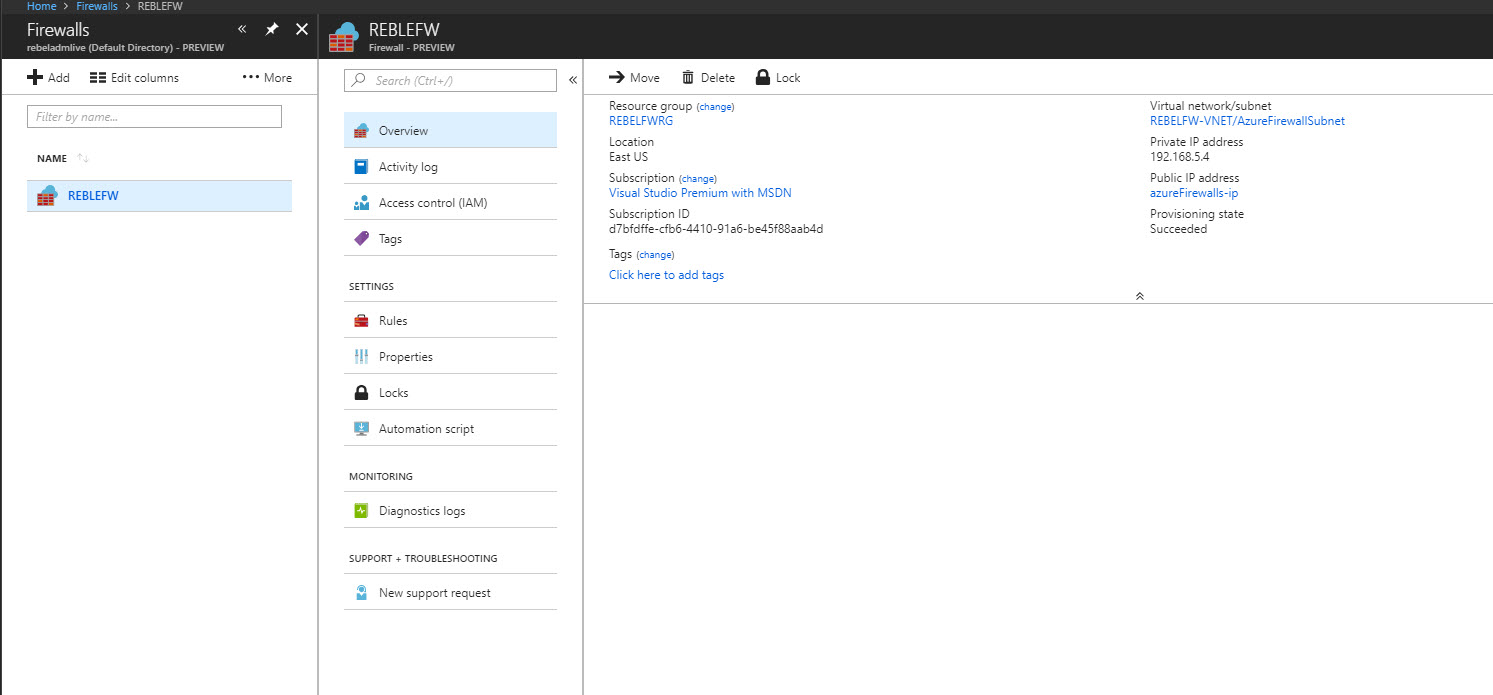
5) Once it is done, we can access it using Azure Portal | All Services | Firewalls
Create Static Route
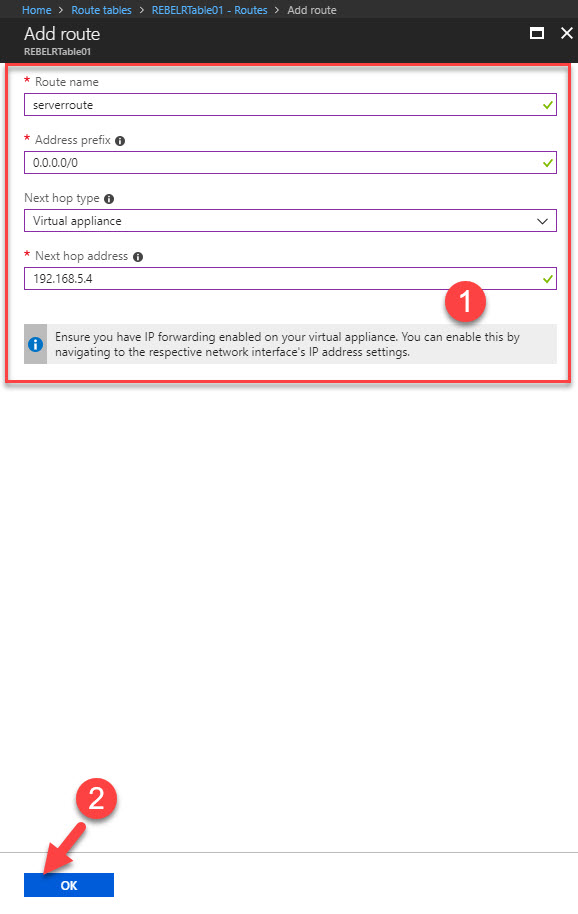
in order to manage traffic using firewall, we need to route traffic for Srvsubnet via new firewall. We can’t do that to management network (MGMsubnet) as we using it as jump network.
To create route,
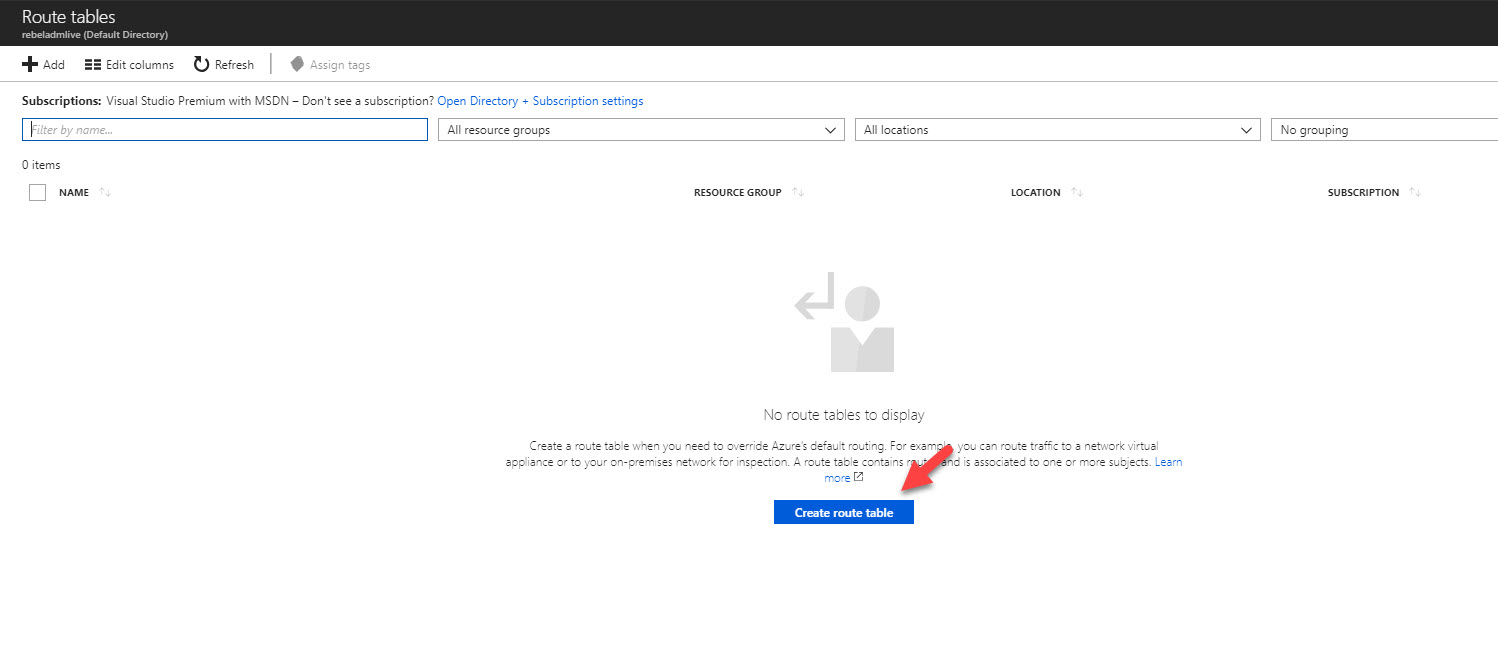
1) Go to Azure Portal | All Services | Route Tables
2) In new window click on Create route table
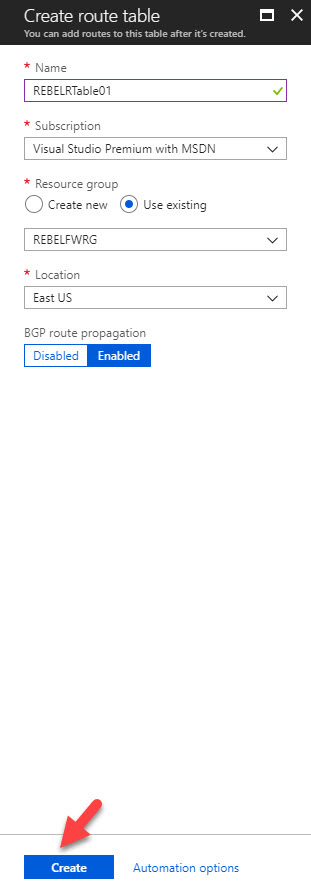
3) In next window, provide name for routing table and select existing resource group we created. Also select the relevant location. Then click create.
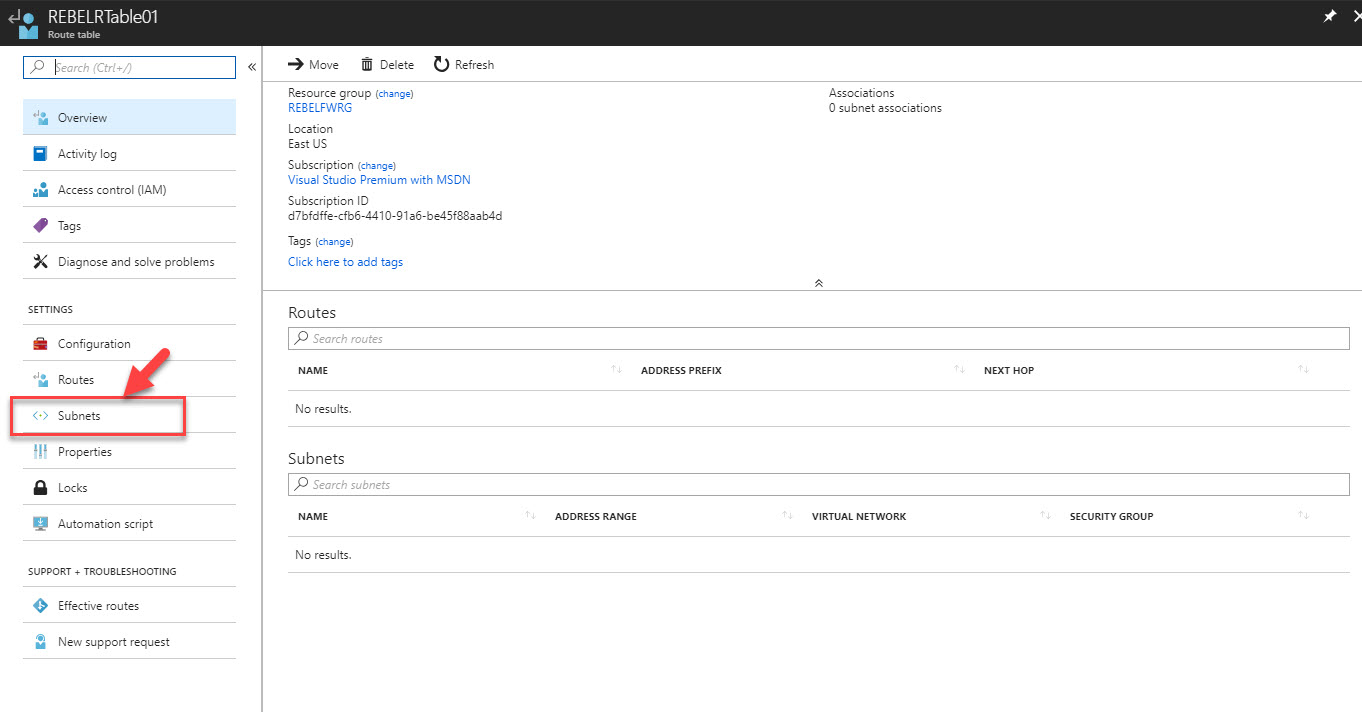
4) Once it’s done, click on new routing table.
5) Then click on Subnets
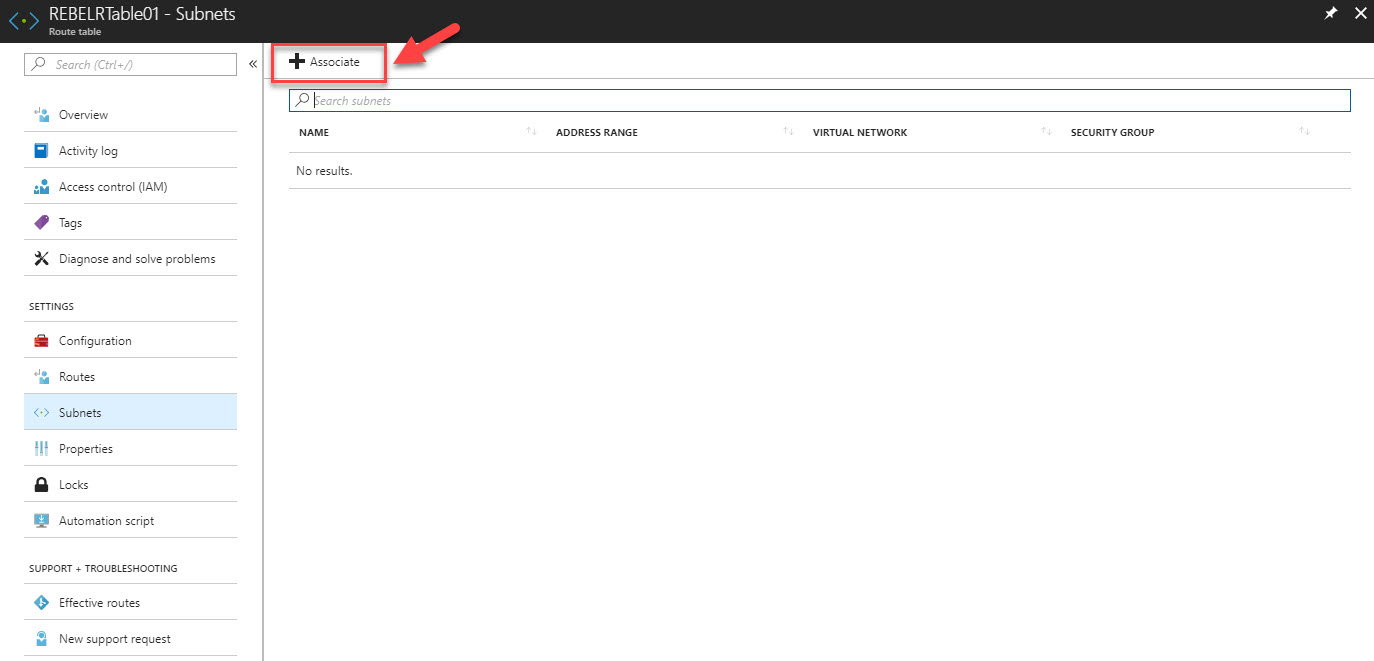
6) Then click on Associate
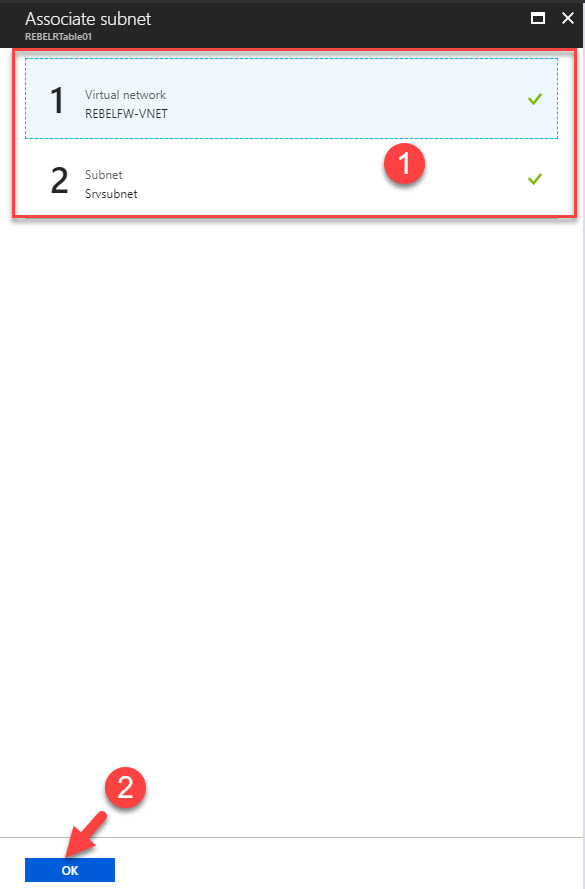
7) In next window select relevant VN and subnet Srvsubnet. Then click Ok to proceed
8) Then click on Routes
9) Click on Add
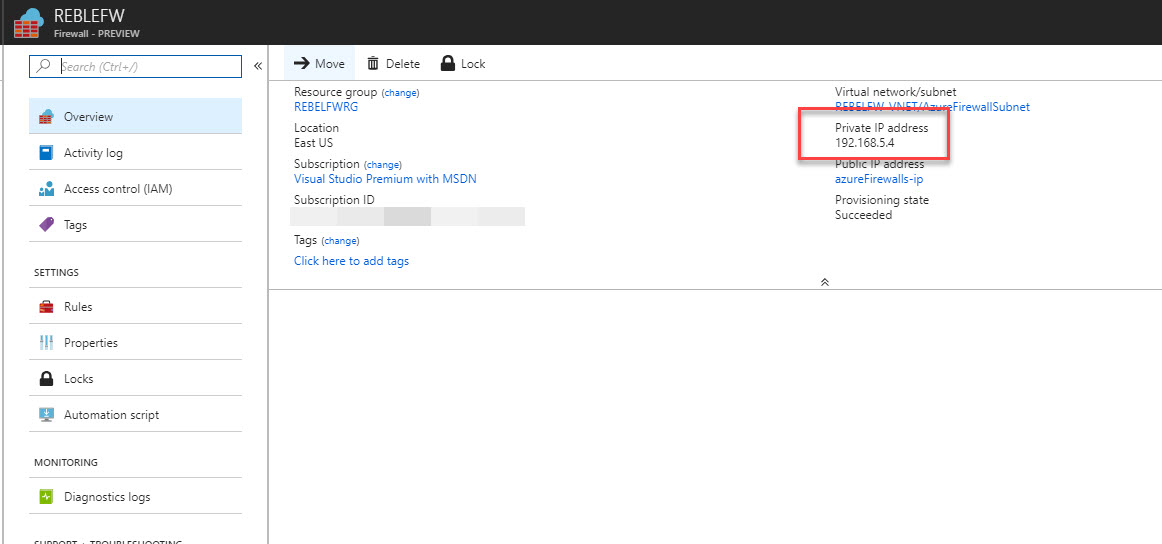
10) In next window fill the info as below. In here next hop type should change as Virtual Appliance. Next hop address is firewall’s private ip. You can find it from firewall page.
Create Firewall Rule
Now is the fun part. In firewall I am going to create firewall rule to allow access from my server’s subnet (192.168.2.0) to rebeladmin.com
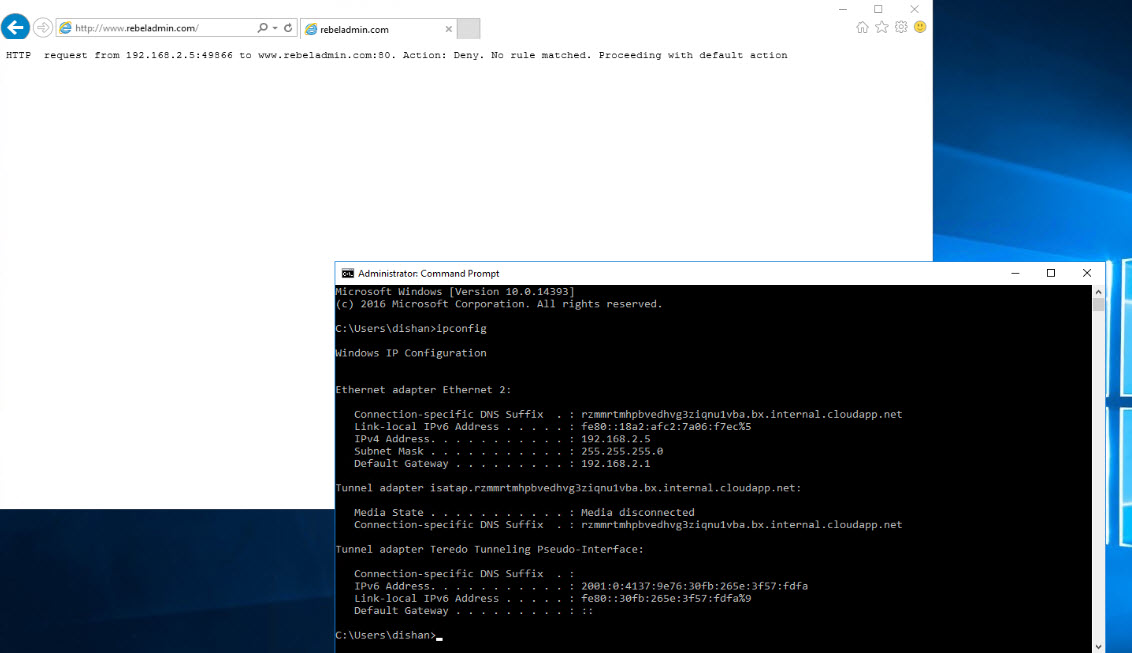
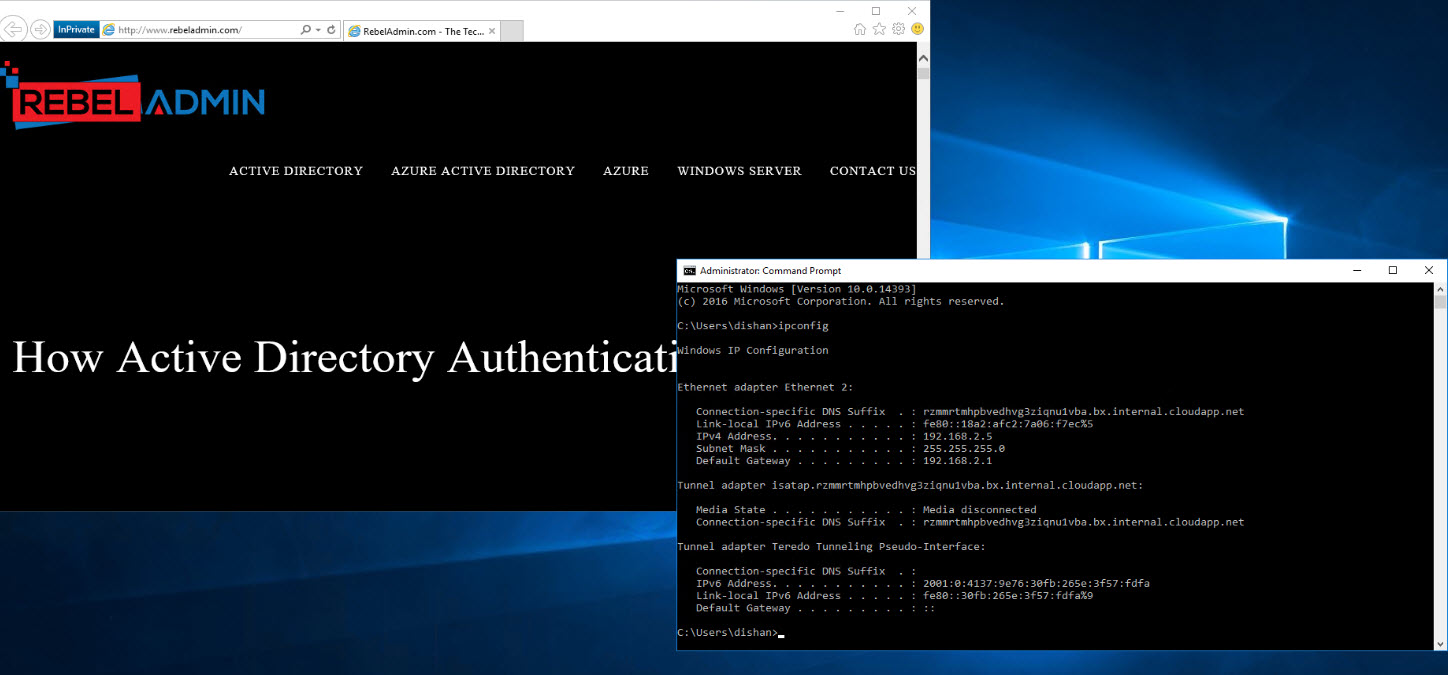
Before start, I have RDP in to management server we create in previous step. Then RDP in to server using its private ip. It have ip address of 192.168.2.5 and it cant access rebeladmin.com. this is because it does have universal rule for blocking.
To create relevant rule,
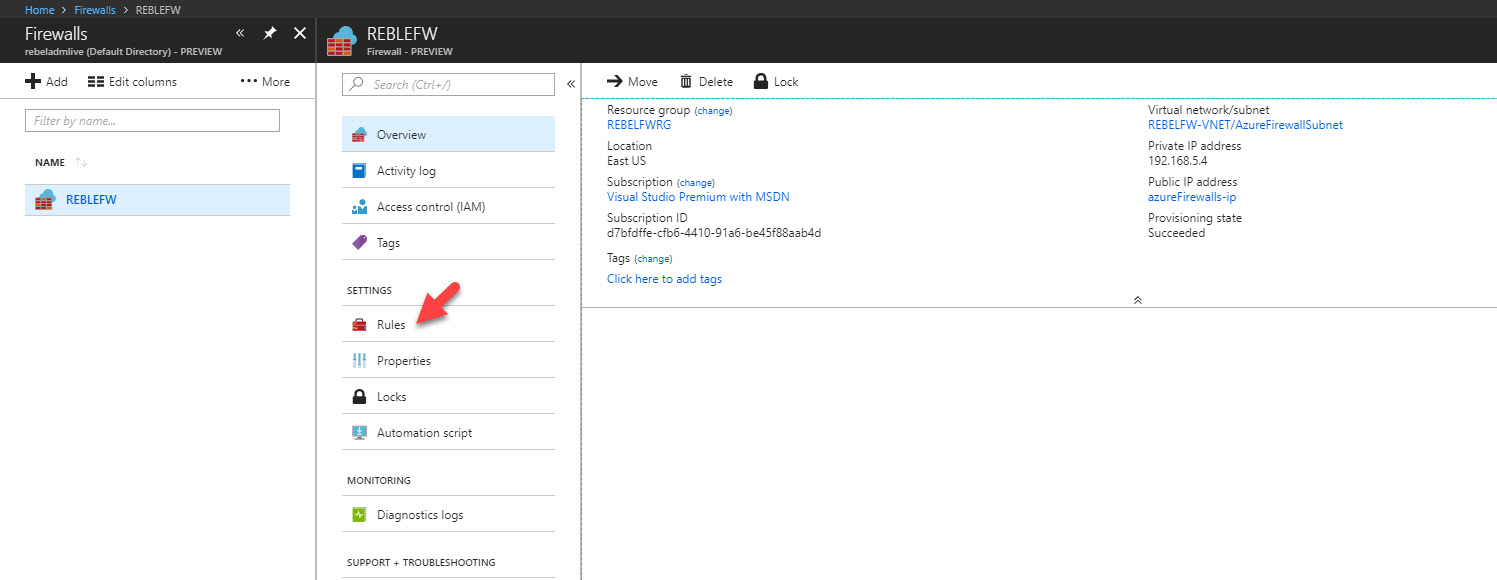
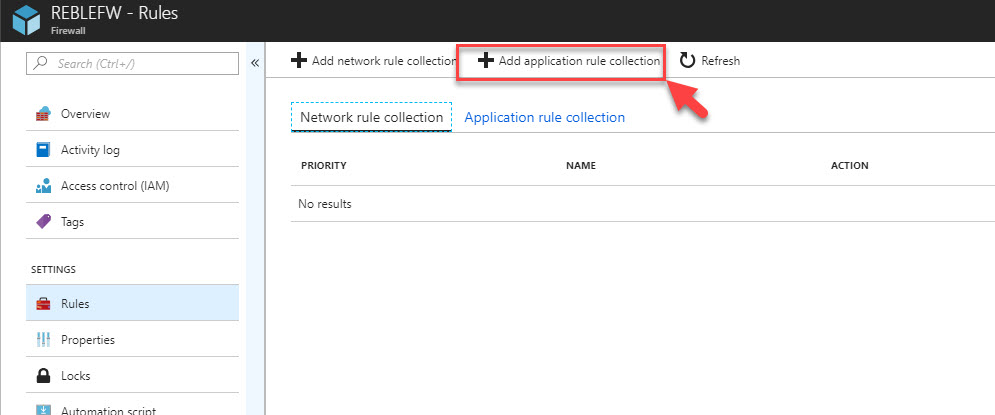
1) Go to Firewall page and click on Rules
2) As it is related to application, we need to create application rule. To do that click on Add Application rule collection
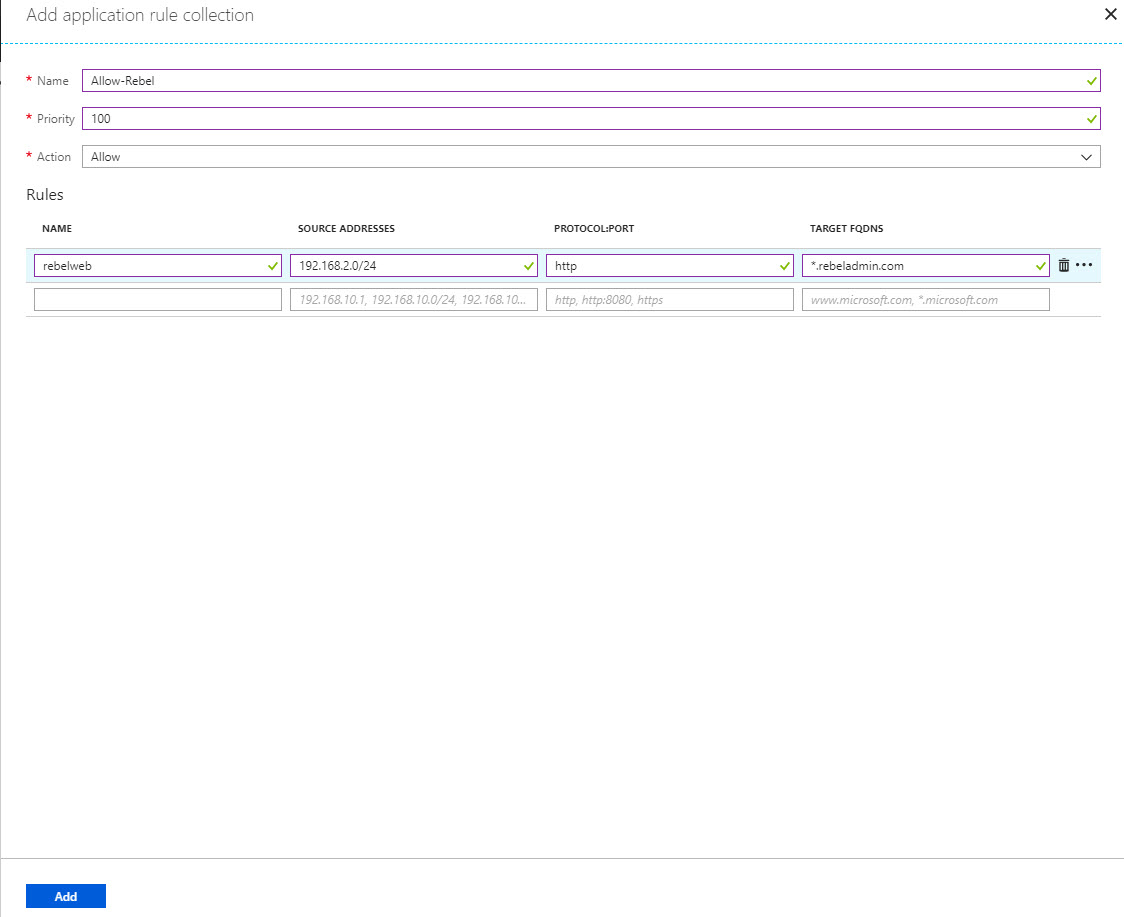
3) In next window, provide name for collection, then assign priority number for it. then select action as allow. In rule source address should be server subnet which is 192.168.2.0/24. Protocol is http and destination is *.rebeladmin.com. It will allow anything under that domain. once relevant info is in click on Add
Testing
Once rule is in place, go back to VM and launch new IE window in private mode (I do not need cache).
Then try to access rebeladmin.com
As expected we can view the website.
This marks the end of this blog post. Hope now you have better understanding how azure firewall works. If you have any questions feel free to contact me on rebeladm@live.com also follow me on twitter @rebeladm to get updates about new blog posts.







What if we have to create the same setup for the multiple VM behind the firewall, I mean to say here multiple IP addresses behind the firewall.